

English
Tips & Tricks – New eZsign Interface in eZmax – Essential Best Practices
The Importance of Properly Naming Your Files
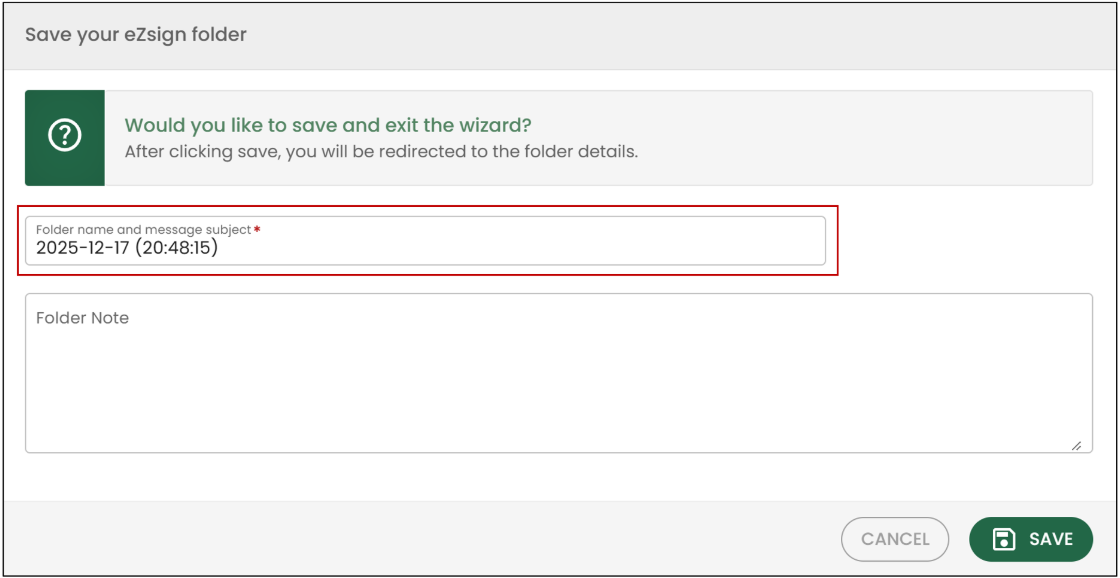
It is very important to properly name your eZsign files , as this makes them easier to find in the eZsign File List.
If you see files displaying only a date, this means they were not named when they were created.
NOTE : As soon as the system reaches Step 1 , a file is automatically created by default.
When creating an eZsign file, if you need to leave the file for any reason, make sure to click Save.
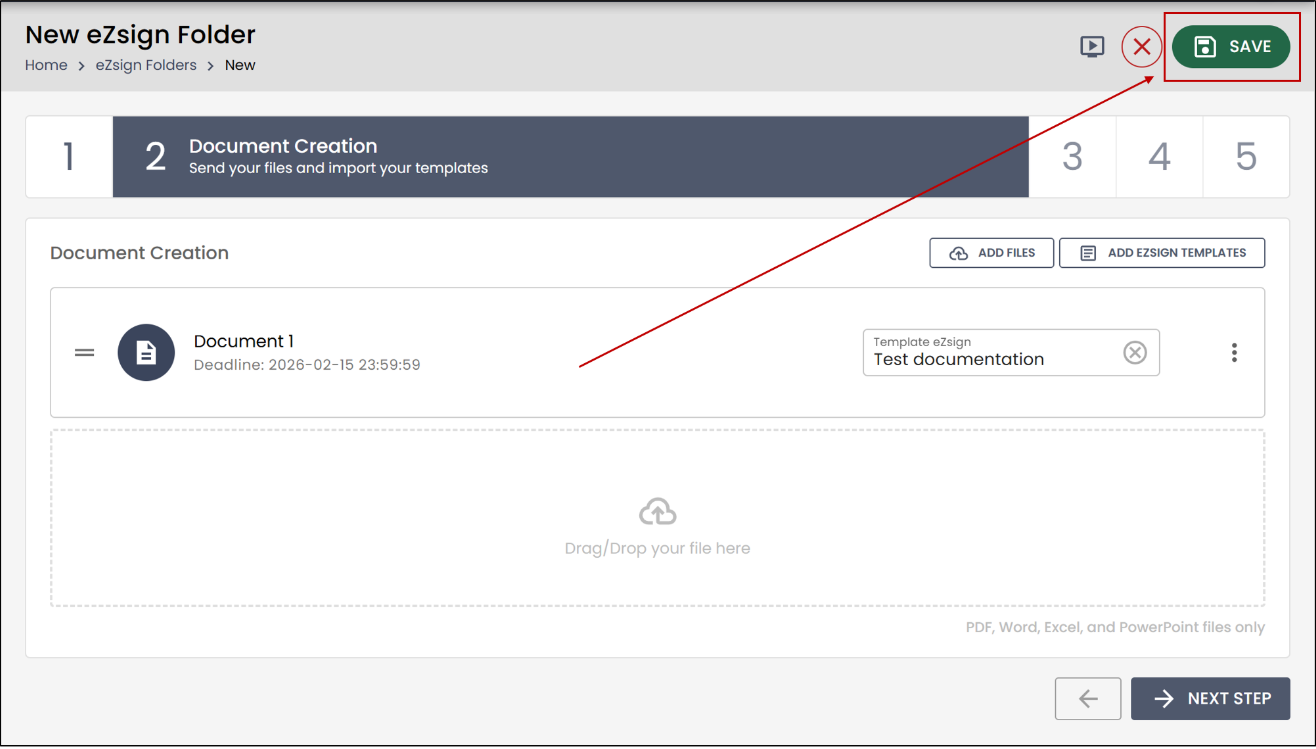
You will then be prompted to enter the File Name , and click Save again.
For more information, see the article: The Importance of Properly Naming Your Folders
Managing Required Actions When Importing a Form
When creating a new eZsign file, documents are added at Step 2.
If a fillable form is added at this step, an action is required.
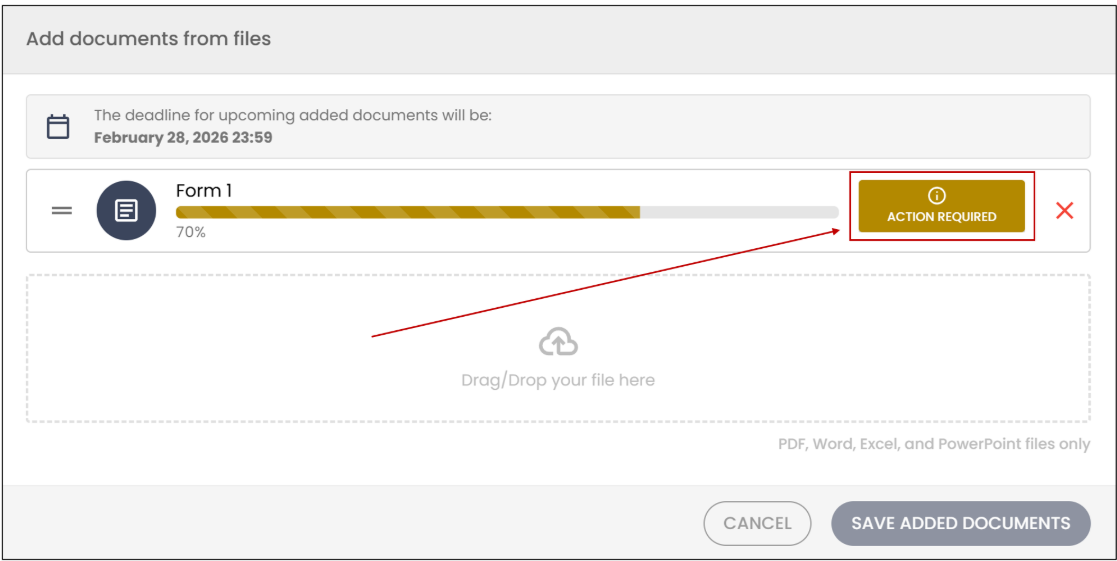
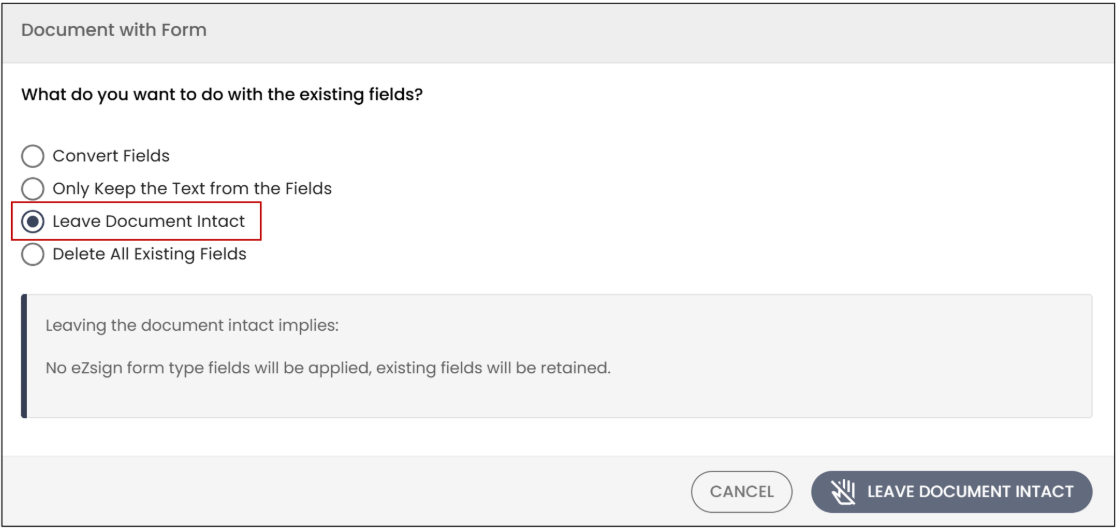
For forms coming from InstanetForm , we recommend selecting the third option, Leave the document intact , which keeps the document in its original state: no form fields are added and existing fields remain unchanged.
For more information, see the article: Import a Form into eZsign – Action Required
Expired Documents: How to Update the Date
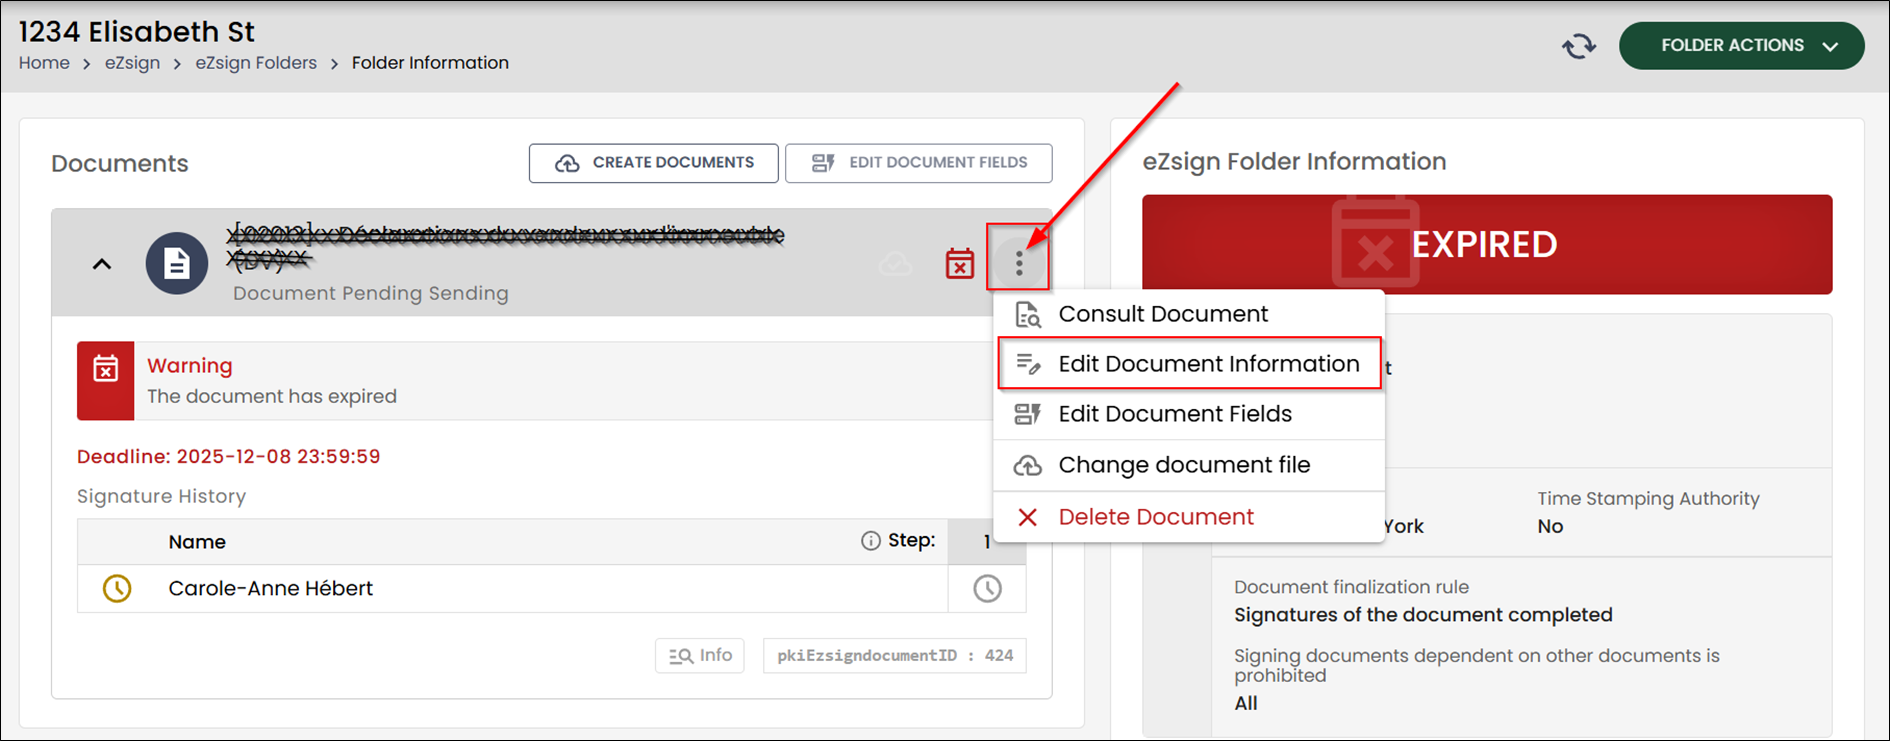
When a file is in the Expired stage and you wish to resend it for signature, you must update the document’s signing deadline.
In the eZsign file, click the three dots next to the document, then select Edit document information.
Adjust the signing deadline, then resend the file by clicking the green button in the top-right corner.
Adding Multiple Documents to Be Signed in a Single File
You can add multiple documents to be signed at the same time.
At Step 2 – Document Creation , you can select and upload multiple files at once directly from your device.
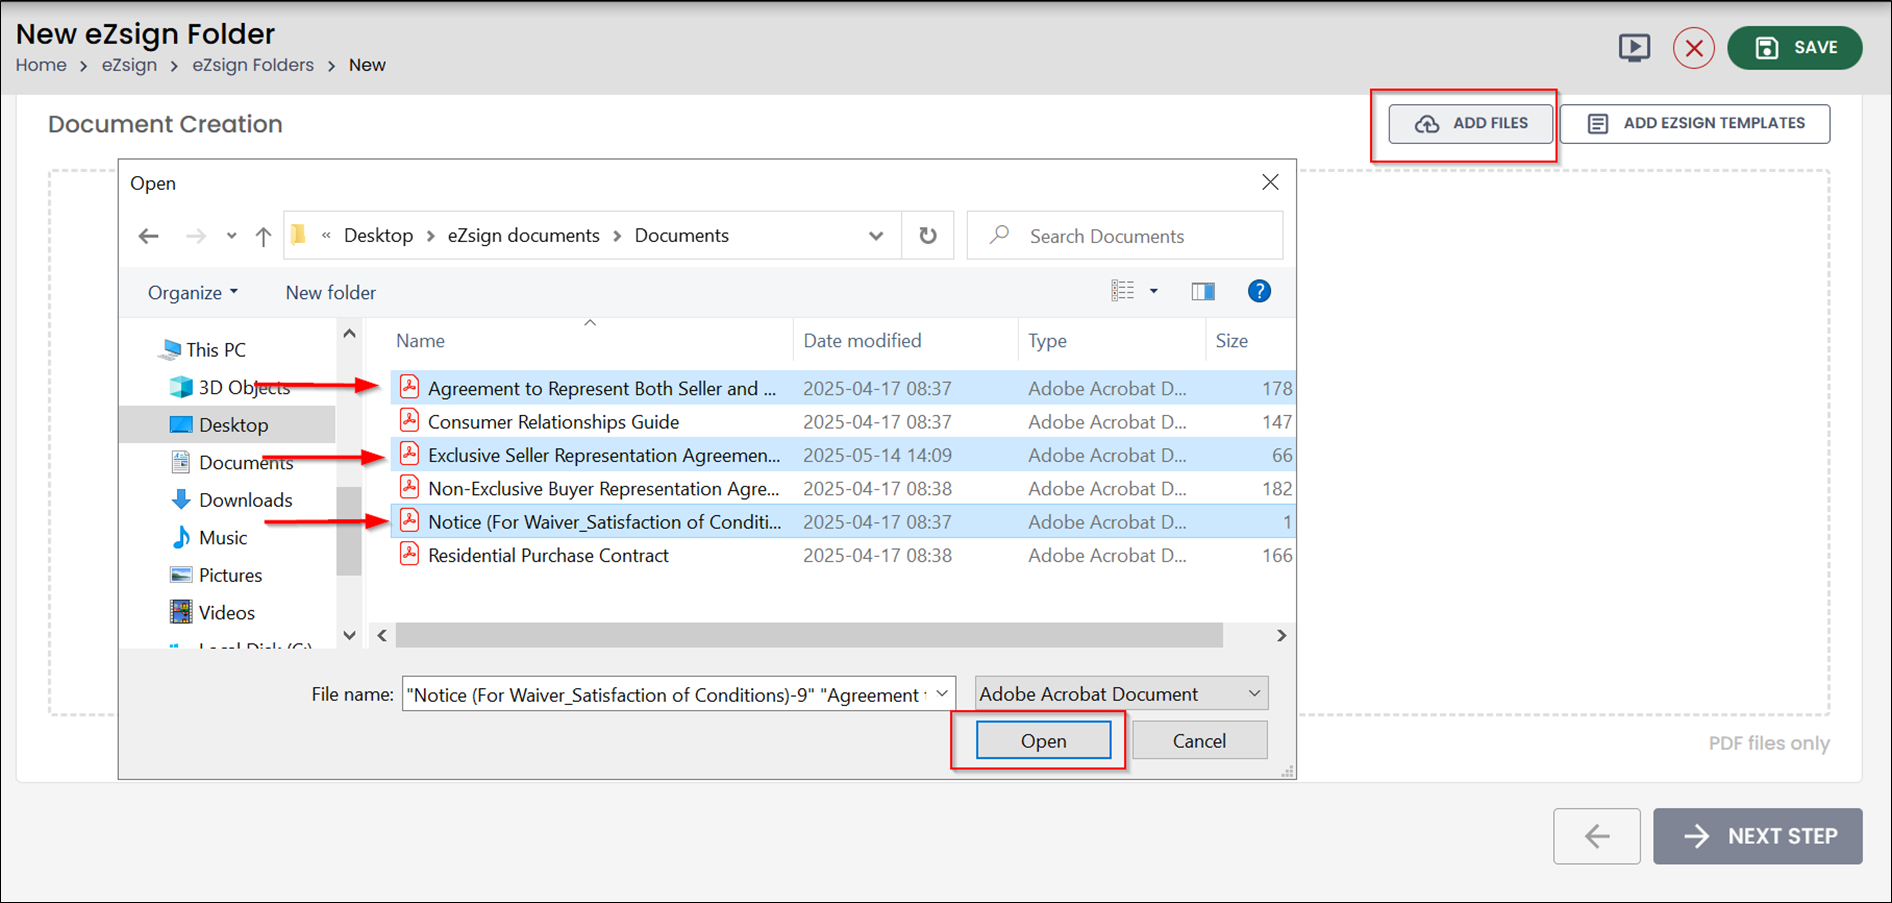
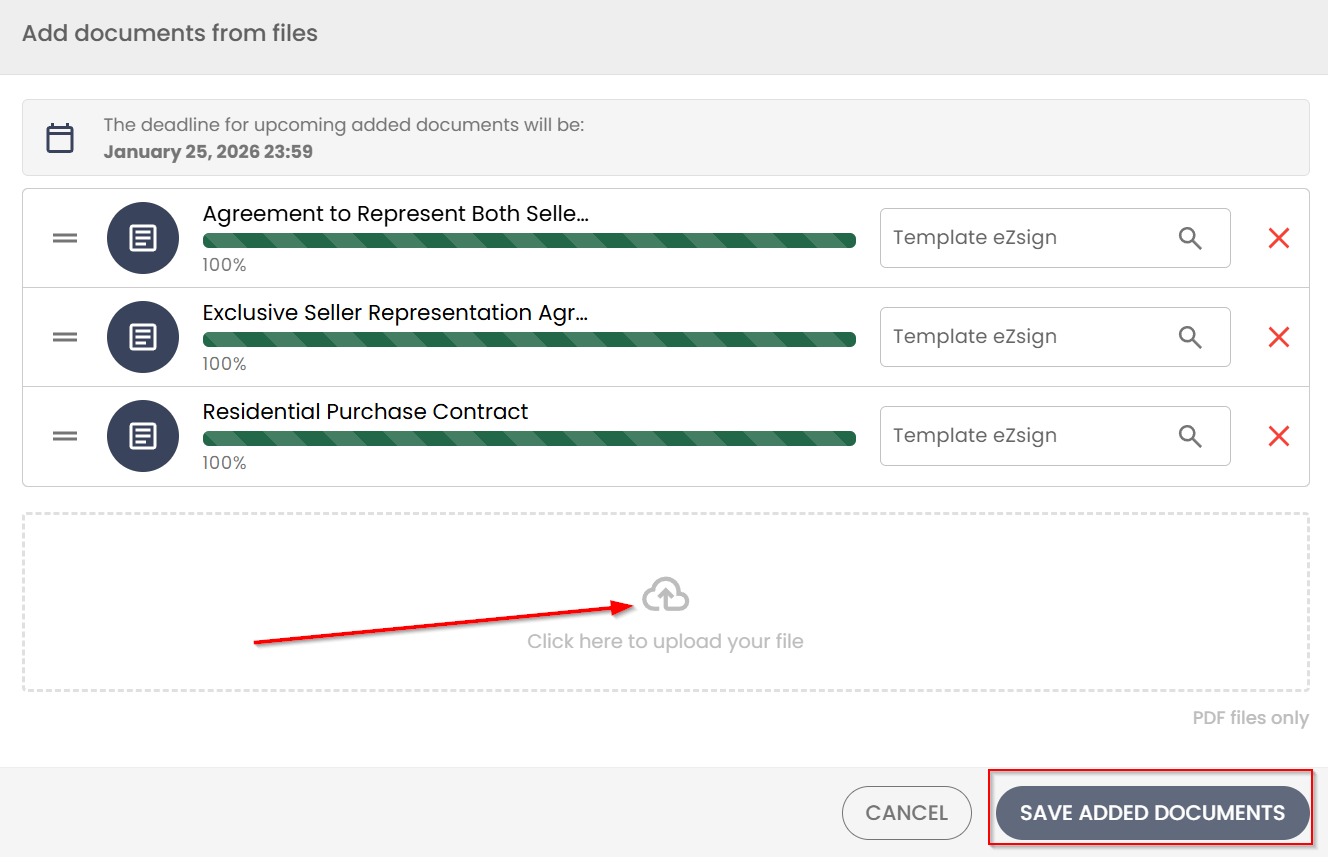
Once you click Open , the documents will be ready for the next step.
If you wish to add more documents, simply click Click here to upload your file again.
For more information, see the article: Creating an eZsign Folder: Start Here
How to Safely Cancel the Sending of a Document
You can cancel a signature request either for the entire file or for a specific document.
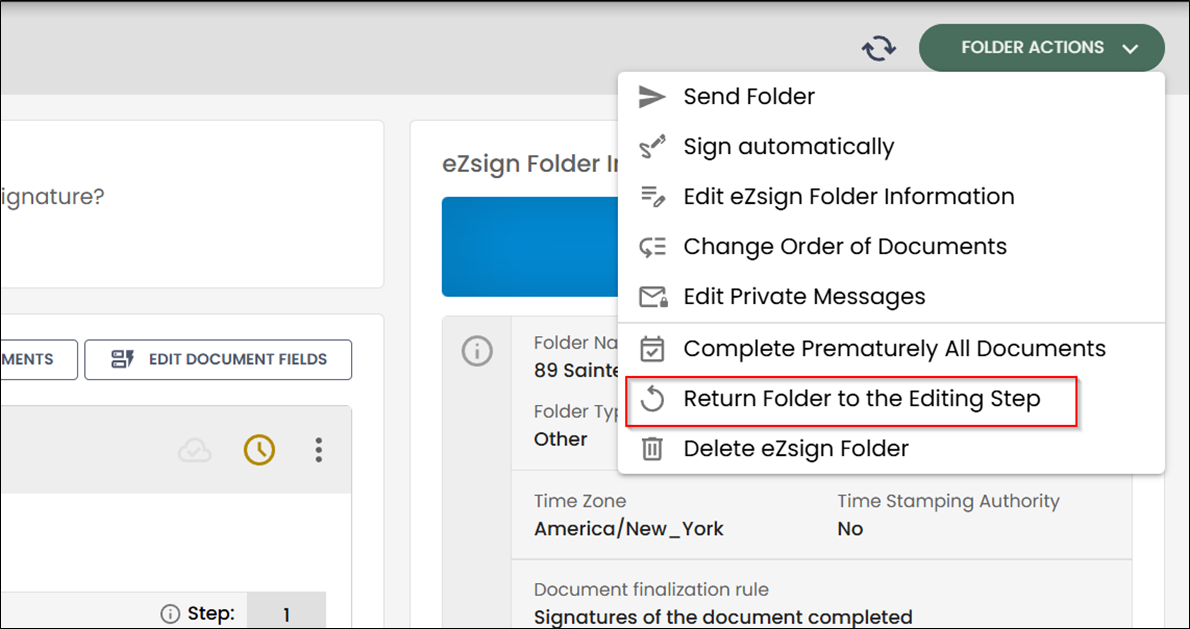
To cancel sending for all documents, open your eZsign file and, using the green menu in the top-right corner, click Return folder to the Editing Step.
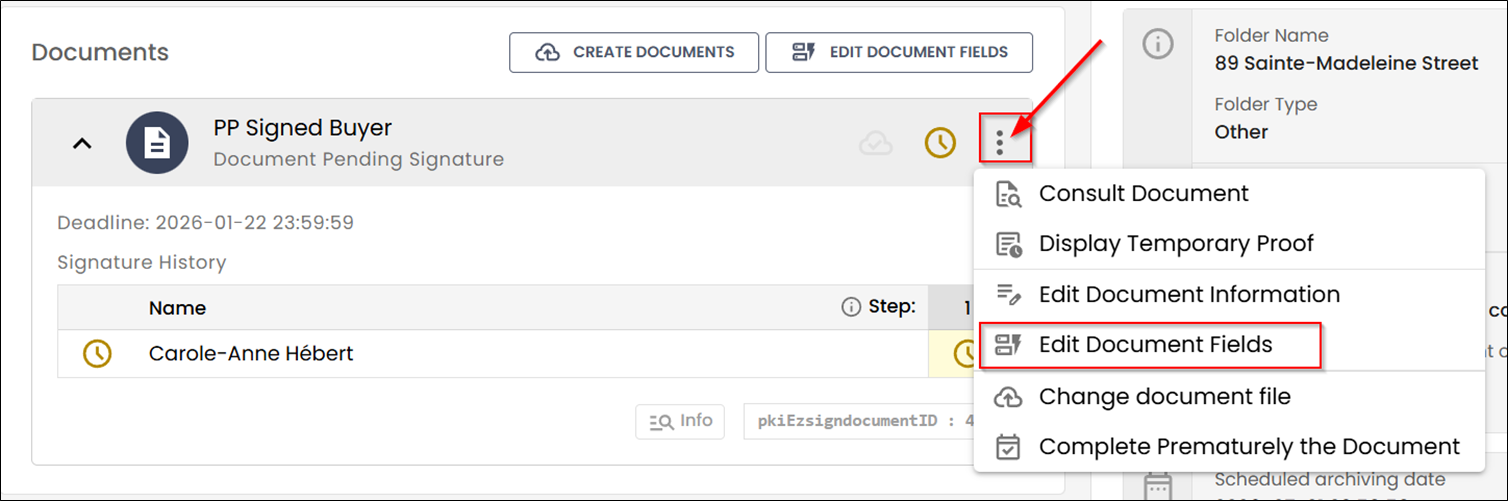
To cancel sending for a single document, click the three dots next to the document and select Edit document fields.
For more information, see the article: "Sent/Partially Signed" File: Available Actions
Adding Fields to All Signers in a Single Action
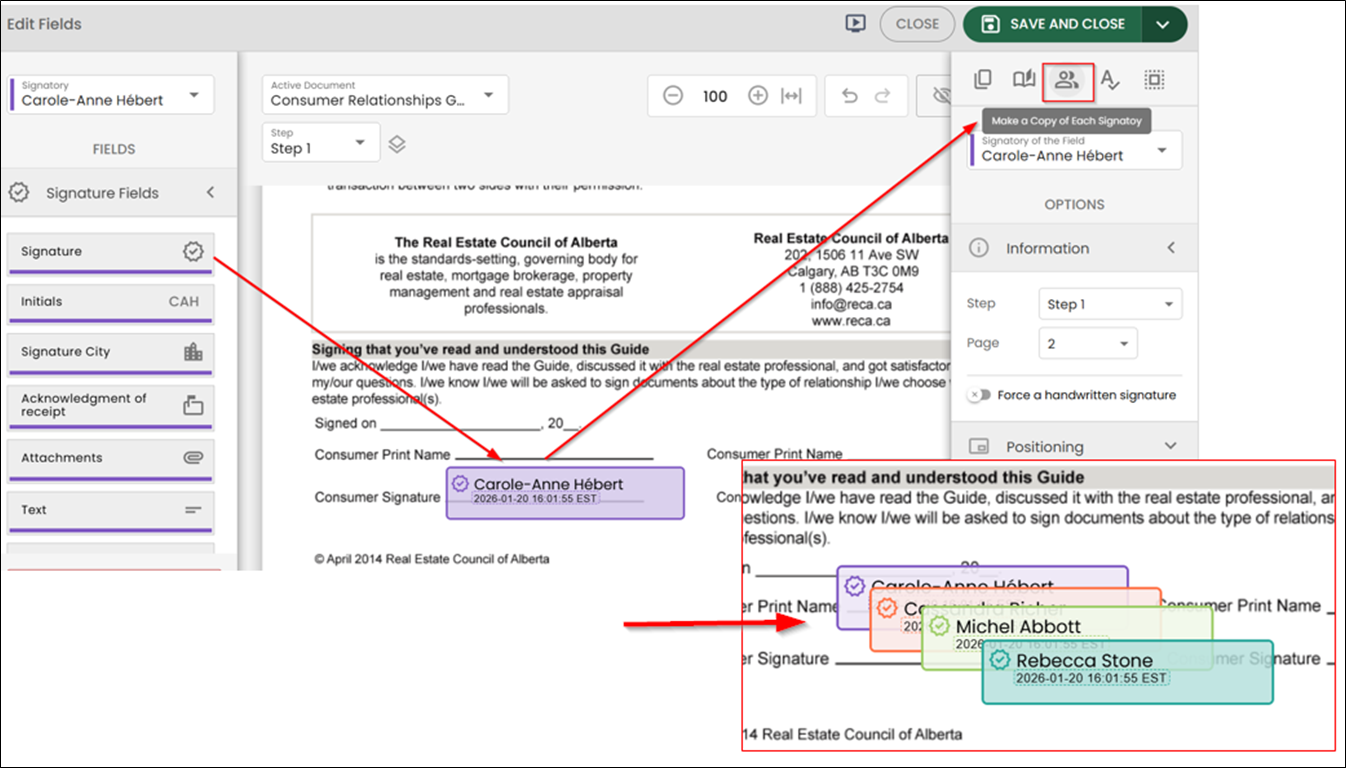
When adding a signature or form field, you can apply it to all signatories at once.
Start by adding the field for one signer. A menu will appear on the right side of the screen. Click the icon showing two overlapping people — Create a copy for each signer.
Changing the Order of Documents in a File
You can change the order of your documents in two places in the new eZsign.
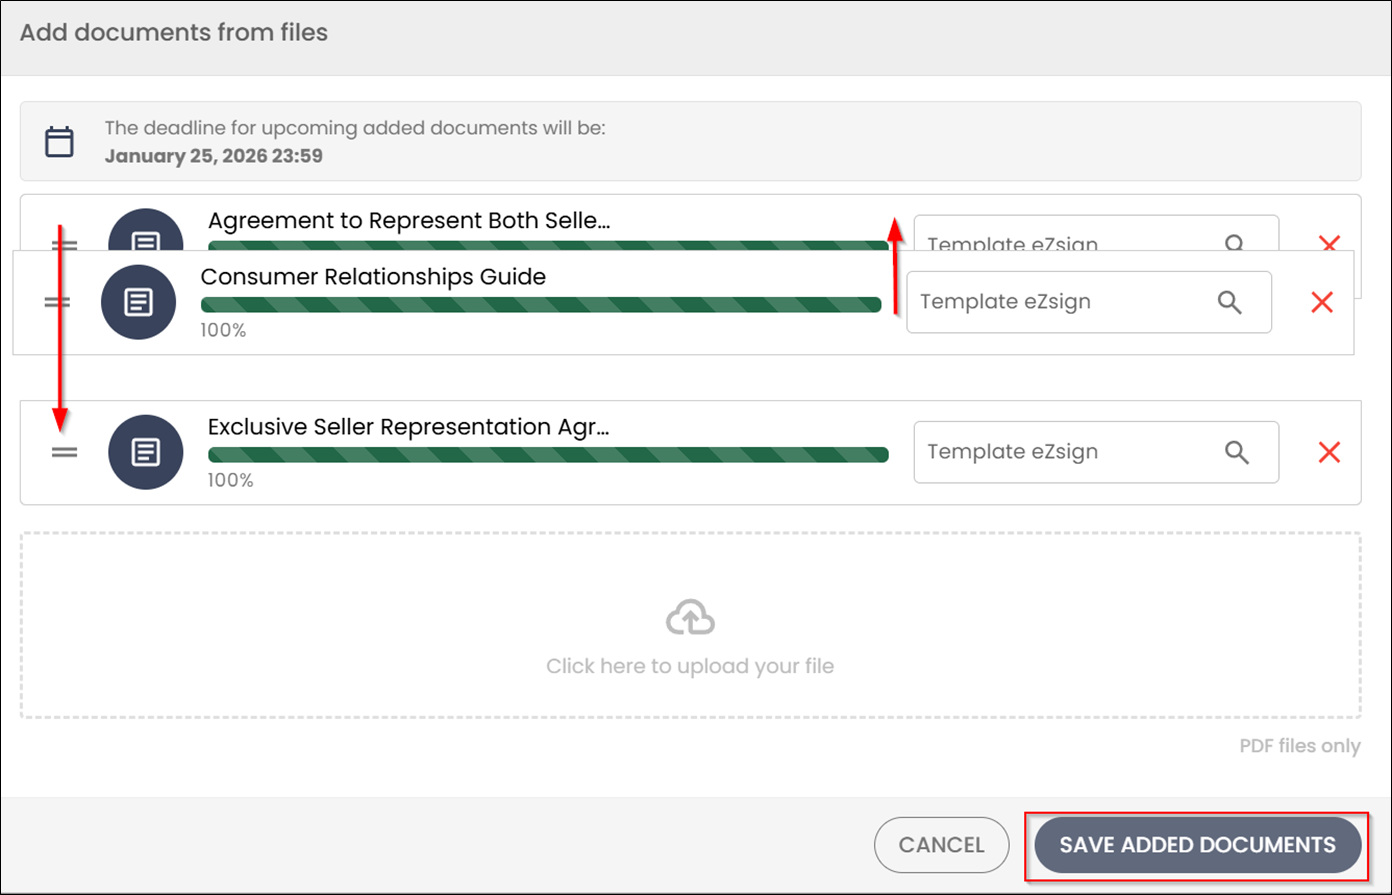
At Step 2 – Document Creation , you can reorder documents by dragging them with your mouse into the desired order.
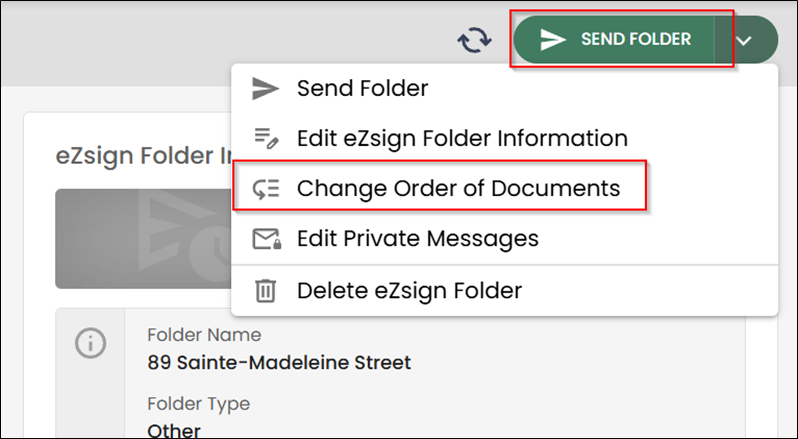
You can also change the order directly in an already created eZsign file via the green menu in the top-right corner by selecting Change document order.
For more information, see the article: "Sent/Partially Signed" File: Available Actions
Downloading Multiple Completed Documents at Once
When a file is completed, you can download multiple documents at the same time, either from the Completed/Signed Documents section or through the Electronic Document Management (EDM).
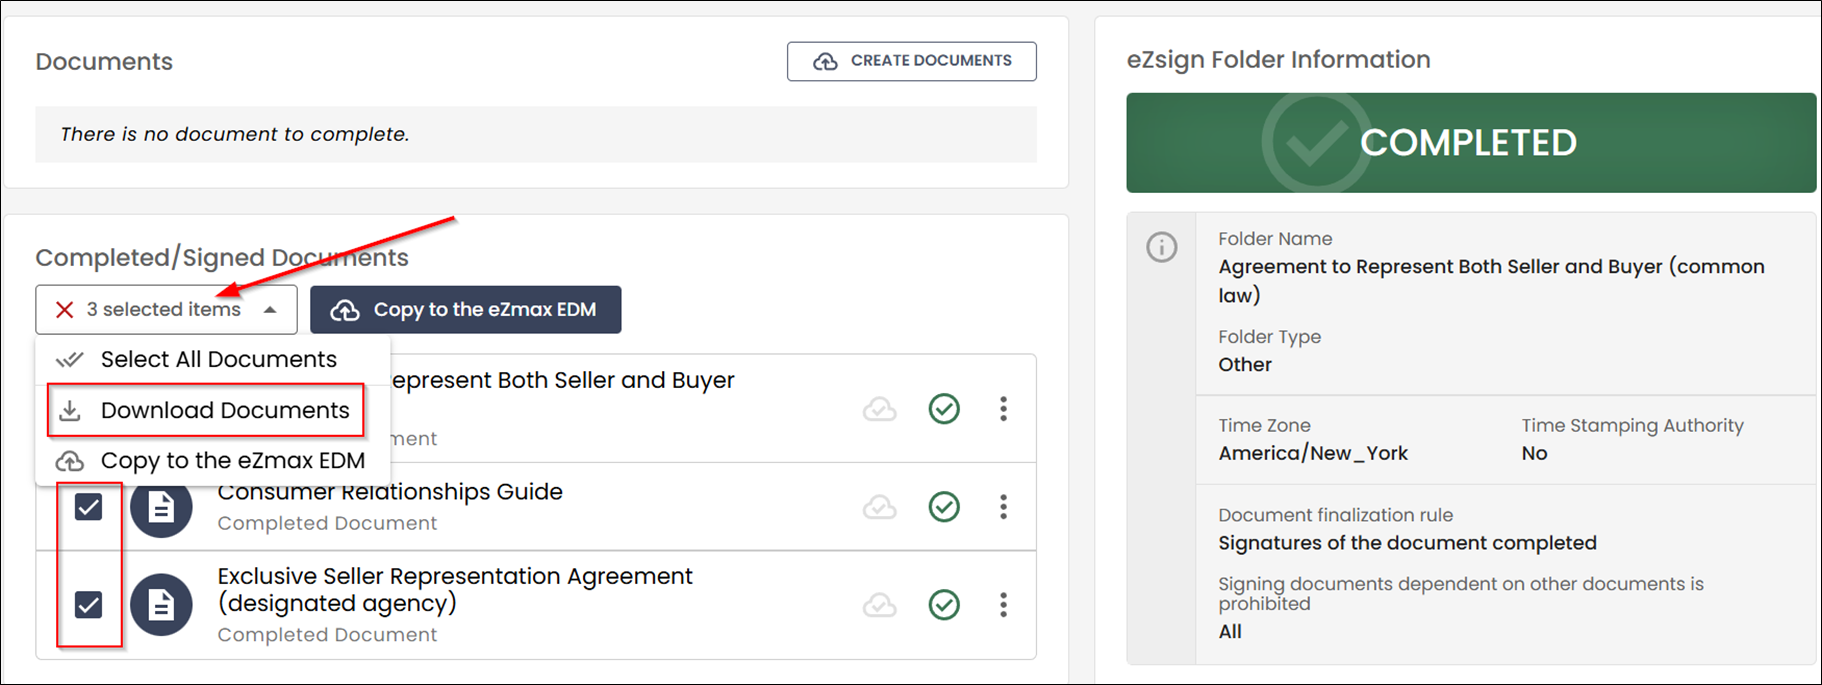
In the Completed/Signed Documents section, select the documents you want to download, then open the X items selected dropdown menu and click Download documents.
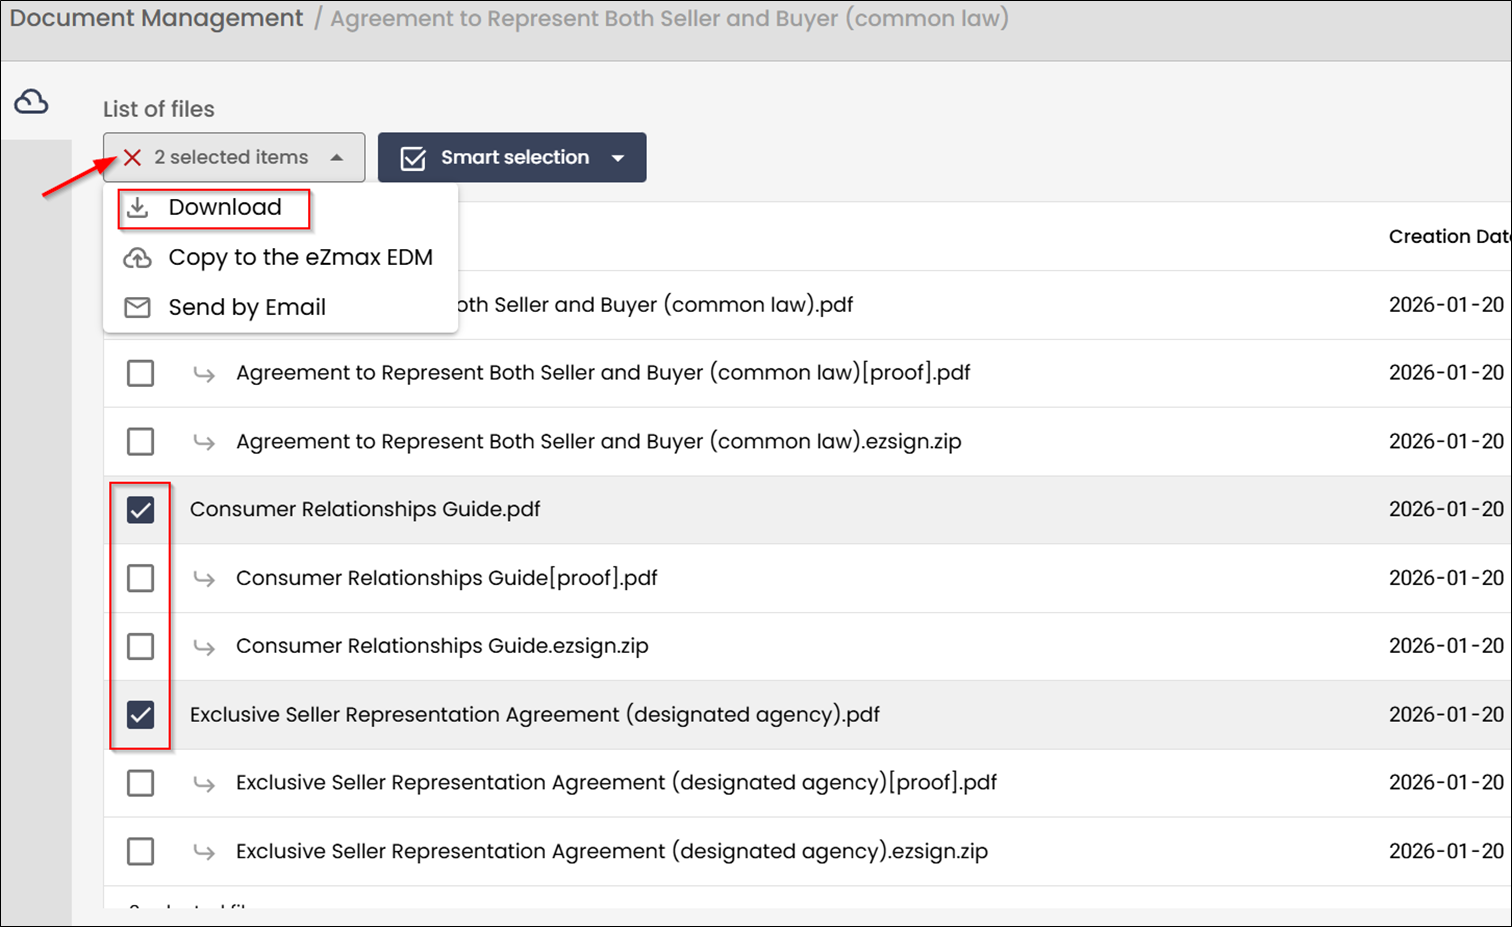
To download from the Electronic Document Management (EDM) , access the EDM located at the bottom-right of your eZsign file. Select the desired documents, then open the X items selected dropdown menu and click Download documents.
Signing a Document Directly in the Application via Email
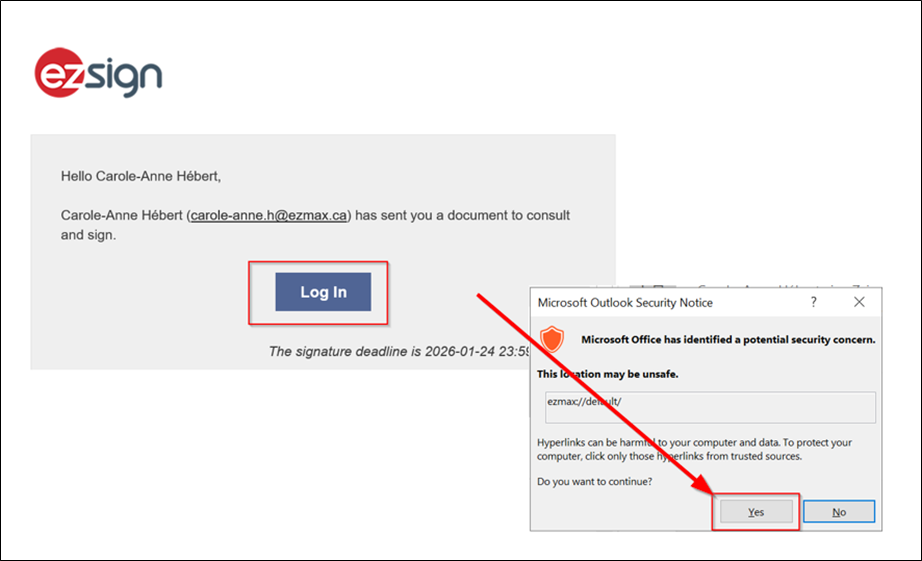
If you receive documents to sign from your agency administration or a colleague and the email invites you to connect to the application to sign, click Sign in directly from the email.
If a message appears indicating that the site is unsafe, this simply means your email provider does not recognize the application—it does not mean the site is actually dangerous. Click Yes to continue.
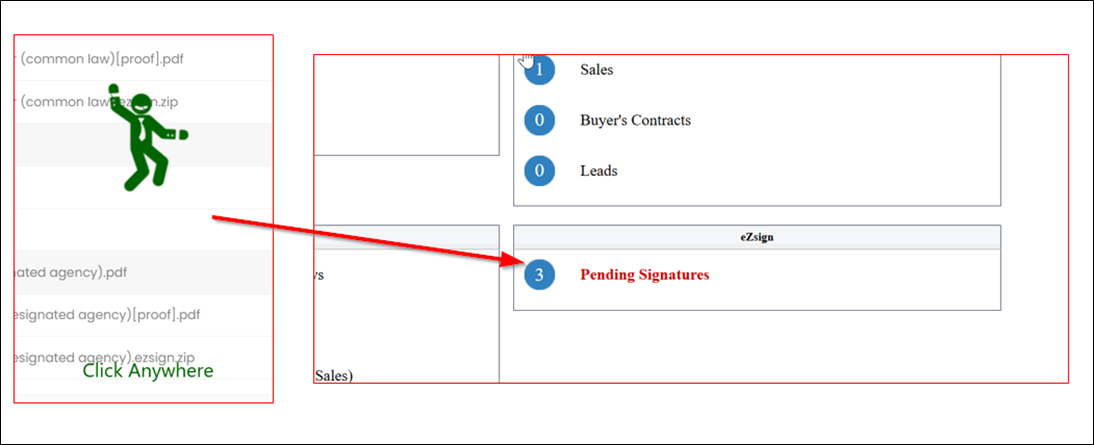
You will then be redirected to the application. In eZmax, an animated green character will appear—click anywhere in the eZmax window to be redirected to the home page, in the Pending Signatures section.
Efficiently Assigning Signature Blocks from a Template Across Multiple Documents
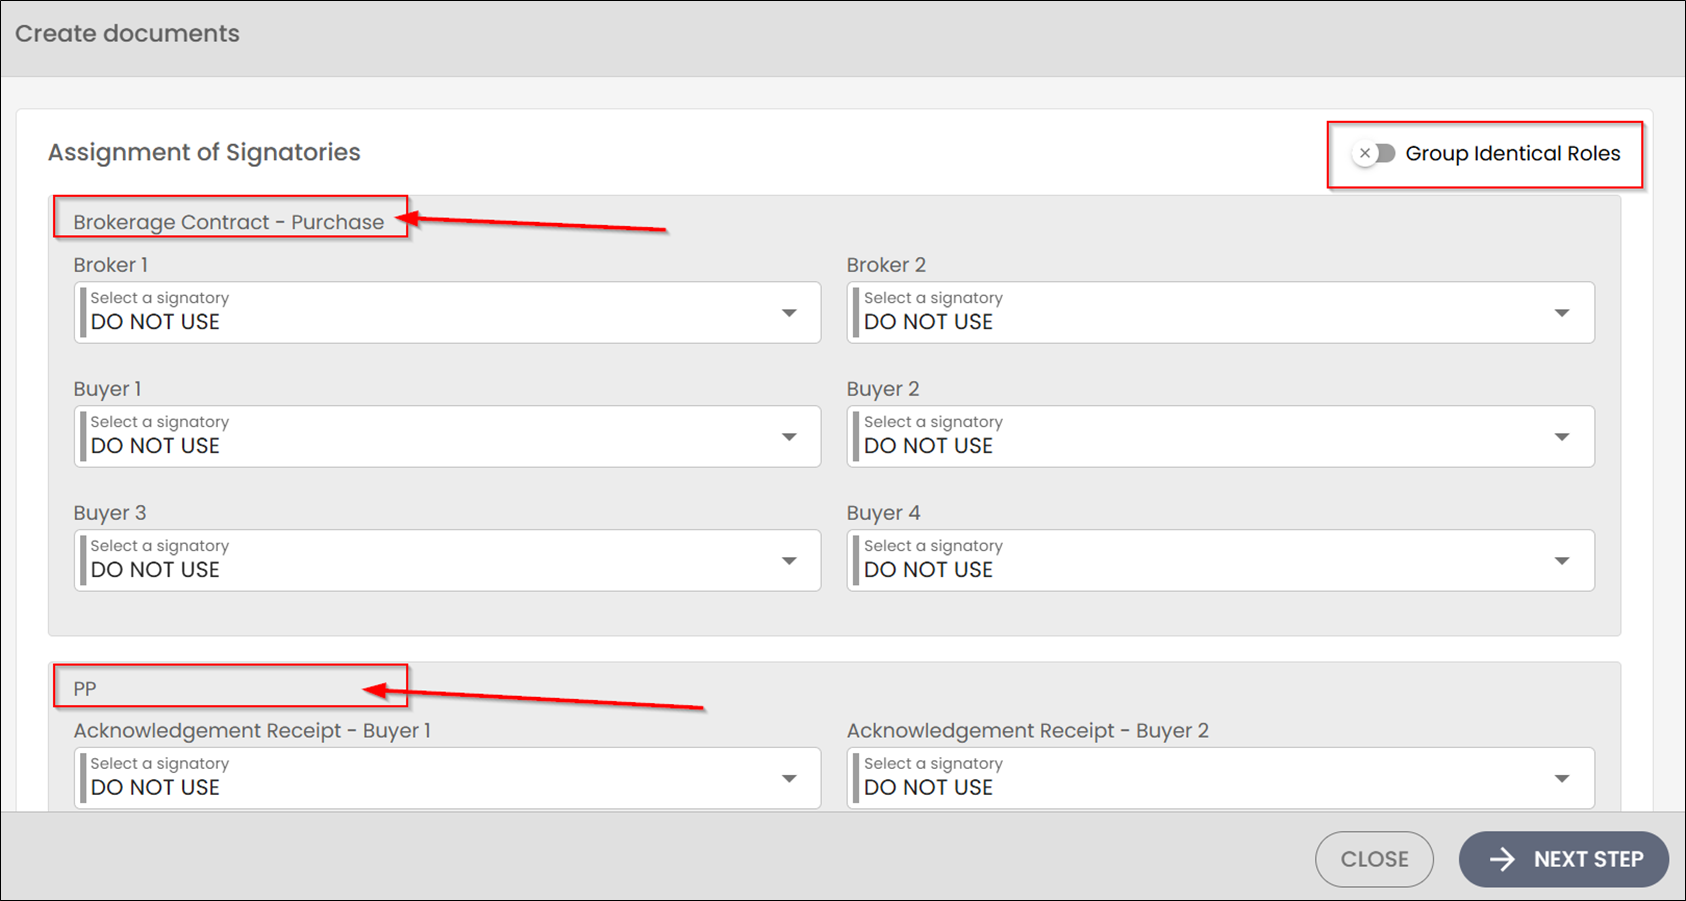
When adding multiple documents that use different templates, you may notice at the signer block assignment step that some templates contain the same roles. In this case, the system automatically groups blocks associated with identical roles.
However, this grouping can sometimes cause confusion. It is therefore recommended to ungroup identical roles in order to assign signers more precisely, document by document.
Optimizing eZsign File Search
When using the search function in the file list, the system automatically displays only the files that match the search criteria. In other words, the list is filtered based on the search term you entered.
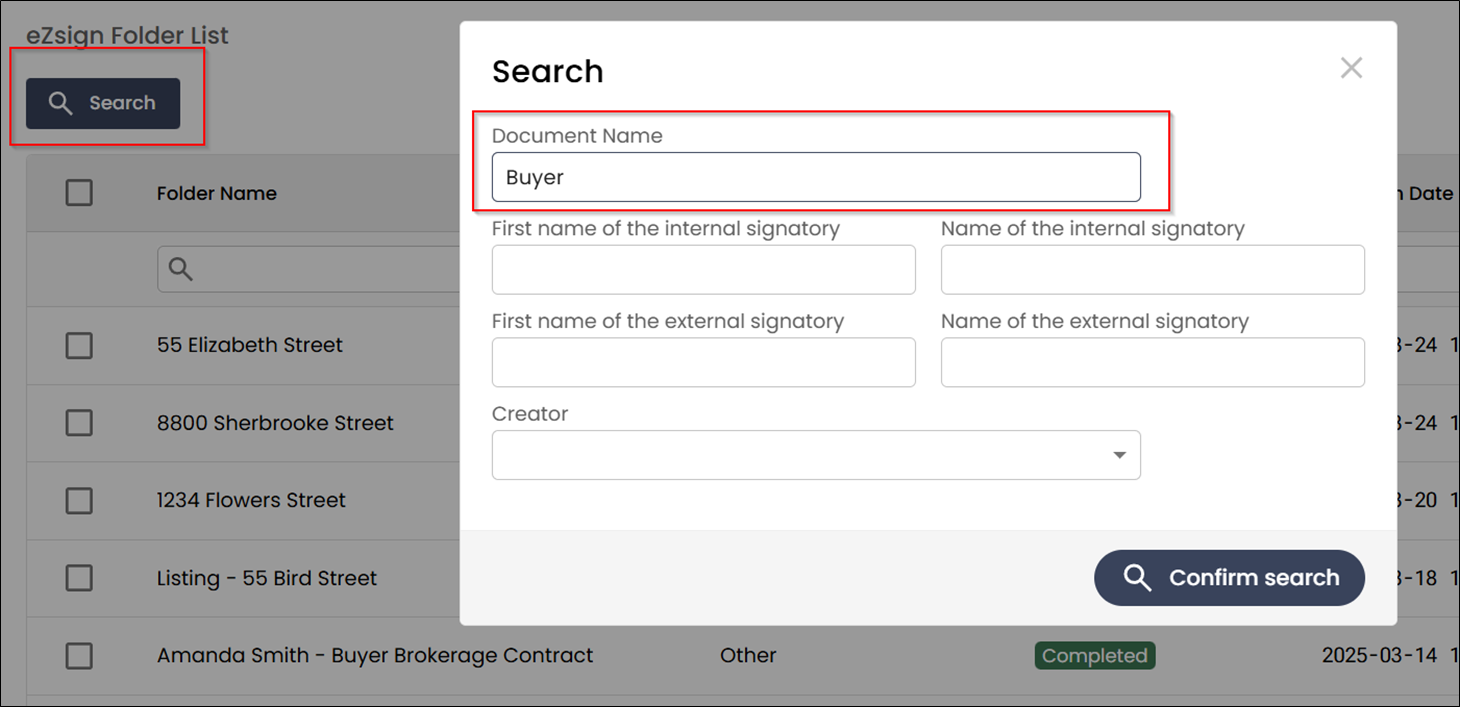
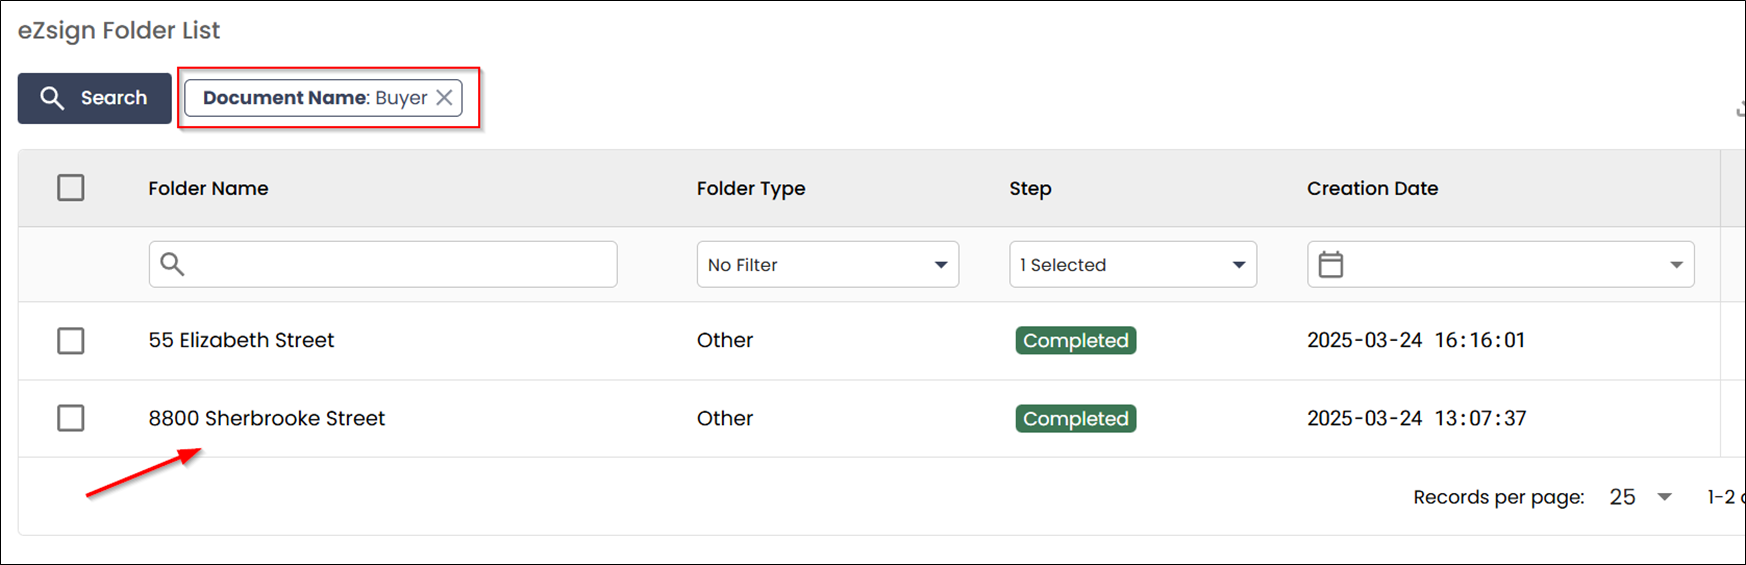
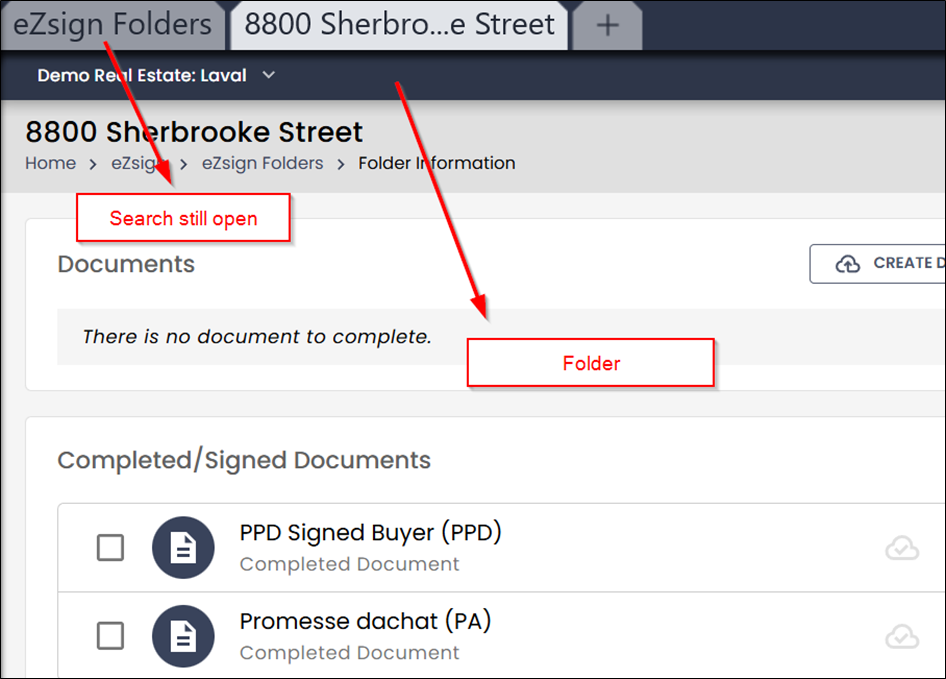
If you want to keep this filtered list, hold down the Ctrl key on your keyboard and click on a file. The file will open in a new tab without losing your search results. This makes navigation easier when searching for information that may appear in multiple files.
Upgrading to a Pro account - Key benefits
The eZsign PRO account offers several additional features. Here are the most important ones:
Detach and reposition the signature date
Send documents for consultation only, with proof of consultation
Use pre-saved message templates (global or private messages, in both French and English)
Any user can upgrade to a PRO account directly from their Subscription page by clicking Upgrade.
For more details: Upgrade to an eZsign Pro Account - The Benefits
NOTE : When the eZsign subscription is managed and provided by your agency, all users must be migrated to the PRO version.
An official request from your agency’s administration must be submitted to us in order to proceed with the migration.
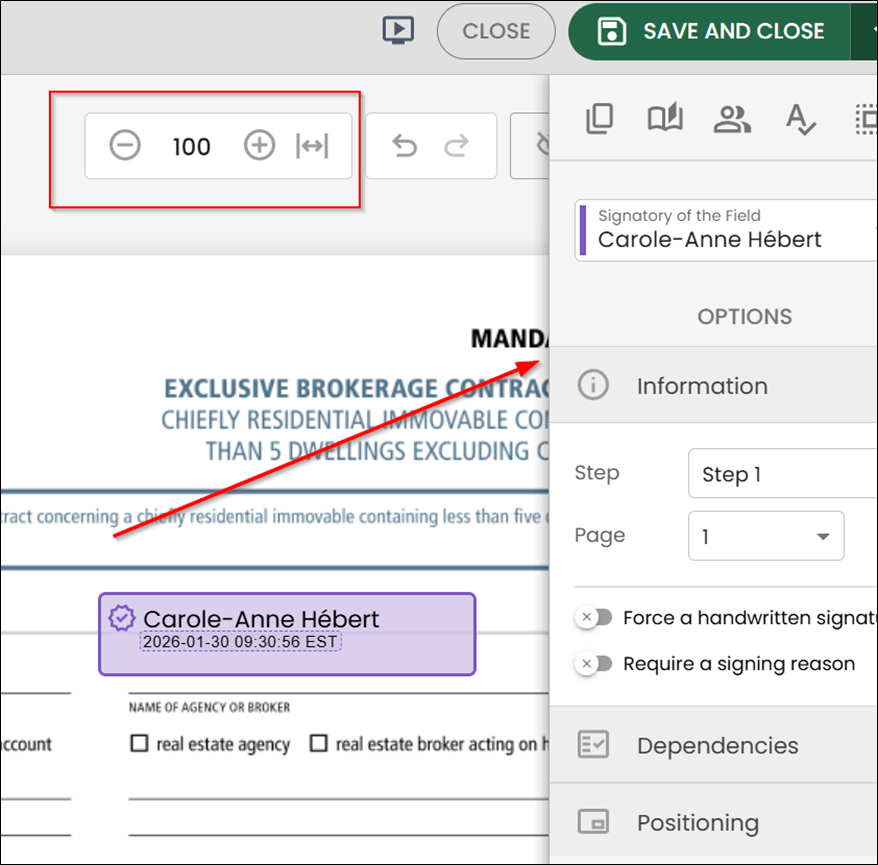
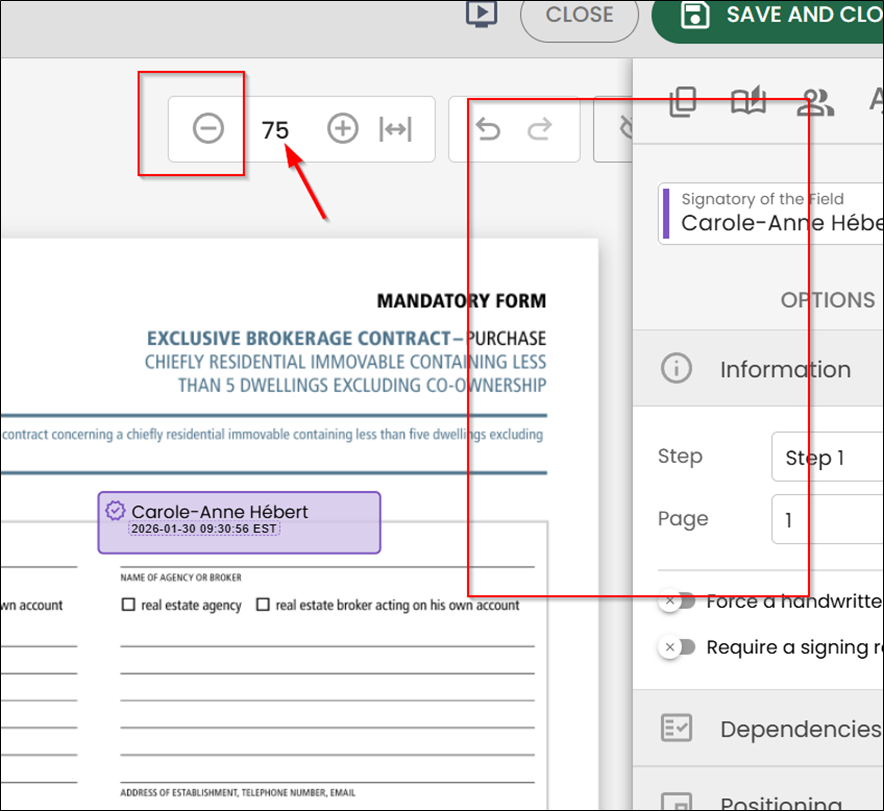
Viewing the full document when adding signature or form fields
When adding signature or form fields to a document, some areas may be partially hidden by the menu on the right-hand side of the screen.
💡 Tip
You can easily adjust the document view by reducing the zoom percentage using the zoom control located at the top of the screen.
This will allow you to view the entire document and place your fields more accurately.
Option “Always send a copy of the signed document”
When adding a signer to an eZsign file, you have the option to check “Always send a copy of the signed document.”
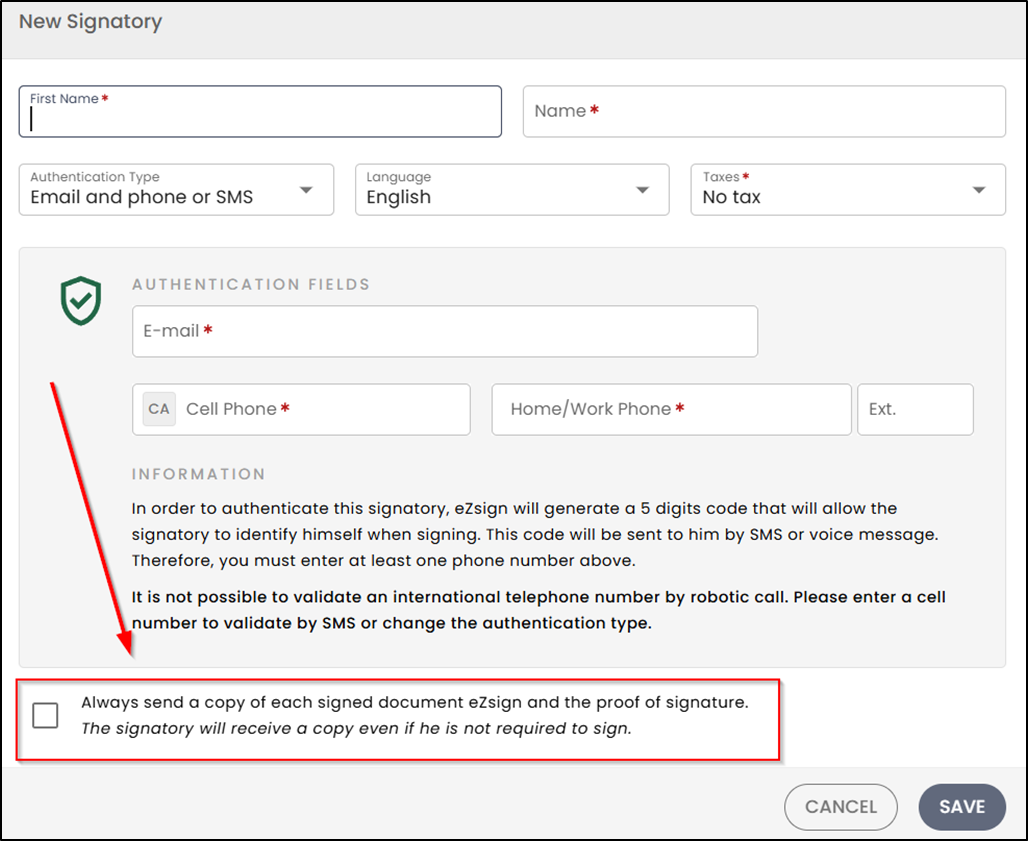
This feature is intended to CC someone , allowing them to automatically receive completed documents without having to sign.
If this option is selected for a signer:
- They will receive a copy of the signed documents
- Even if they did not sign the document
Use this option only for people who should be copied (e.g., assistant, administration), and not for signers.