

English
Creating an eZsign Folder
Creating an eZsign Folder
Whether you want to create a personal folder or a shared folder, the procedure is the same.
- From your home page, click on QUICK MENU >> Create a Folder.
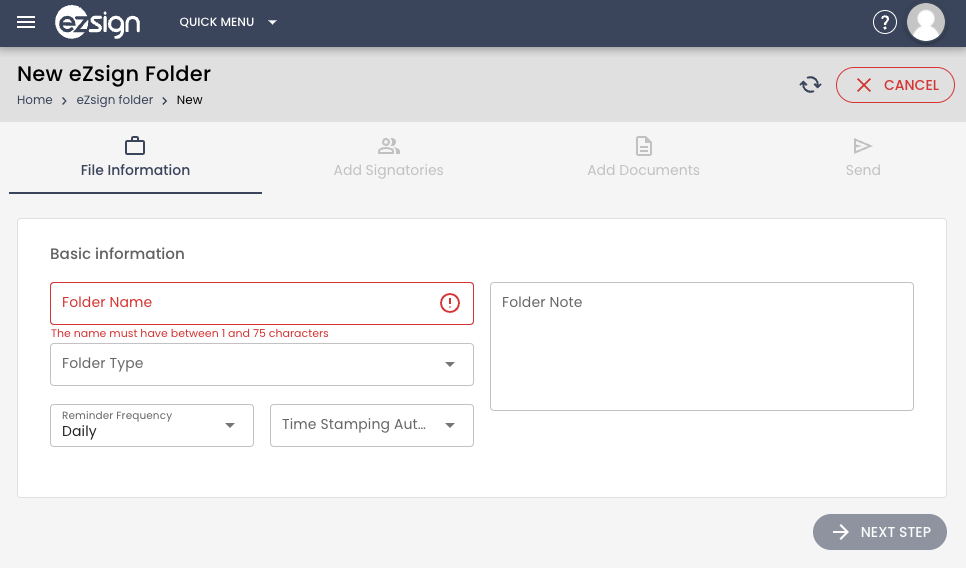
Enter the Folder Name.
Select the Folder Type. The choices you will have in this drop-down list will depend on your package (personal or shared folders). For more information, please see the article Difference between a Personal Folder and a Shared Folder.
Select the desired Reminder Frequency. It is possible to send an e-mail to an external signatory reminding him that he has a signature to complete in a document.
- "Daily": The reminder will be sent every day until the document is signed.
- "Weekly": The reminder will be sent once a week until the document is signed.
- "None": There will be no reminder sent even if the document has not yet been signed.
You can add a Folder Note , such as the type of documents that can be added to this folder.
Click on NEXT STEP to add signatories.
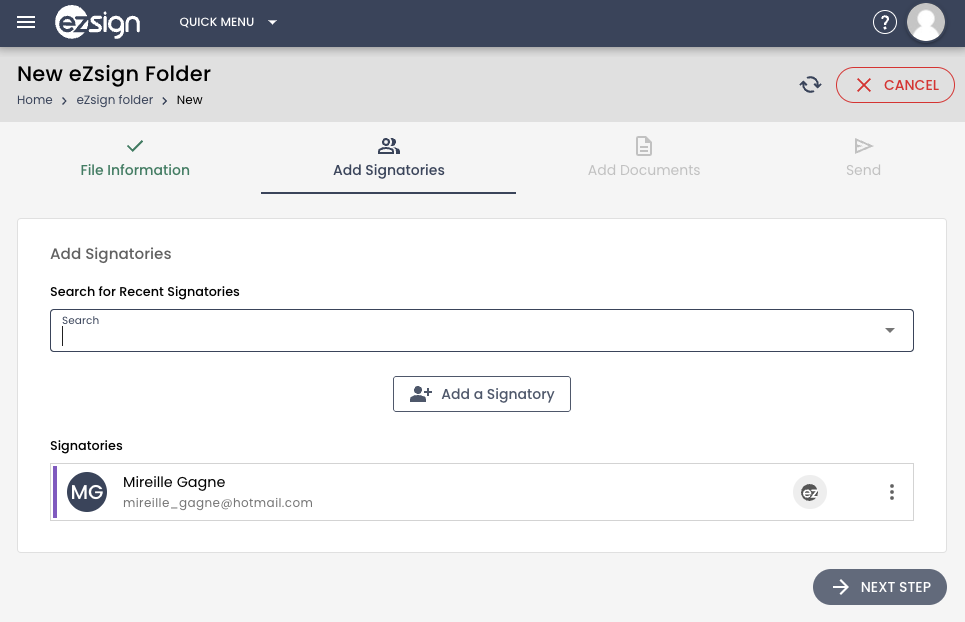
- The user who created the folder is automatically added to the signatories, but you can add more signatories in 2 different ways, i.e. by searching for someone already entered in the system or by creating a new signatory.
Existing Signatory
- Start typing the signatory name in Search for Recent Signatories and select the desired person from the list that will appear.
NOTE: When it is a shared folder, each member of the user group that has access to this type of folder will have access to the signatories added to the folder.
New Signatory
- Click on Add a****Signatory.
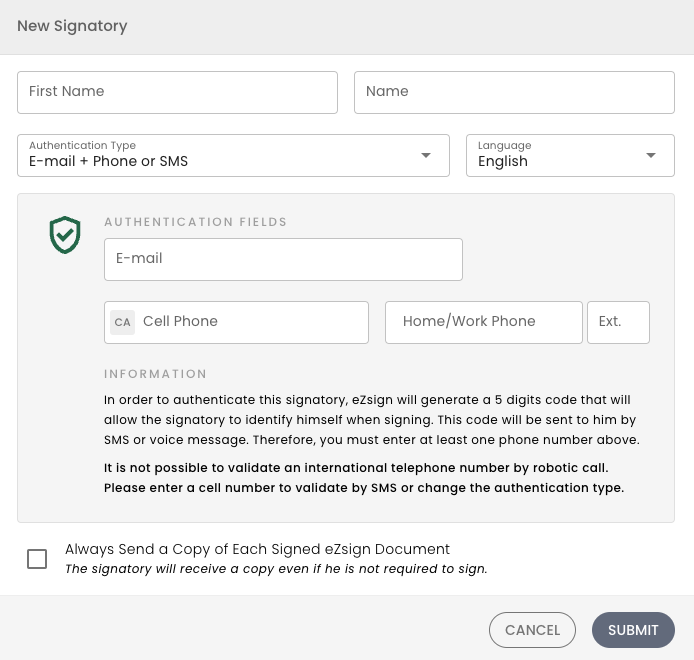
Enter the First Name and Last Name of the signatory.
Select the appropriate Language. The e-mail message and all the instructions sent to the signatory will be in this language.
Select the desired Authentification Type. For more information, please see the article Types of Signatory Authentication.
Depending on the type of authentication selected, enter the Cell Phone or Home/Work Phone.
Click on SUBMIT and the signatory will be added in the eZsign folder.
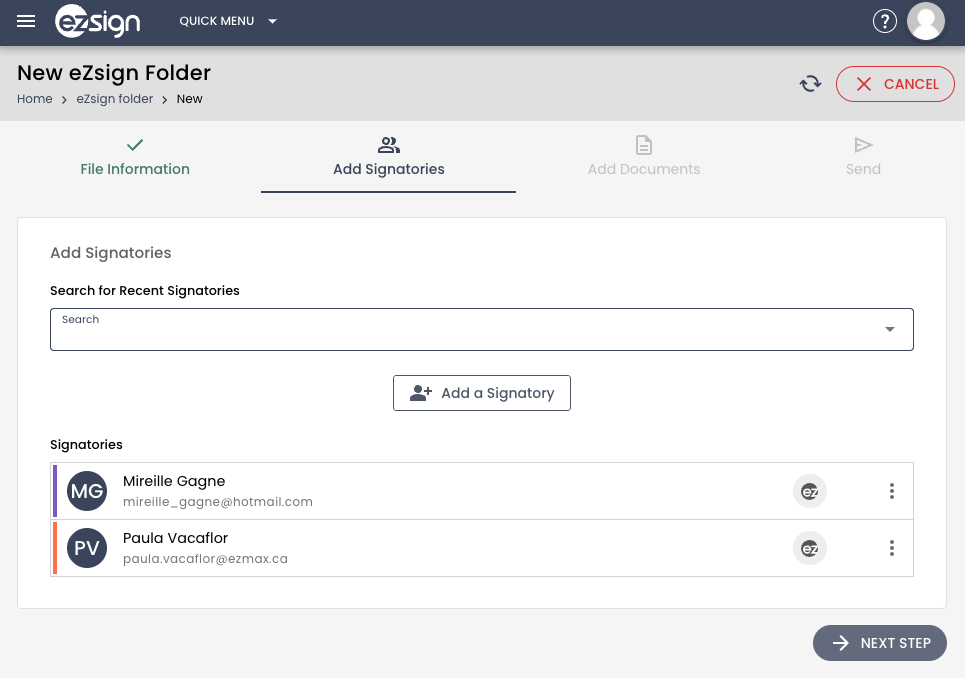
- Click on NEXT STEP to add documents.
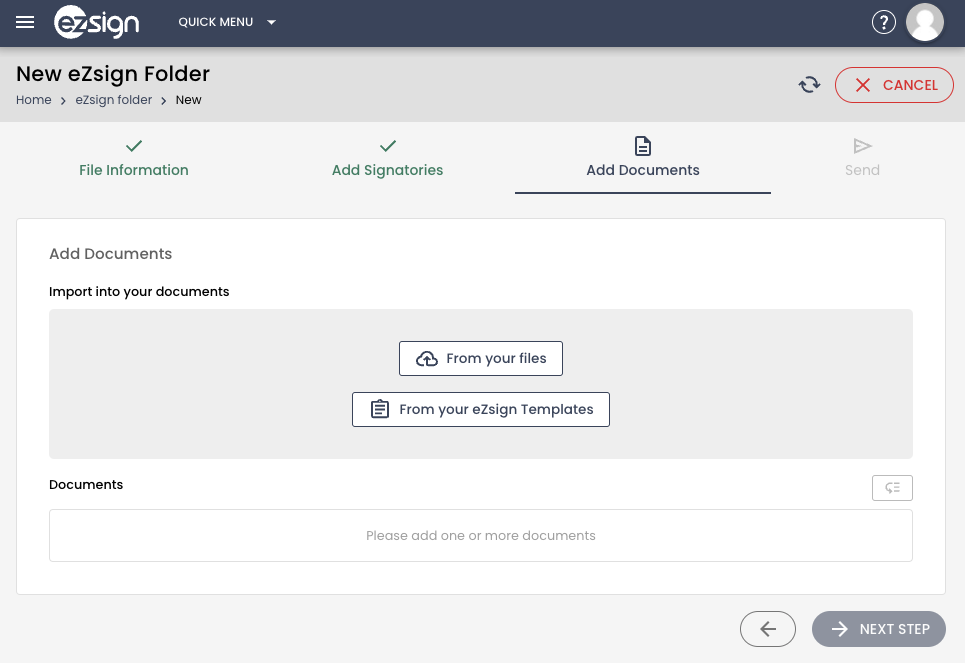
There are 2 ways to add documents: From your files (will be explained in this article) and From your eZsign Templates (for more information, please see the article Adding/Loading/Editing a Template).
Click on From your files.
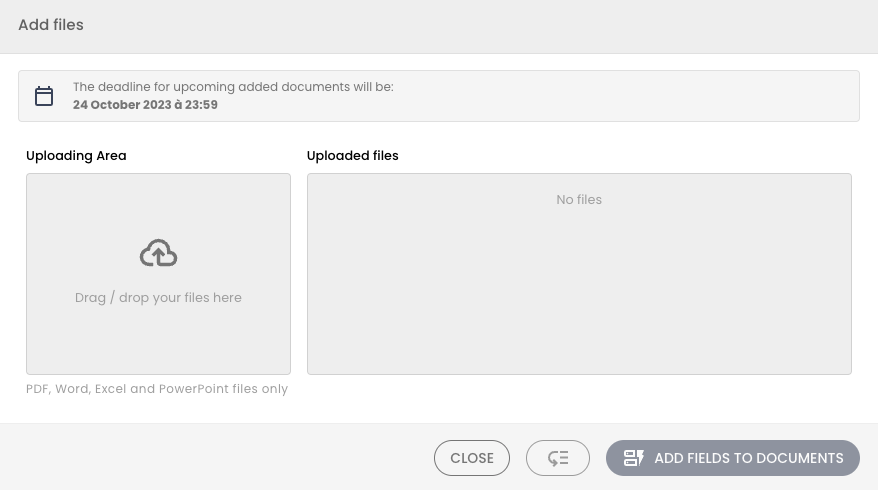
- Drag/drop your files in the Uploading Area.
Warning
The file to be downloaded must be in PDF, Word, Excel and PowerPoint format.
- Once the documents are added, click ADD FIELDS TO DOCUMENTS.
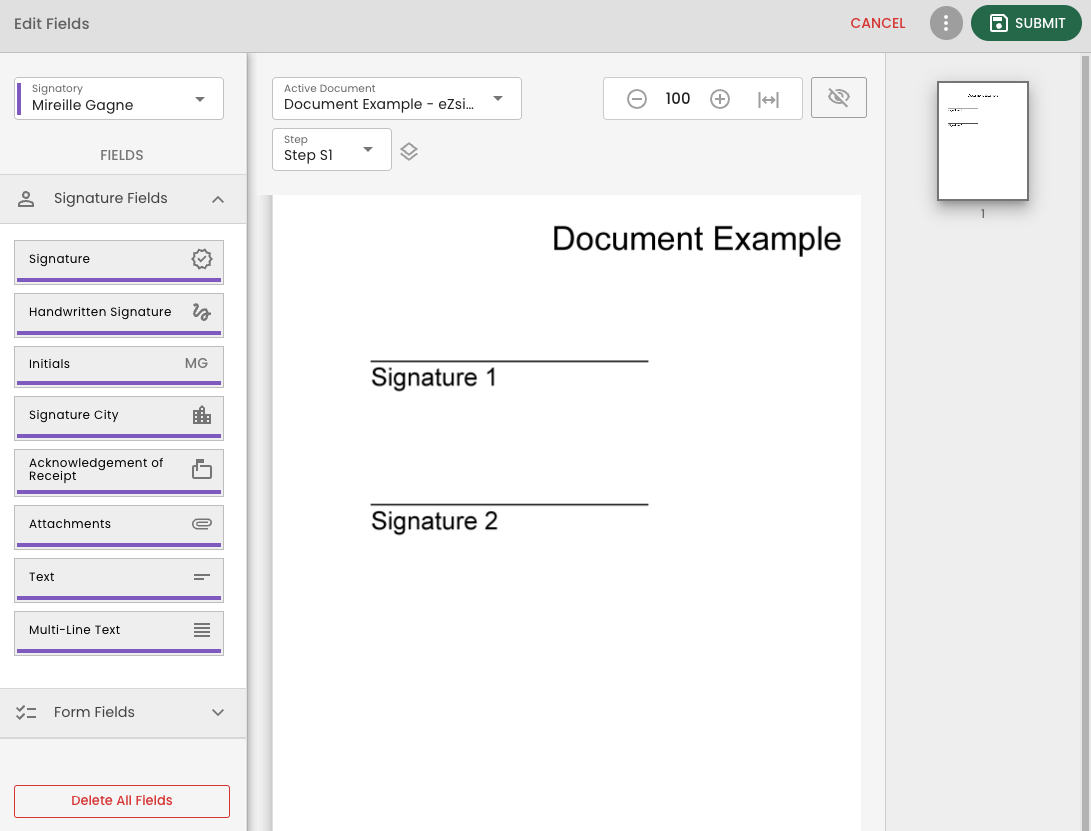
Select the Active Document from the drop-down list.
At the top left, select the desired Signatory. Each of the signatories will have a different field color (the same as the one in the "Signatories" section of the folder).
For each of the signatories, choose and drag the field type in the document from the Signature Fields list.
Once all fields have been added to all documents, click on SUBMIT.
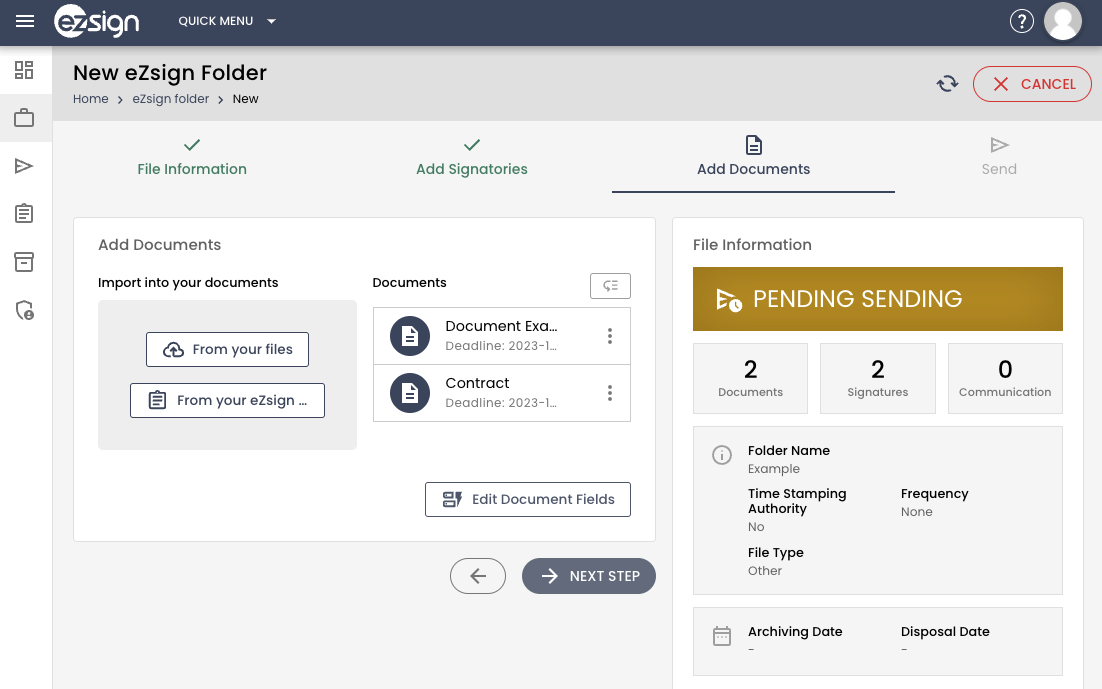
- Click on NEXT STEP to access the document sending page.
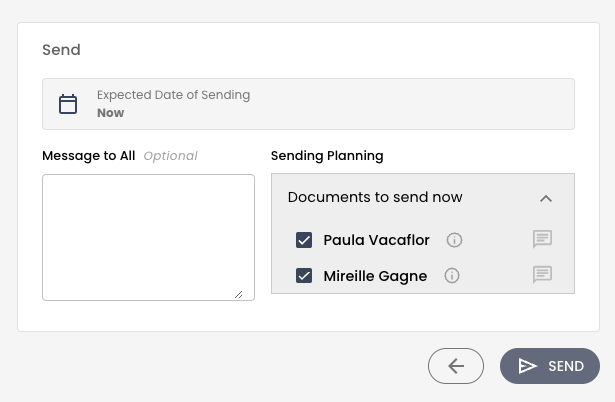
- You can write a private message to each of the signatories by clicking on this icon

to the right of the signatory.
- Click on SEND.