

English
Adding/Editing a Supplier
Adding a Supplier
From Main menu >> Accounts Payable >> List of Suppliers.
Click on Actions >> New Supplier.
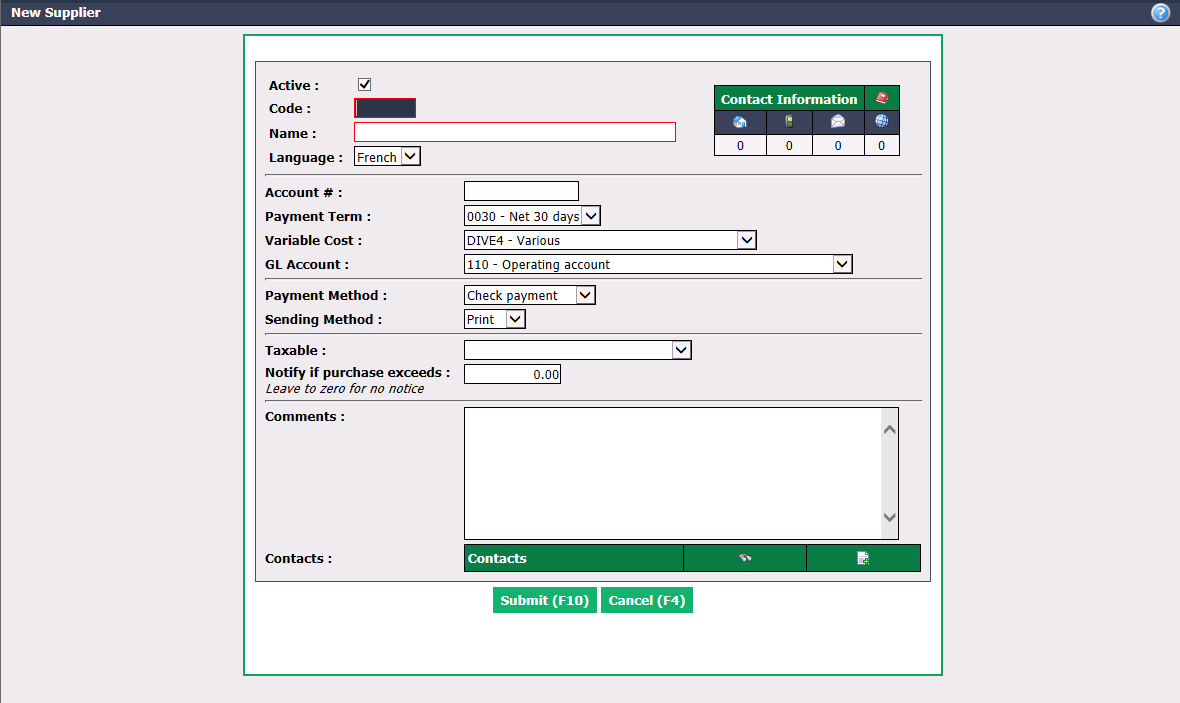
Create a Code for the supplier and enter supplier Name.
Make sure you select the appropriate display Language for this supplier.
Contact Information for the supplier, i.e. addresses, e-mails, phone numbers and Websites, can be added by clicking on one of the icon in the box.
NOTE: If you want to e-mail account statements or EFT payment confirmation through the program, make sure you add an e-mail address in the Contact Information.
Enter your Account # if you have an open account with this supplier.
Enter Payment Term. For more information, please see the article Adding/Editing a Payment Term.
Enter Variable Cost. For more information, please see the article Adding/Editing a Variable Cost.
A GL Account can be selected and assigned to supplier so that future invoices will be assigned by default to that GL.
Select a Payment Method to be used by default each time you pay invoices for this supplier. The payment method can be changed manually every time you pay an invoice.
Warning
If you choose an electronic transfer as Payment Method, you must save the supplier information at least once and then go add a bank account.
Select a Sending Method :
- Print: Will allow you to print a hard copy of statements or EFT payment confirmations.
- E-mail: You can create an e-mail account statements through Accounts Payable >> Account Statements and select Sending Method >> According to preference. This will send the statement to the e-mail on file with the supplier.
If your office is set up for payment via EFT and you want to send payment confirmation to the supplier. Payment confirmation via e-mail can be selected at the time the EFT file is created and sent or later by selecting the EFT payment from Accounts Payable >> List of Payments by Electronic Funds Transfer (EFT), click on Actions >> Send slip according to preference.
Make sure you select the appropriate taxes for your area under Taxable.
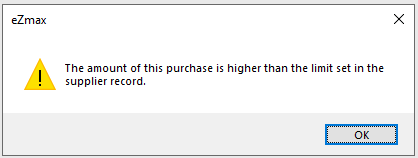
You can set a spending limit for this supplier under Notify if purchase exceeds. If a purchase exceeds this amount, eZmax will display this warning message :
Comments are for internal use only. This information will not be printed on any cheques or statements.
Individual contacts of the supplier can be added under Contacts by clicking on the + icon. You can search in your eZmax contacts by clicking on the Binoculars icon.
Click on Submit to save your changes.
Editing a Supplier
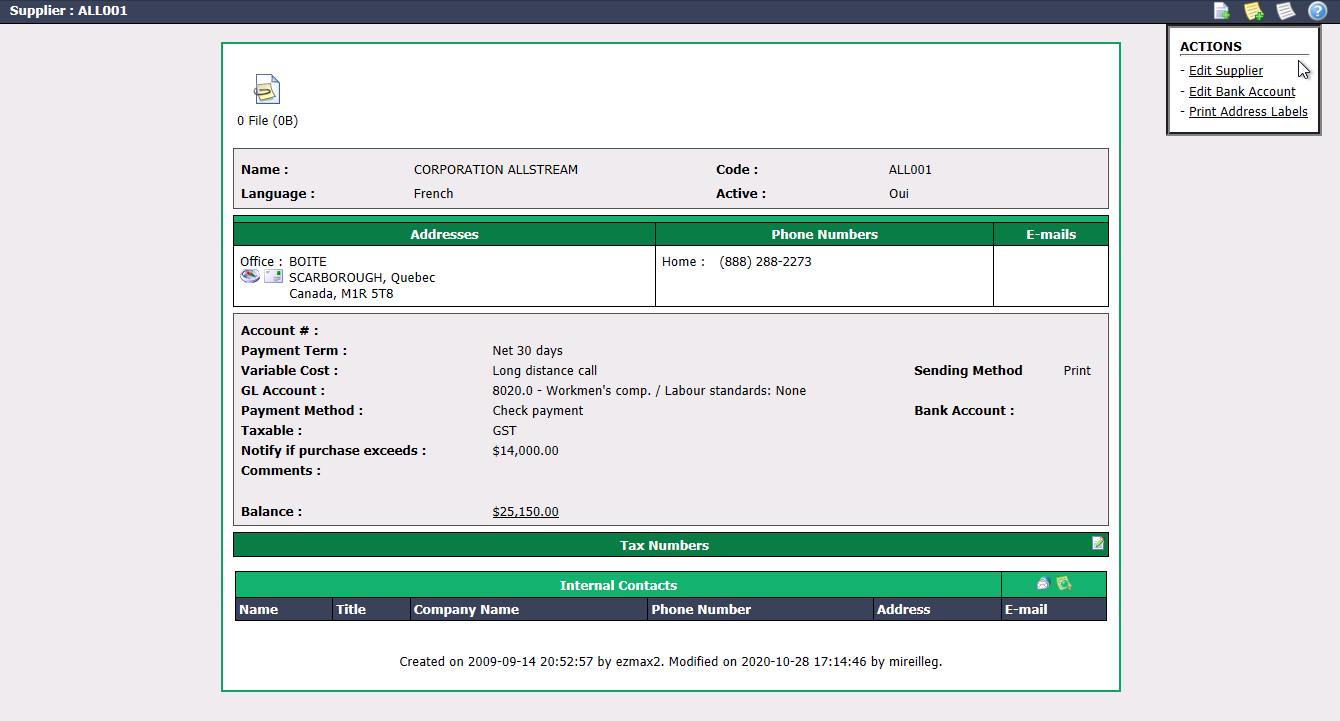
Once the supplier is created, you will have access to his profile.
If you use eZmax Admin EDM, you will be able to add documents directly in the supplier’s profile and have access to communications made through the EDM section.
At any time, you have the possibility to click on the Balance due to the supplier and see the list of invoices (paid and outstanding).
You can enter the Tax Numbers of the supplier by clicking this icon

.
From the Actions menu, you will be able to:
- Edit Supplier: Make the desired changes and click on Submit to save them.
- Edit Bank Account: If the current payment method is "Check payment" and you want to change it to "Electronic transfer", you must check the Direct Deposit box and enter the appropriate Transit , Institution and Bank Account numbers. If the current payment method is "Electronic transfer", you can modify the bank account information for EFT (electronic funds transfer).
NOTE: Add "0" before the 3-digit institution number.
* Print Address Labels