

English
Adding/Editing a Team in the System
Adding a Team
From Main menu >> Real Estate >> List of Teams.
Click on Actions >> New Team.
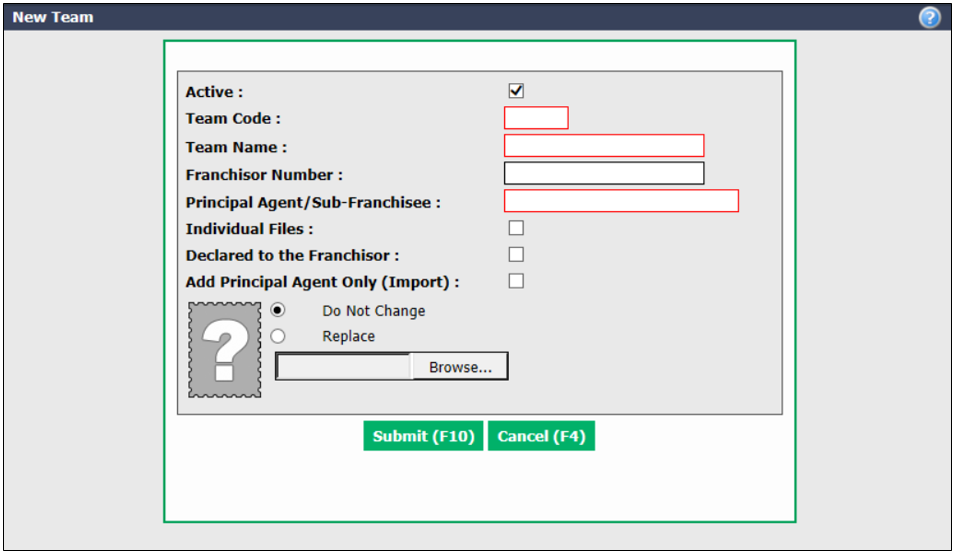
Active will be checked when the team is active. To inactivate a team, uncheck this box.
Create a Team Code (abbreviation, maximum of 5 characters) and enter the Team Name (full name).
You can enter the Franchisor Number , if applicable.
Individual Files : In the case of a team with members who are in different departments or who are sub-franchisees, check this box if you want each member to have a different file number.
Declared to the Franchisor : Check this box if you want the team data to appear in the report sent to the franchisor, if applicable.
Add Principal Agent Only (Import) : Check this box so that when importing listings, only the main agent will be imported and not all team members.
The team’s photo can be added by clicking the Browse button, then selecting and uploading the desired file.
Click on Submit and the team will be added in the system.
Adding Team Members
Once the team is created, you must add all the active members of this team.
- Go to the profile of a team member and click on Actions >> Edit Agent.
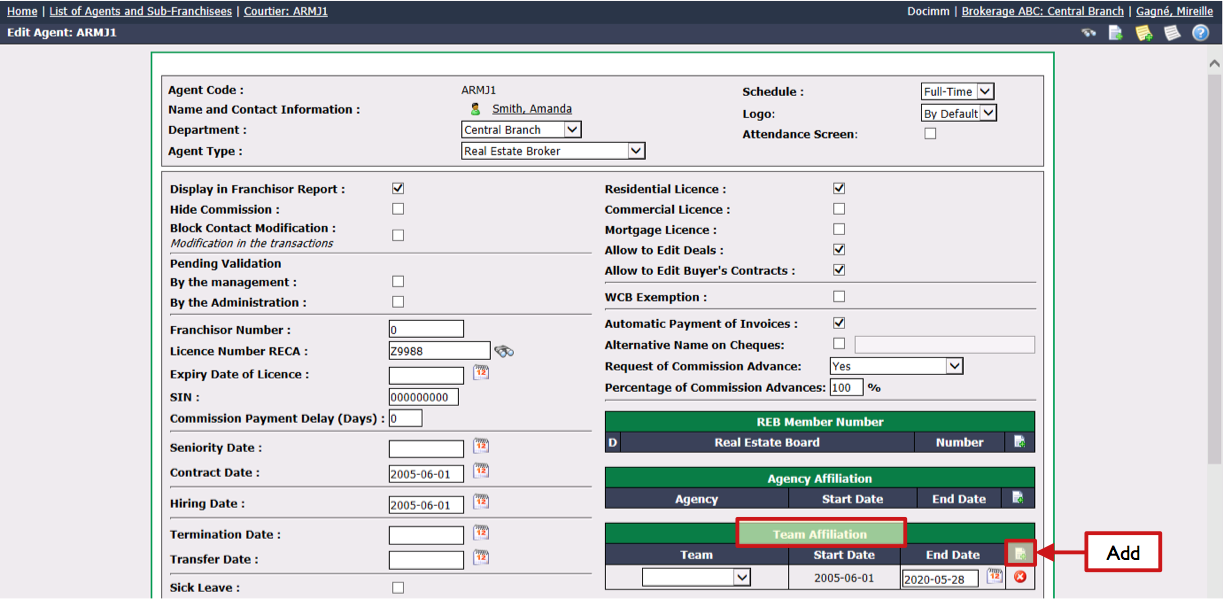
In the "Team Affiliation" section, click on + icon to add a team.
- If the agent was individual, you must select the empty space in Team field and enter the End Date , i.e. the last day as an individual agent. Then, you click on the + icon to select the Team in which he is now a member and enter the Start Date , i.e. the first day as a new member of this team.
- If the agent was part of another team, you must enter the End Date in the field next to that team, i.e. the last day in that team. Then, you click on the + icon to select the team in which he is now a member. The Start Date , i.e. the first day as a new member of this team, will be automatically entered (the day after the end date).
Click on Submit and the member will be added in the team.
Repeat these steps for each agents of this team.
Information
It is possible to produce a report, for a given date, indicating the start and end dates for each member of all teams entered in the system. All you have to do is go to the List of Teams, click on Actions >> Team Report, enter the desired date and indicate whether the team is declared to the franchisor or not, if applicable.
Editing a Team
- To modify an existing team, select it from the List of Teams.
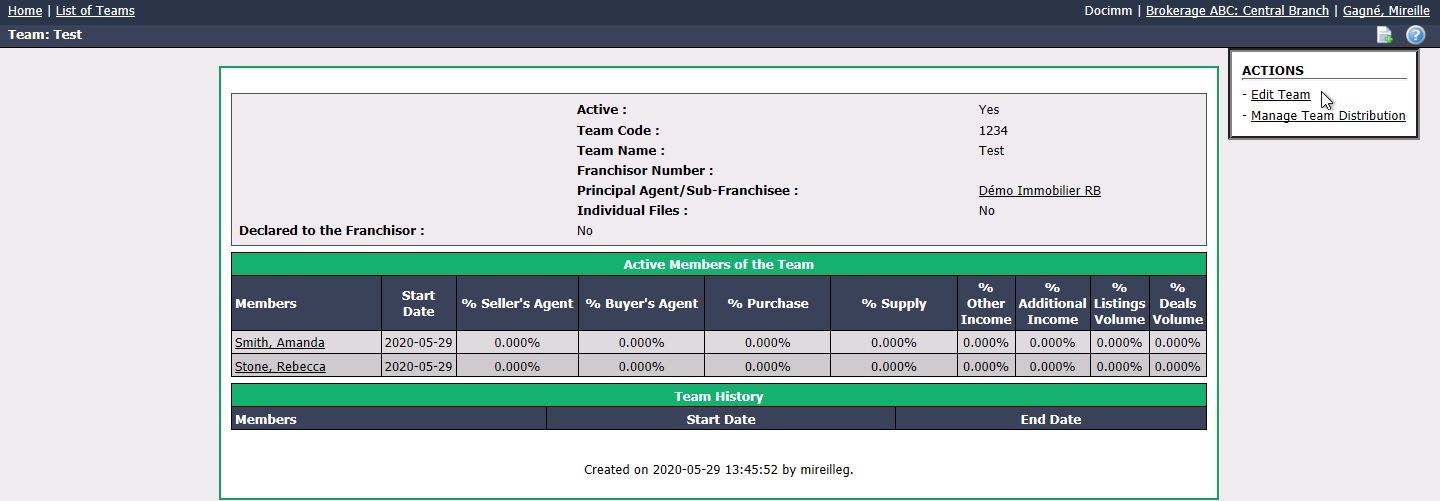
From the Actions menu, you have the option to Edit Team and to Manage Team Distribution.
Edit Team: Make the desired changes and click on Submit to save them.
Manage Team Distribution:
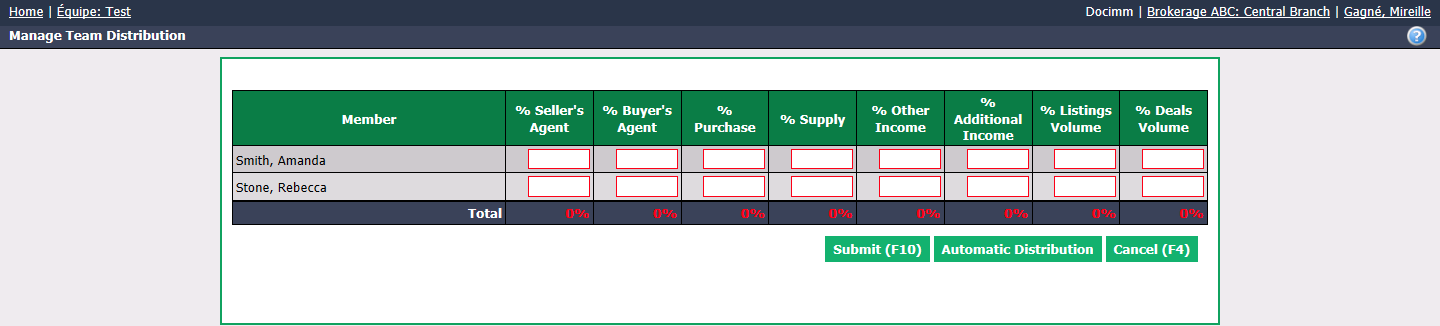
* For each team member, enter the desired percentage for each category or click **Automatic Distribution** to have 50 in all boxes.
  * **% Seller’s Agent** : When the team represents the sellers, it is the percentage of commission that will be allocated to each agent.
  * **% Buyer’s Agent** : When the team represents the buyers, it is the percentage of commission that will be allocated to each agent.
  * **% Purchase** : When the team makes purchases, it is the percentage of the amount of these purchases that each agent will have to pay.
  * **% Supply** : When the team buys supplies (photocopies, envelopes, signs, etc.), it is the percentage of the amount of these supplies that each agent will have to pay.
  * **% Other Income** : When the team receives other income than during a deal (mortgage referral, consultation, etc.), this is the percentage of the amount of this income that each agent will receive.
  * **% Additional Income** : When the team receives additional income, this is the percentage of the amount of this income that each agent will receive.
  * **% Listings Volume** : When the team add a listing, this is the percentage of points received that will be allocated to each of the agents.
  * **% Deals Volume** : When the team closes a deal, this is the percentage of points received that will be allocated to each of the agents.

* Click on **Submit** to save changes.
Warning
The total for the team distribution in each category must be 100%.