

English
Adding/Editing a User
Adding a User
From Main menu >> Admin >> List of Users.
Click on Actions >> New User.
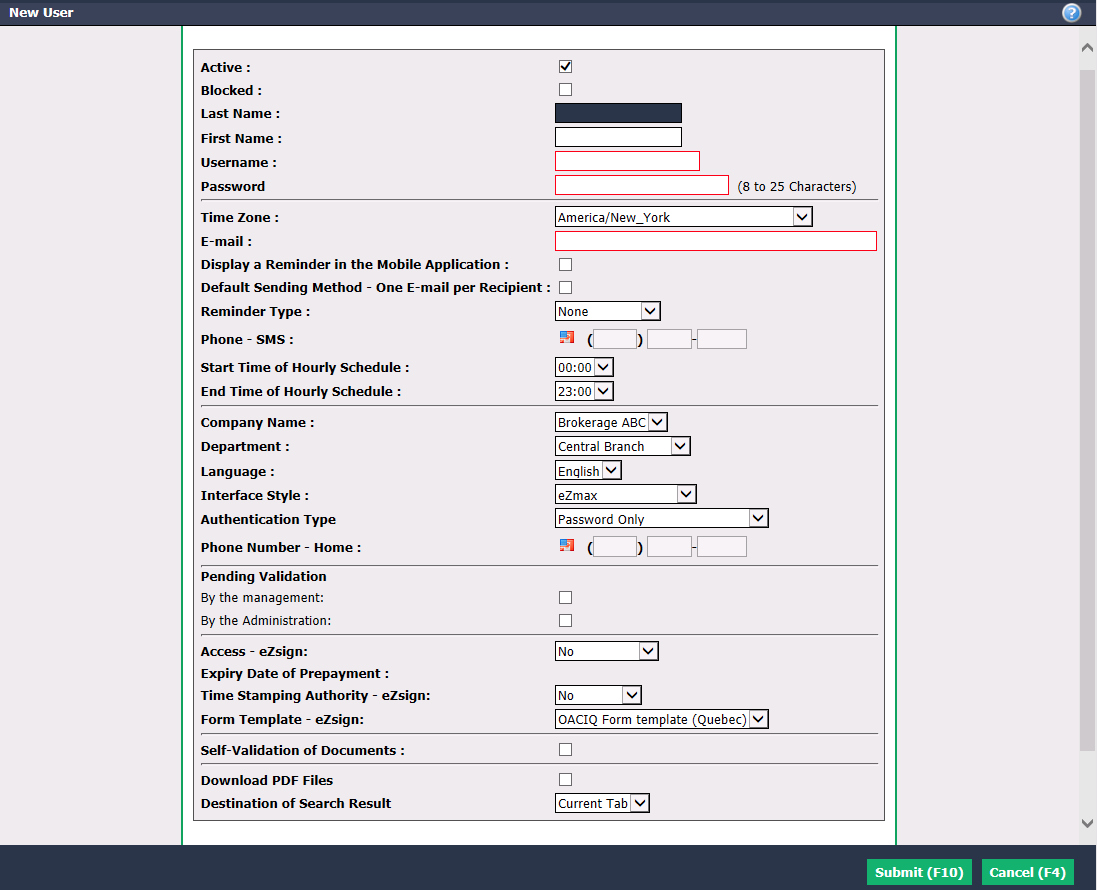
Active will be checked when the user is active. To inactivate a user, uncheck this box.
Blocked is checked only if the user has made 3 failed login attempts.
Enter the Last****Name and First Name of the user.
Assign a Usern****ame. Suggestion: The last name followed by the first letter of the first name, for example: smitha for Amanda Smith.
Enter a temporary Password. (Suggestion: Ab123456!) The user will be prompted to change the password at first login.
Warning
The password must contain at least 8 characters, one uppercase, one lowercase, one digit and one special character.
The appropriate Time Zone will be selected by default, but you can change it manually.
Enter an active E-mail address for the user.
Display a Reminder in the Mobile Application : Not applicable.
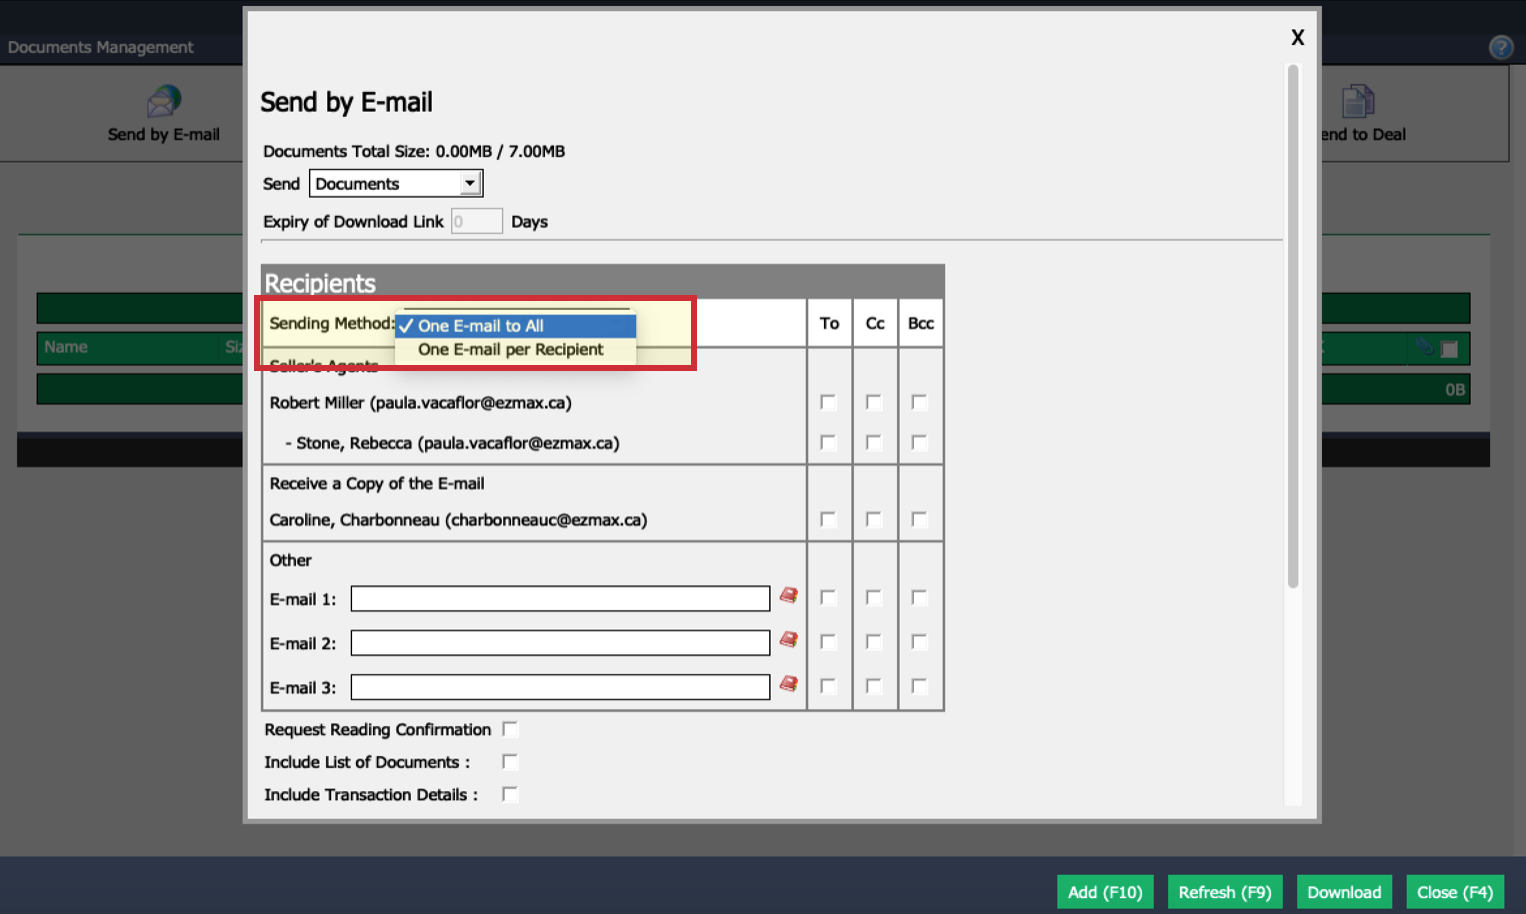
Default Sending M****ethod - One E-mail per Recipient can be selected or not. When selected, eZmax will designate that method by default when sending documents through the EDM (see example below). If not selected, the method by default will be "One E-mail to All".
Select a Reminder Type if appropriate. If "Text message" is selected, the Phone - SMS section will be activated and a cell phone number can be entered.
If the user will have an established work schedule, Start Time of Hourly Schedule**** and End Time of Hourly Schedule can be selected.
Select the Company Name , Department (if multiple departments are configured) and the appropriate display Language for this user.
Interface Style can be changed to different display and colour styles for that user.
Select Authentication Type as desired. By default, it’s "Password Only" but there is also "Password and Secret Question". If you choose the latter, you must select a Security Question from the drop-down list and enter the Answer.
Pending Validation : If the user file needs to be validated, indicate whether this will be done By the Management or By the Administration.
The " eZsign" section is completed only if eZsign module has been installed in the system.
- Access - eZsign**😗***"No" is selected by default when creating an user account, but if you want to give access to eZsign for this user, select "Provided by the Office".**
- Expiry Date of Prepayment: When eZsign has been prepaid, an eZmax employee will process the payment and the expiry date will be displayed here. This date is not editable by the users.
- Time Stamping Authority - eZsign : Select "No", "Best Effort" or "Mandatory". For more information, please see the article Time Stamping Authority.
- Form Template - eZsign: The template of the appropriate province can be selected.
Self-Validation of Documents means that documents added to the EDM by this user will automatically be validated.
Download PDF Files means that when the user opens a document in the EDM, the document will open in another program (like Adobe) instead of opening in an eZmax TAB. Users with multiple screens sometimes prefer this option.
Destination of Search Result can be changed as desired. We strongly recommend using New Tab.
Click on Submit and the user will be added in the system.
In the user profile, from the Actions menu, you have the possibility to:
- Edit User: For more information, see below in this article.
- Reset Unique Key for eZmax E-mail: Not yet available.
- Manage Authorizations: For more information, please see the article Authorization Management of an Admin User.
- Display Session History: Allows you to see, among other things, the login and logout times of the eZsign user.
- Reset Password: For more information, please see the article Resetting a User Password.
Editing a User
To modify an existing user, select the desired user from the List of Users and click on Actions >> Edit User.
Make the desired changes and click on Submit to save them.