

English
Adding a Regular and/or Incorporated Agent
- Click on the Agents icon

or from your Main menu >> Real Estate >> List of Agents and Sub-Franchisees.
- Click on Actions >> New Agent.
NOTE: Not all fields are mandatory. If you have not completed a mandatory field, when you will click on Submit , eZmax will indicate you the field to complete.

Assign an Agent Code. Suggestion: First 4 letters of last name followed by first letter of first name, for example: SAMPS for Susan Sample.
Assign agent to the right Department if your office has departments.
Name and Contact Information : Click on Name and Contact Information icon

to create a new contact file for the agent.
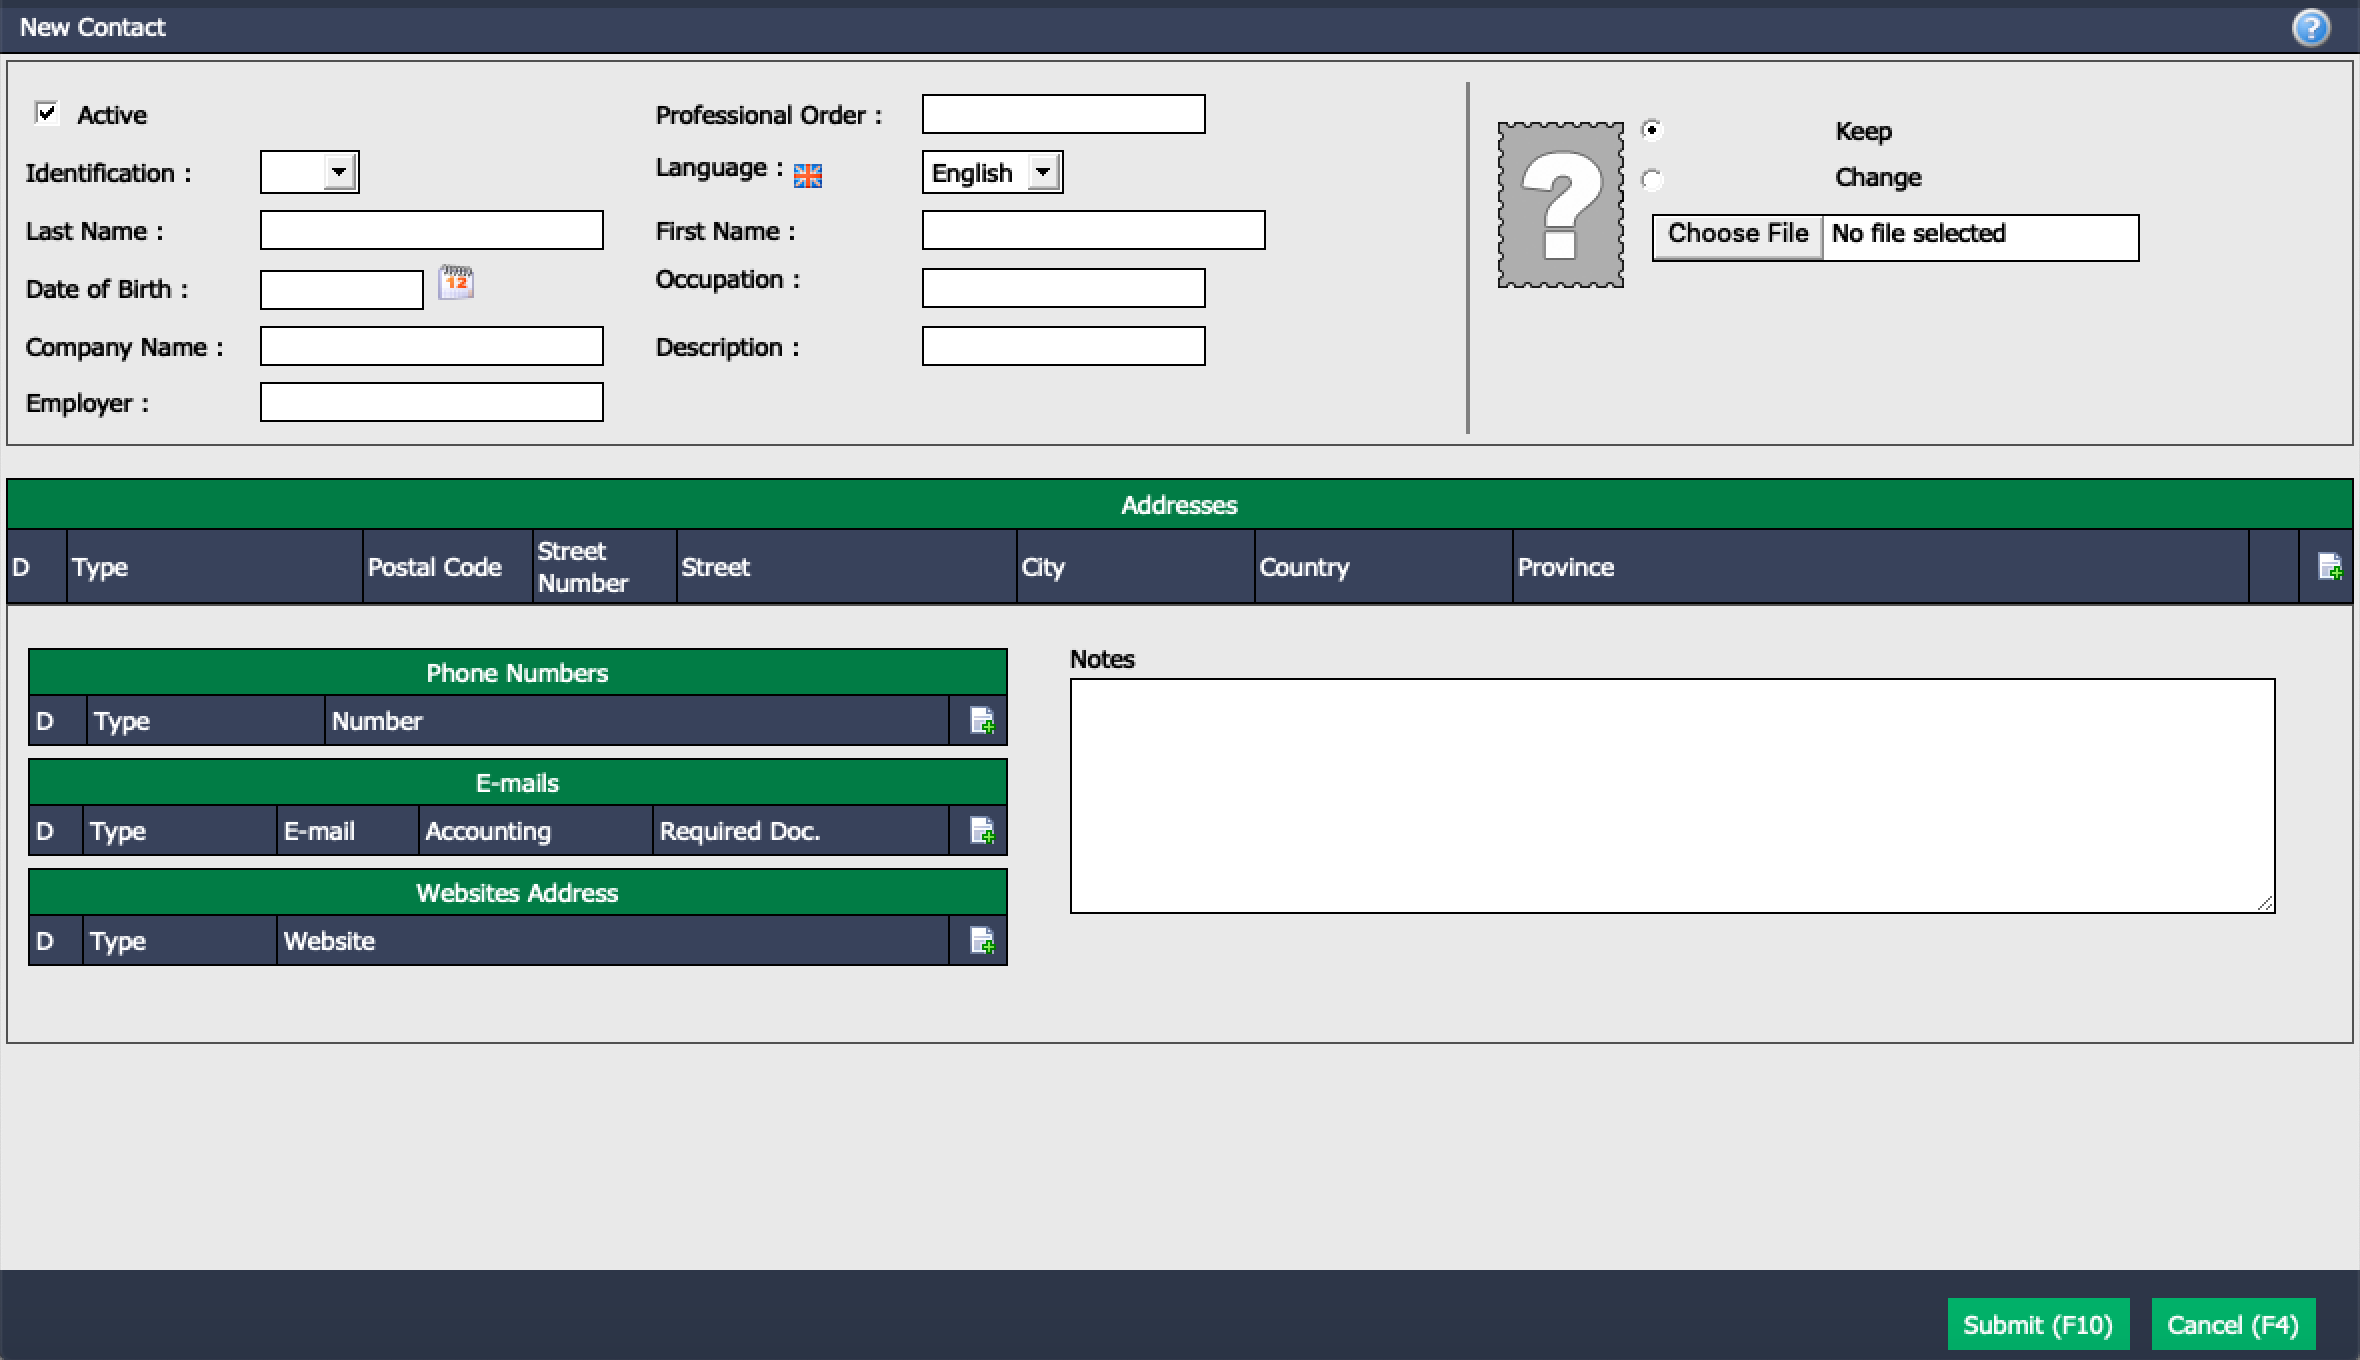
- You must enter the Last Name and First Name of the agent. The other fields are not mandatory.
- If your database is configured to synchronize with your real estate board, the agent’s photo that appears on MLS will be imported into the system.
- The agent’s photo can be added by clicking the Browse button, then selecting and uploading the desired file.
- Addresses , Phone Numbers , E-mails and Websites can be added by clicking on the Sheet with a + icon.
- Notes can also be entered.
- Once all the contact information is entered, click on Submit.
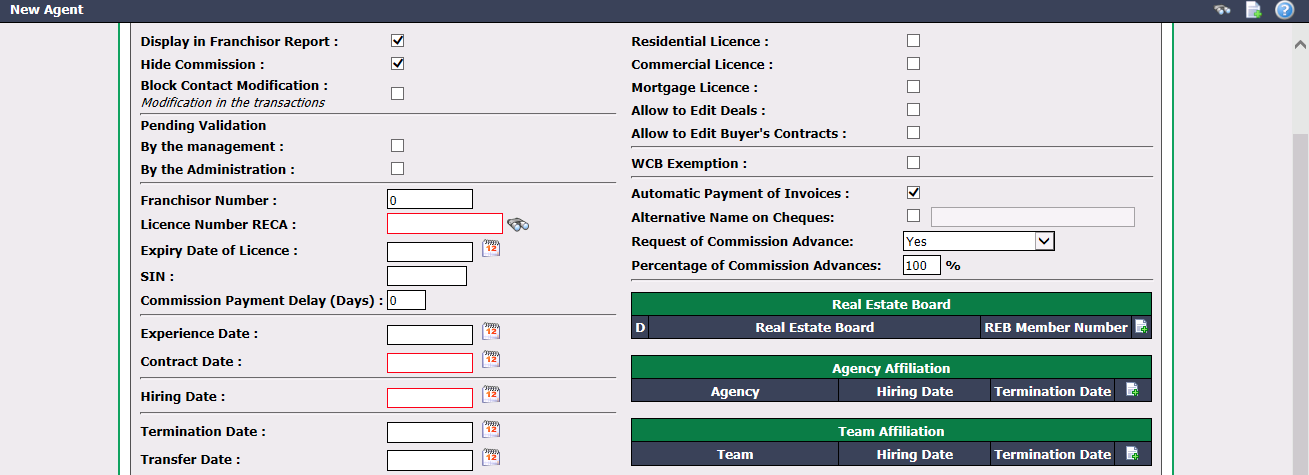
If the agent is part of a franchise, ensure Display in Franchisor Report box is selected so that the agent appears in the appropriate reports.
If you check Hide Commission, the agent commission will not appear when he is in a shared deal with another agent.
Block Contact Modification : When selected, the agent will not be able to modify any contacts in eZmax i.e. owner/buyer, etc. Only an administrator will be able to change this information once the agent enters it.
Pending Validation can be used when you require this agent’s activity to be validated by a director, administrative staff or a broker owner. The agent’s new listings and new deals will display automatically on the home page as “Requiring Validation”. Only the users that have the “Validation Authorization” will be able to validate a transaction.
Enter the agent’s Franchisor Number if he is part of a franchise or otherwise, enter “0”.
Enter the agent’s Licence Number with his governing body (RECA in this example) and Expiry Date****of Licence.
Enter the Social Insurance Number in SIN field.
Commission Payment Delay (Days) is used when there is a delay in paying out commissions after a deal closes.
Enter the Expérience Date (date of this agent’s first real estate job), Contract Date and Hiring Date as appropriate.
Should an agent terminates his contract with your office or transfers to another office within the same franchise, these dates can be entered in the Termination Date and Transfer Date fields.
Select the licences that the agent owns such as Residential , Commercial and/or Mortgage.
Allow to Edit Deals and Allow to****Edit Buyer’s Contract can be selected if you want to give these possibilities to the agent.
WCB Exemption may be checked as appropriate.
Automatic Payment of Invoices is checked by default so that any outstanding invoices due from the agent can be paid out on a deal payout.
Alternative Name on Cheques can be used if the payee name is different from the agent name. For example, the agent name is Robert but prefers to be paid out as Bob.
Request of Commission Advance can be selected should your office use the commission advances offered through eZcom and if so, a Percentage of Commission Advances can be assigned to a maximum percentage as desired.
By clicking on the Sheet with a + icon, select the agent’s Real Estate Board from the drop-down list and enter his REB Member****Number.
If your office has Agency Affiliation or Team Affiliation , click on the Sheet with a + icon, select this information from the drop-down list and assign Hiring Date and Termination Date as appropriate.
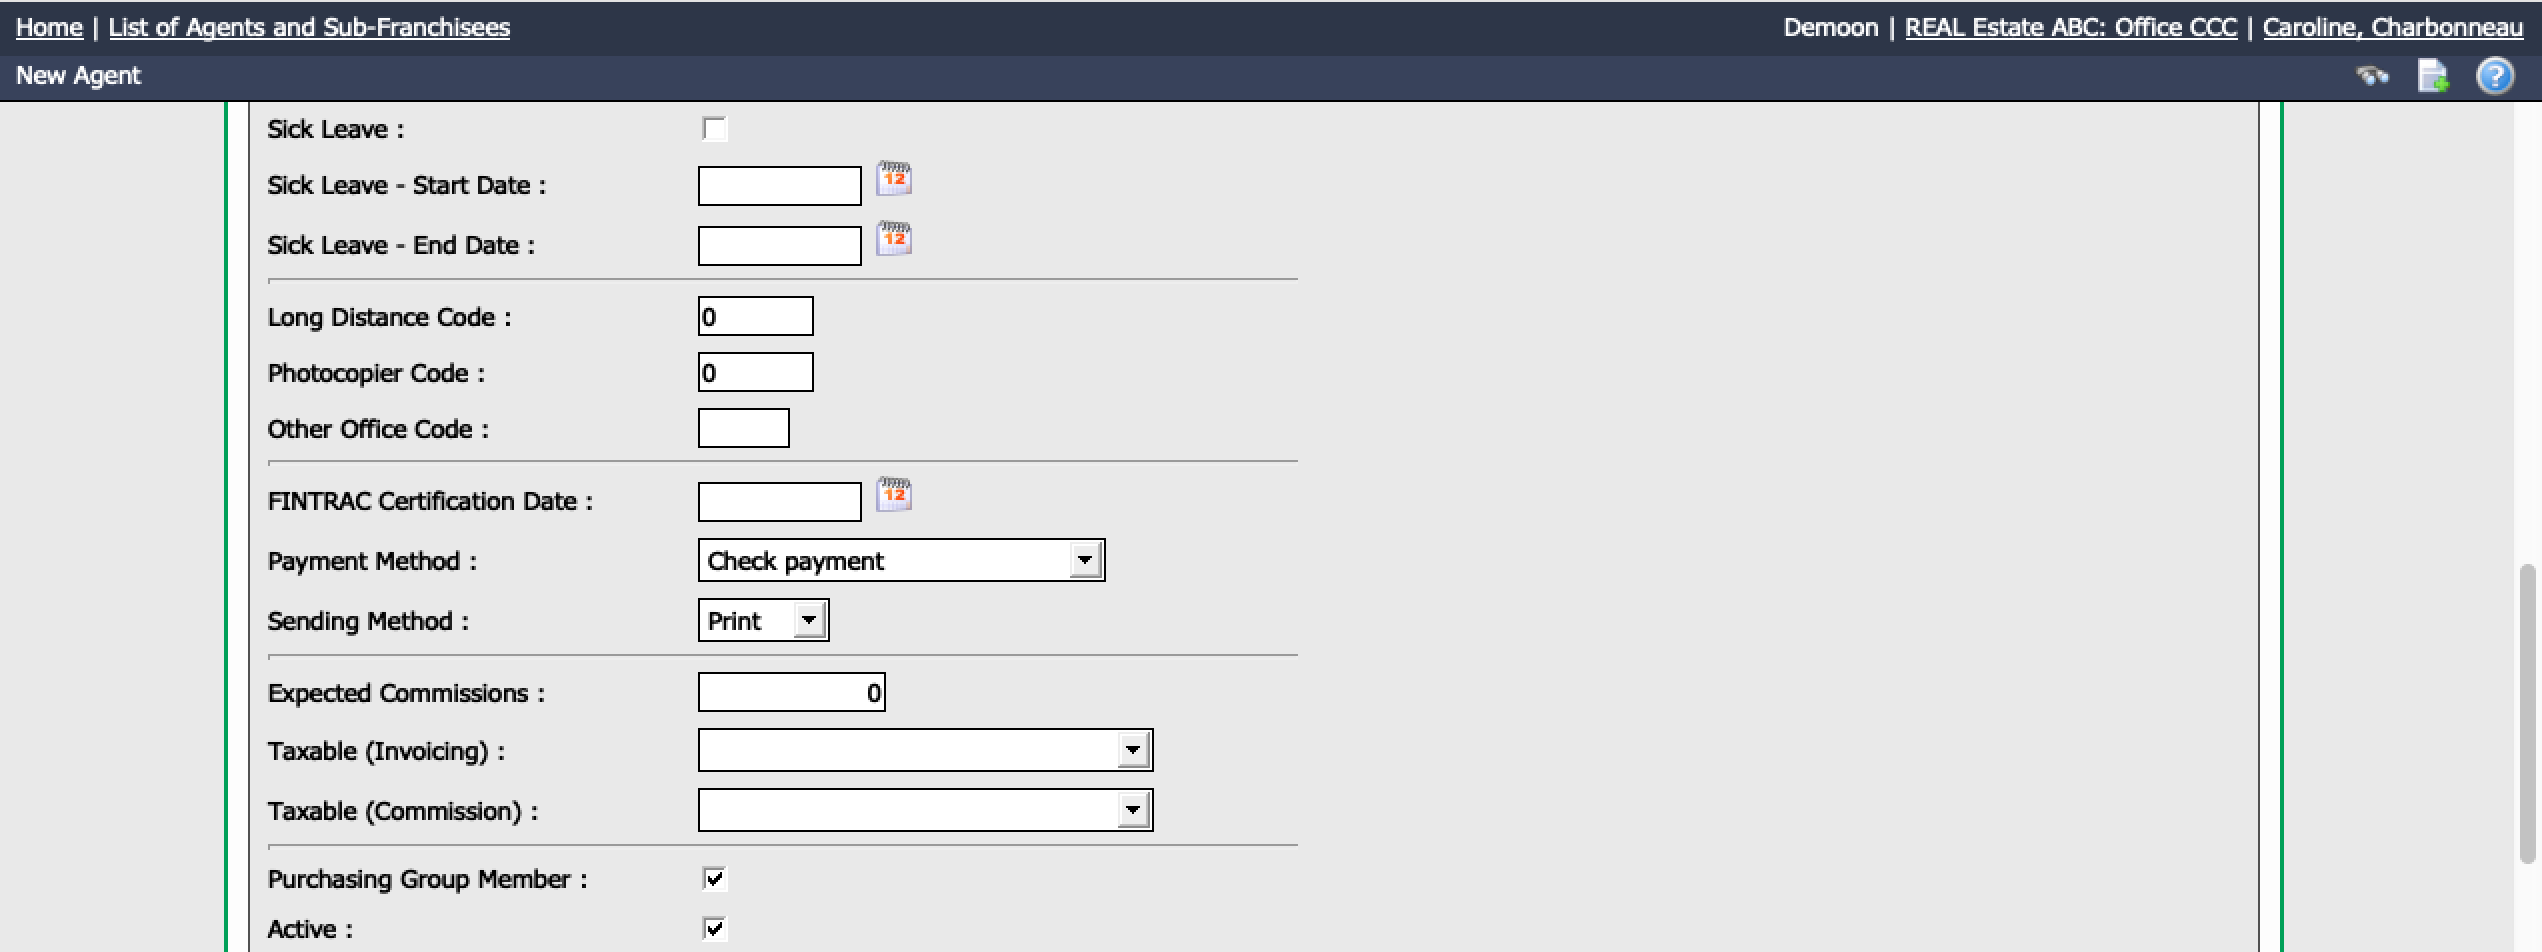
If the agent is on Sick Leave , this option can be selected and the appropriate Start Date and End Date can be entered.
Office codes relevant to the agent such as Long Distance Code , Photocopier Code or Other Office Code (such as security system code) can be entered.
FINTRAC Certification Date can be maintained in agent file as well.
Payment Method is selected from drop-down list to determine how and from which account the agent is to be paid, e.g. paid via cheque from commission trust account.
Warning
If you choose an electronic transfer as ** Payment Method,** you must save the agent information at least once and then go add a bank account. For more information, please see the article Agent Bank Account.
Sending Method can be selected by default to determine how the agent receives documents such as invoices, statements, etc.
- Print: Hard copy
- E-mail: Attached file
Expected Commissions allows you to enter his expected annual commission which would be used for comparative purposes, e.g. Budget vs Actual.
Taxable (Invoicing) : From drop-down list, select which taxes apply when the office invoices the agent.
Taxable (Commission) : From drop-down list, select which taxes apply on agent’s commissions.
If the agent is part of a Purchasing Group , this can be noted.
Active is checked by default to indicate that the agent is active within the office. To inactivate an agent, e.g. if he quits the office, uncheck this box.
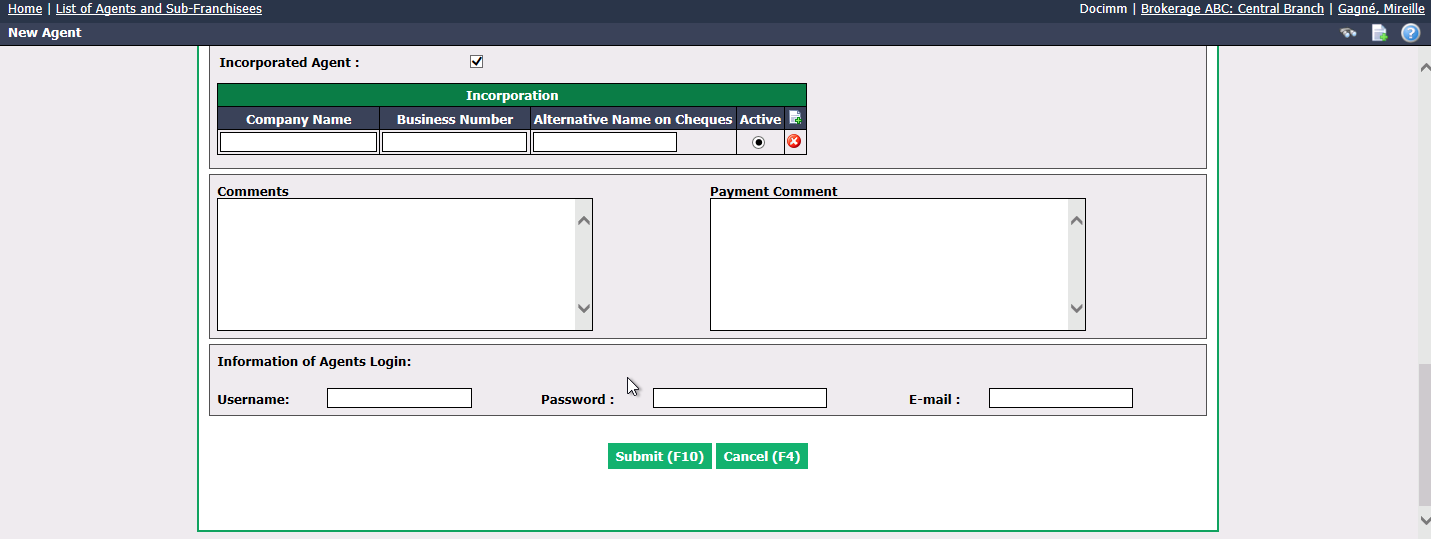
- Should the agent is incorporated, place a check mark beside Incorporated Agent and this will give you access to the fields to enter the appropriate incorporation information for the agent (Company Name , Business Number , Alternative Name on Cheques).
Warning
Once the incorporated agent is created, you must add a bank account in the "Incorporation" section of his profile. For more information, please see the article Agent Bank Account.
Comments can be used to note information internally while Payment Comments will appear on the screen as a reminder whenever a payment is generated for the agent.
Information of Agents Login: For agents who log into the agent portal, you need to complete the Username , Password and E-mail fields.
Once all information is entered, click on Submit.
Adding the Tax Numbers
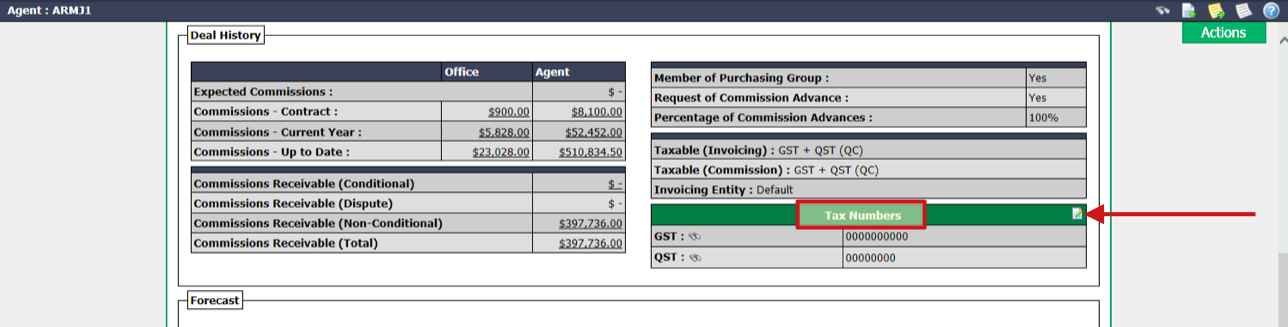
Once agent is created, you must add the Tax Numbers of the agent in the appropriate section.
Regular Agent
Incorporated Agent
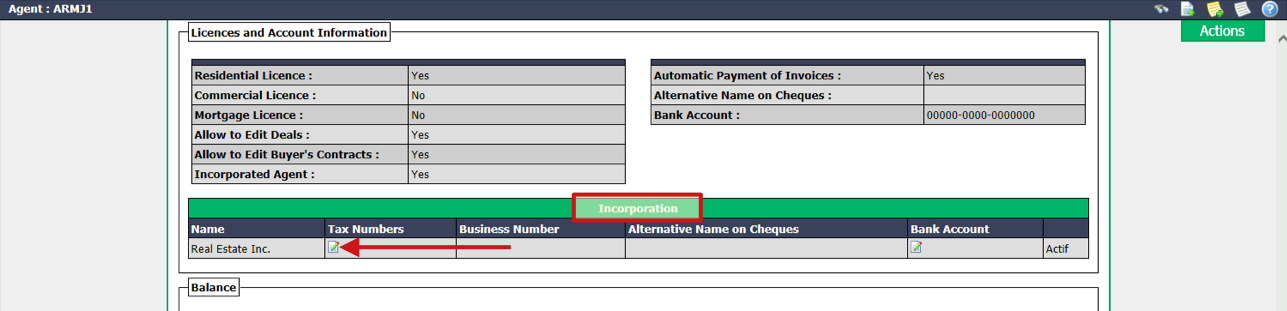
- In the "Incorporation" section, click on the Sheet with a + icon.
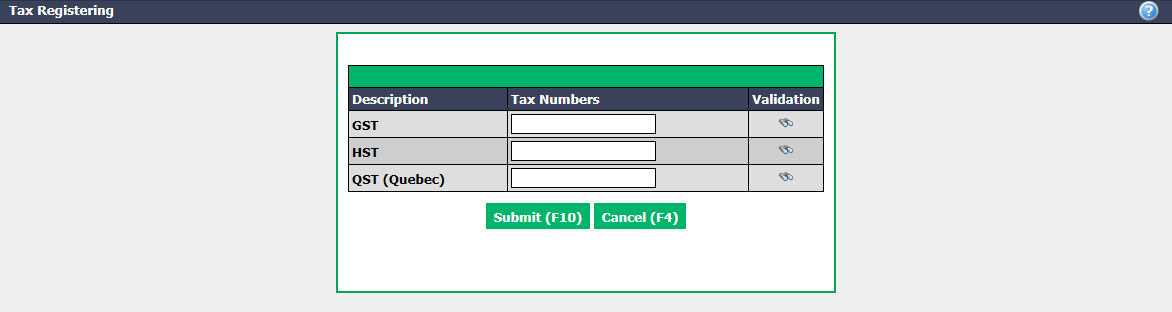
- Enter the appropriate tax numbers and click on Submit.
Adding a Credit Card**
Once agent is created, you can also add one or more Credit Cards.
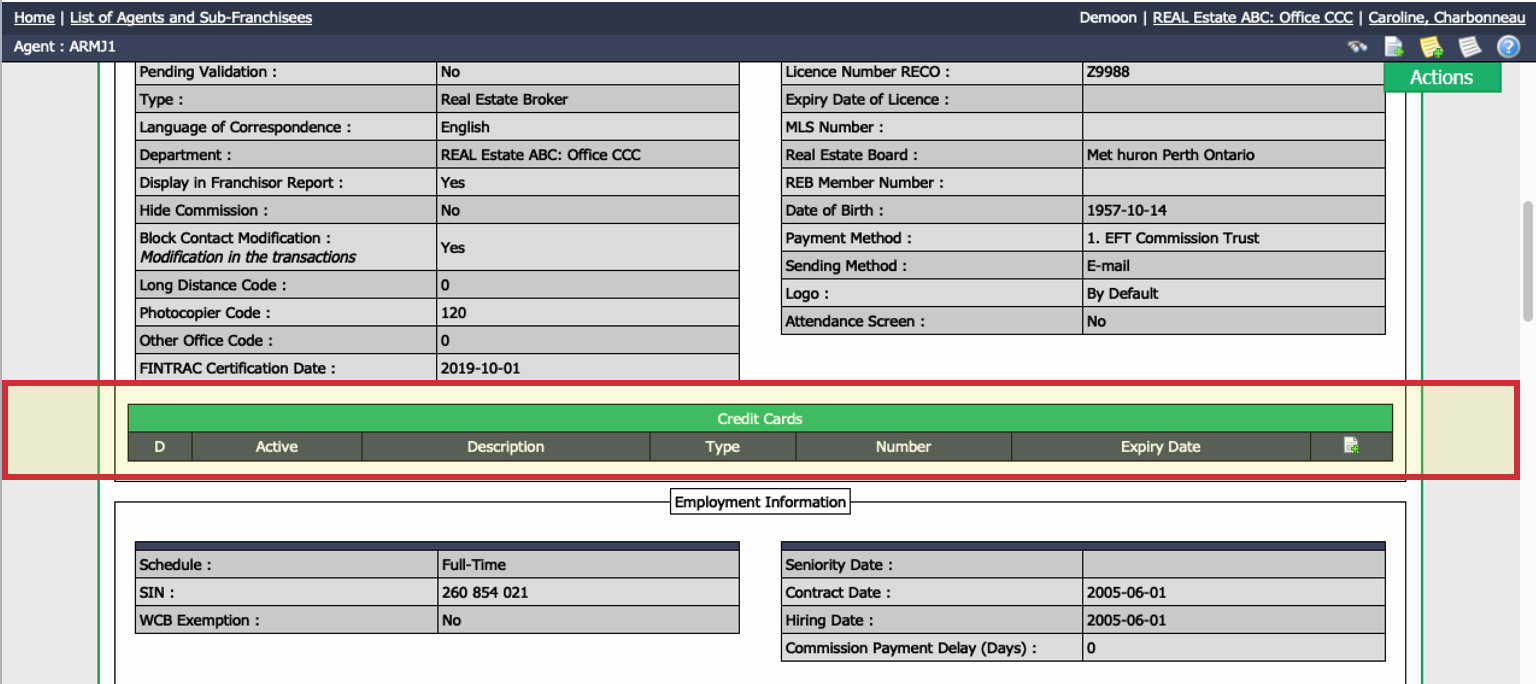
- In the "Credit Cards" section, click on the Sheet with a + icon.
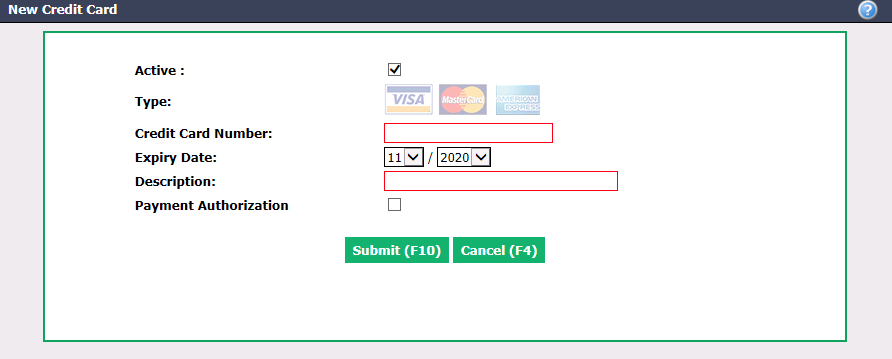
- Enter the credit card information and click on Submit.
NOTE: The Payment Authorization box must be checked if this agent wants to use the option of paying his invoices by credit card.
- The agent will be able to pay his invoices by credit card provided the company uses the Moneris system. For more information, please see the articles Processing System of Payments by Credit Card and Invoice Payment by Credit Card - Real Estate (415).