

English
Creating a Deal
- When it’s your office’s listing:
You need to access the listing in eZmax via the search tool (Binoculars icon) and convert the listing into a deal.
From the listing, click on Actions >> Edit Transaction and change the Step from "Listing" to "Deal". You will see the deal section appear below the listing section.
Complete the fields in the "Deal Information" section referring to the notes mentioned below as required.
When it’s not your office’s listing:
- You need to add manually the listing and deal simultaneously.
- From this icon

(List of Transactions), click on Actions >> New transaction and the listing section will appear. Select the Step "Deal" and the deal section will appear below the listing section. * Complete the fields in the "Listing Information" and then those in the "Deal Information" section.
NOTE: Not all fields are mandatory. Fill the ones that pertain to your business. If you have not completed a mandatory field, when you will click on Submit , eZmax will indicate the field to complete.
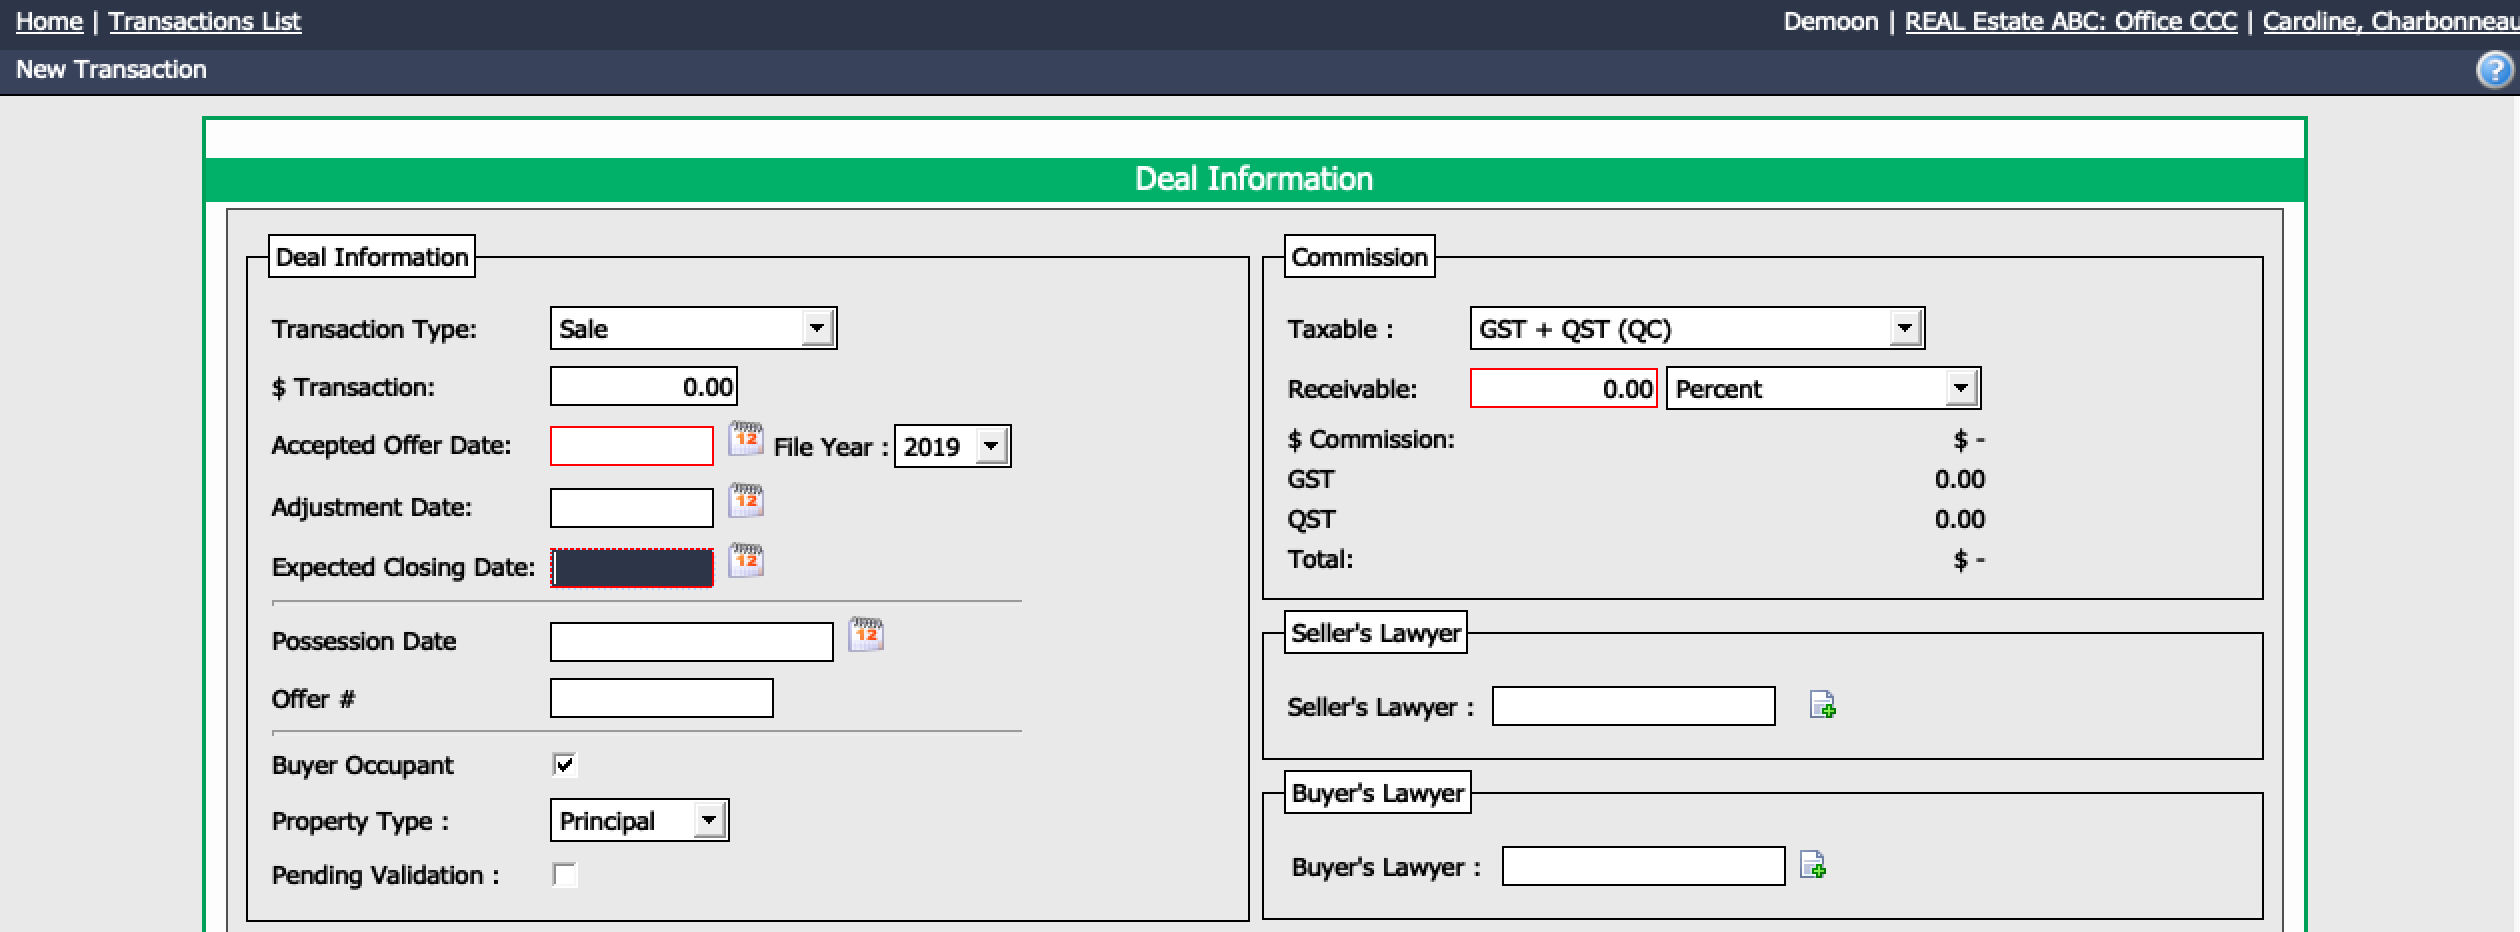
We recommend using the TAB key on your keyboard to move from one field to another.
Specify the Transaction Type (Deal) : Sale or rental (lease).
$ Transaction : Sold price.
Enter Accepted Offer Date , Adjustment Date (if applicable) and Expected Closing Date.
NOTE: The adjustment date is only used in some provinces. If you don’t use it in your province, you can simply leave the field empty.
NOTE: The system assumes that possession date is the same as expected closing date. Possession date can be changed as desired.
Enter the Offer # , whether Buyer is Occupant , the Residence Type and whether deal is Pending Validation. Deals pending validation will be displayed on the home page as "Deal Pending Validation".
Enter the Commission information ensuring:
- Taxable information is correct.
- Commission Receivable entered is the total commission of the transaction. If your office is only on the buyer’s side, you will enter the total buyer’s agent commission.
- Commissions can be entered in "Percent", "Percent, Taxes inc.", "Dollars", "Dollars, Taxes inc." or "Tier Commissions".
NOTE: To have access to tier commissions, you have to create the tiers from Main menu >> Real Estate >> List of Tier Commissions.
- Seller’s Lawyer and Buyer’s Lawyer : Start typing the name of the lawyer in the appropriate field. The Sheet with a + icon to the right of the field is used to add a new lawyer in the system. For more information, please see the article Adding/Editing a Lawyer (100).
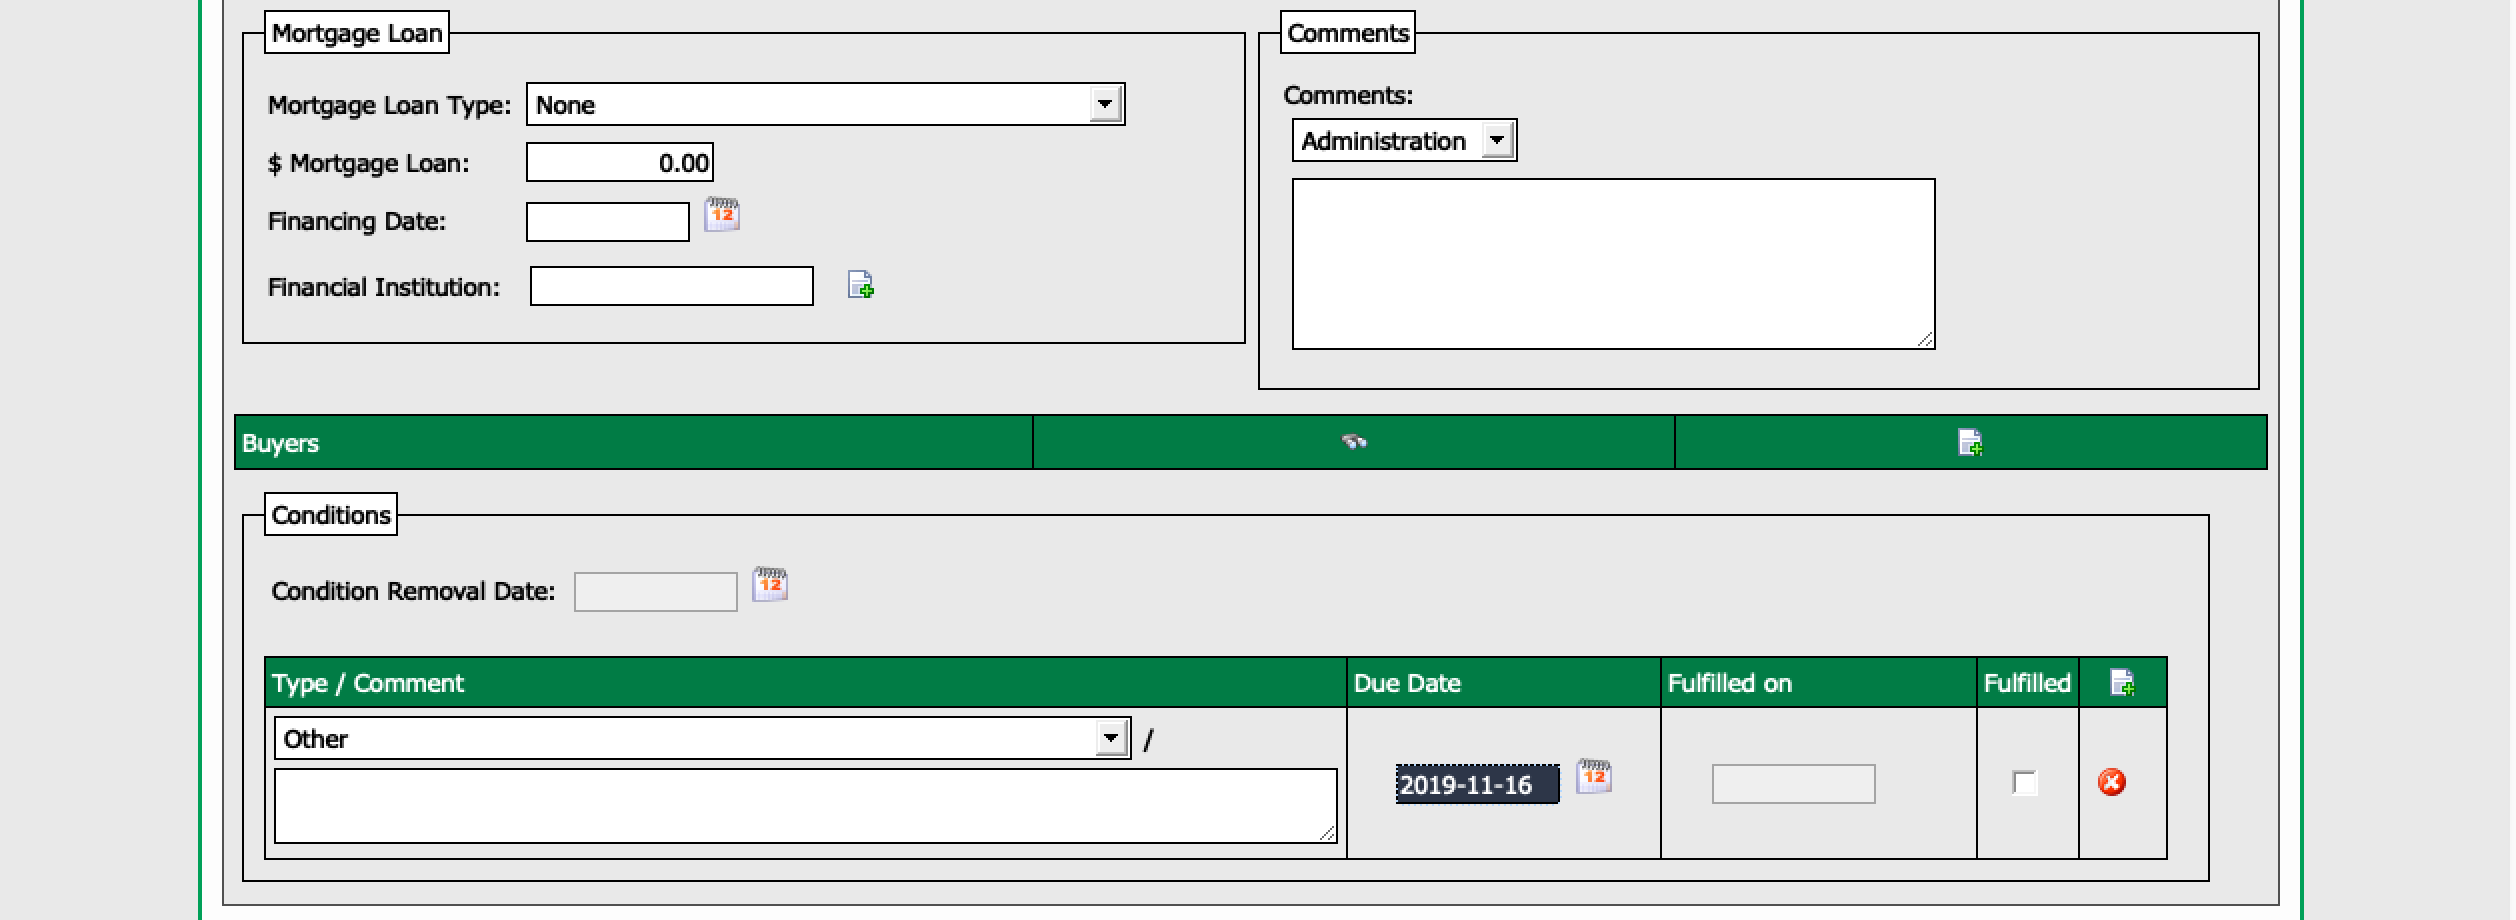
Enter the Mortgage Loan information in the appropriate section if you gather this information.
Comments may be added as:
- "Administration": Visible only by the administrators.
- "Agent": Administrators and agents associated with the deal can see the comments added. Agents will also have a message on their home page under "Unread Comments".
Enter contact information of each of the Buyers by clicking on the Sheet with a + icon or via the search tool (Binoculars icon).
NOTE: Not all fields are mandatory. Fill the ones that concern each of the buyers.
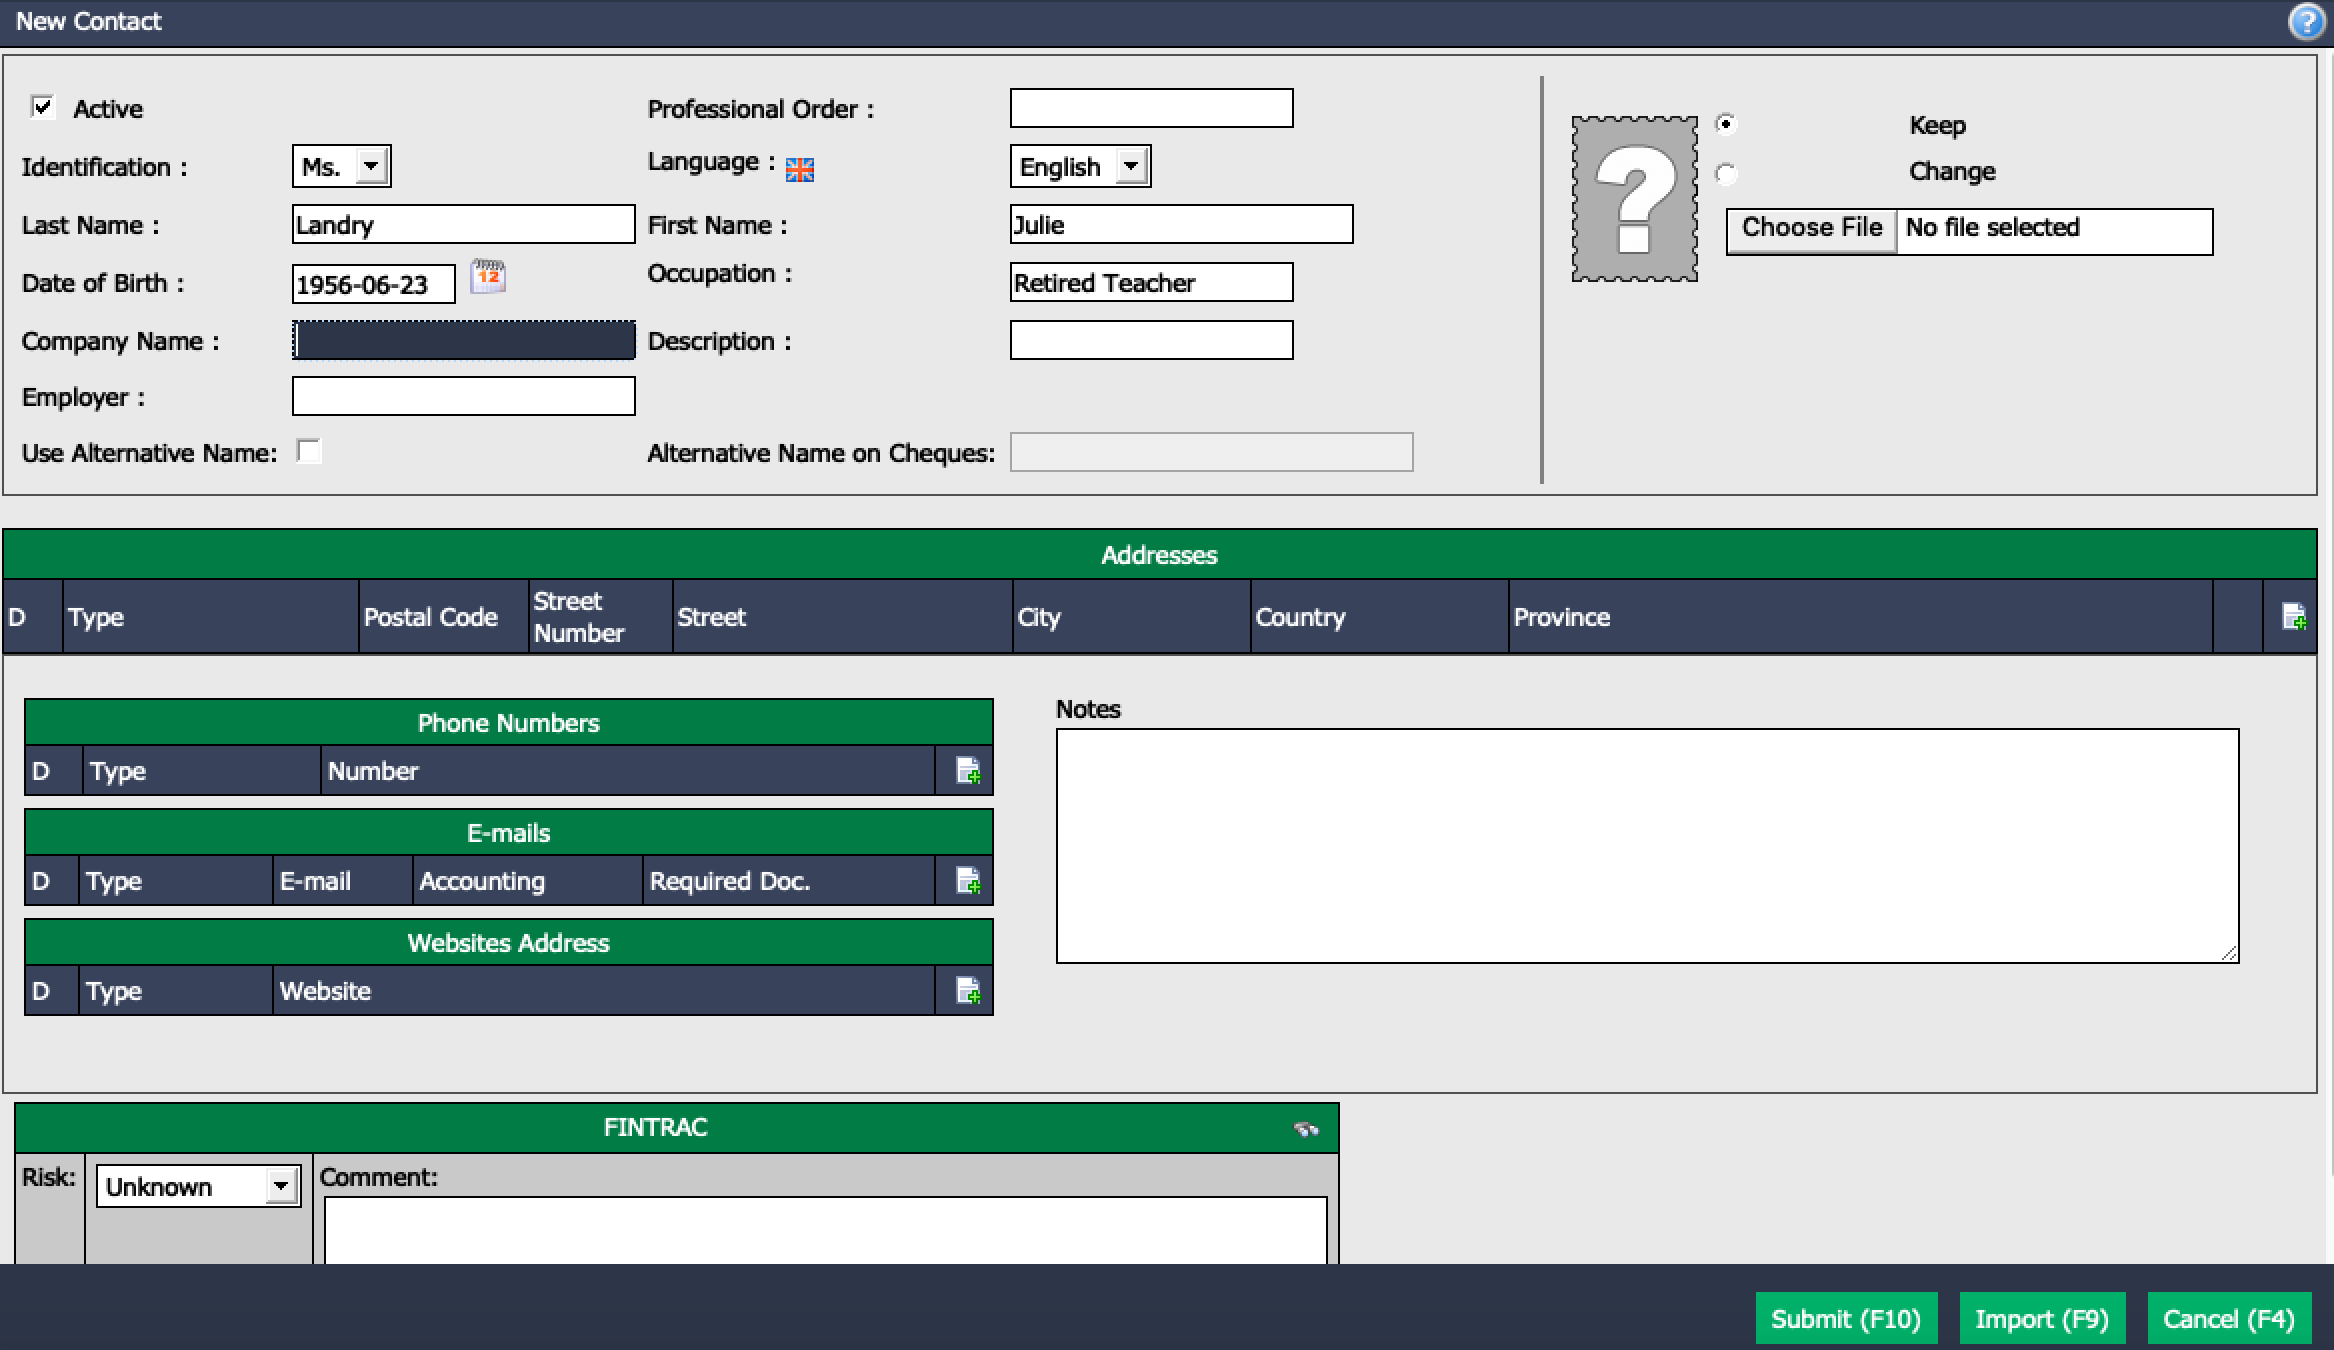
* If you wish to use the **FINTRAC** module, **Last Name** , **First Name** and **Date of Birth** fields are mandatory.

* **Addresses** , **Phone Numbers** , **E-Mails** can be added by clicking on the Sheet with a + icon.

* **FINTRAC** : You can select the **Risk** associated with this contact ("Unknown", "Low Risk", "Medium Risk" or "High Risk") and add a **Comment**. FINTRAC information will be kept in the contact profile.
NOTE: The Binoculars icon (Business Relationship Search) allows eZmax to search for all transactions made in the last 5 years with this contact (with the same first name, last name and date of birth). For more information, please see the article Business Relationship Search.
* Click on ** _Submit_** to save the contact information.
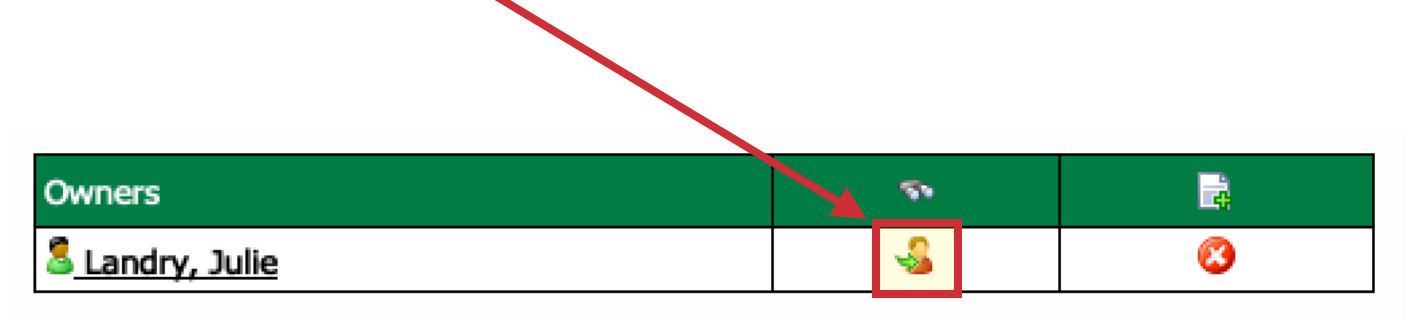
- Once a contact is added to a transaction, if you want to add a new contact with the same address and phone numbers, click on the Duplicate Contact icon.
Add Conditions by clicking on the Sheet with a + icon.
Select appropriate condition Type from the drop-down list. This list is managed by the office. To add a new condition, please see the article Adding/Editing a Deal Condition (75).
You may enter additional Comment in the appropriate section.
Enter Due Date of the condition.
Mark as Fulfilled if appropriate and Fulfilled on field will be accessible to enter firm date.
If more than one condition on deal, click on the Sheet with a + icon and repeat process until all conditions have been added.
If there are no conditions on the deal, enter the Condition Removal Date (also known as "Firm" date).
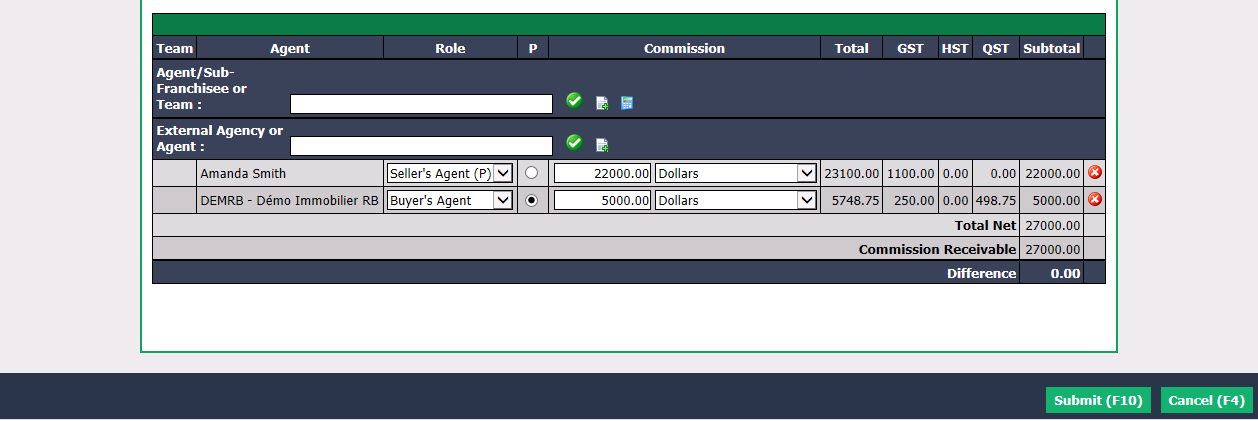
Agent (from your office) Commission: Enter the Agent/Sub-Franchisee or Team name, select it from the list and press the Enter key on your keyboard or click on the Check Mark button. If the name does not appear in the list, click on the Sheet with a + icon to add one in the system. For more information, please see the articles Adding a Regular and/or Incorporated Agent and Adding/Editing a Team in the System.
Outside Agent Commission: Enter the External Agency or Agent name, select it from the list and press the Enter key on your keyboard or click on the Check Mark button. If the name does not appear in the list, click on the Sheet with a + icon to add one in the system. For more information, please see the article External Agencies and Agents.
Select the Role of each agent from the following options:
- Seller’s Agent (P)
- Seller’s Agent
- Buyer’s Agent
- Listing Referral
- Sale Referral
Warning
You can only have one agent with the role Seller’s Agent (P). It is mandatory to have a Seller’s Agent (P) in the deal file.
(P) is for Principal. Even if the Commission of the Seller’s Agent (P) is $0.00, you need to assign this role to submit your deal and continue.
Add the Commission of each agent.
If Difference is anything other than zero, review your commissions assigned in this section against the TOTAL commission receivable on your deal. Difference is usually in this section when you have not allocated the total amount expected to receive on the deal.
Internal Deposits
- To add an internal trust deposit, you must first click on Submit to save your deal so that it is not in editable mode. Once the deal is in non-editable mode, you will see the "Deposits" section at the bottom of the deal.

Click on the Sheet with a + icon.
Enter all relevant information. For more information, please see the article Adding a Trust Deposit.
If you have automatic deposits set up for your office, ensure you select the appropriate individual or grouped automatic deposit so that the system will complete the deposit for you. For more information, please see the article Configuration of an Automatic Deposit.
Click on Submit and the internal deposit associated with your deal will be entered into the system.
External Deposits

- If a deposit is held by external agency on this deal, click on the Sheet with a + icon in the "External Deposits" section.
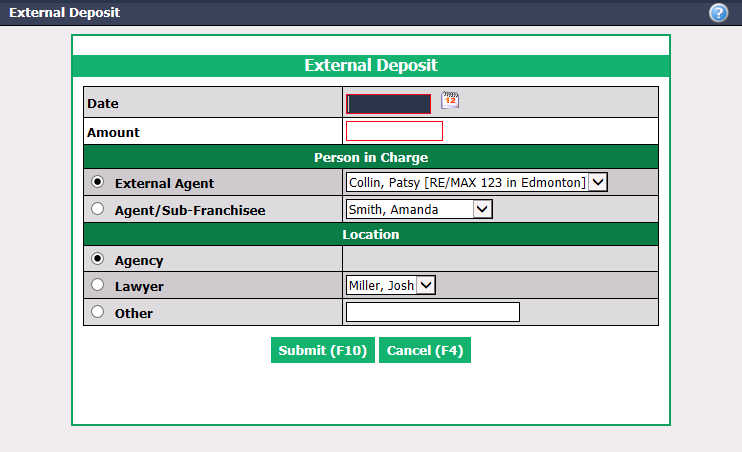
Enter the Date and Amount of the deposit received.
Confirm the External Agent name.
If multiple external deposits are held, each can be entered by repeating the process.
Click on Submit and the external deposit associated with your deal will be entered into the system.
- When all of the deal information is entered, click on Submit to create the deal.