

English
eZmax Invoicing
Necessary Access
- From the main menu, click on the

icon, then type Users in the search bar.
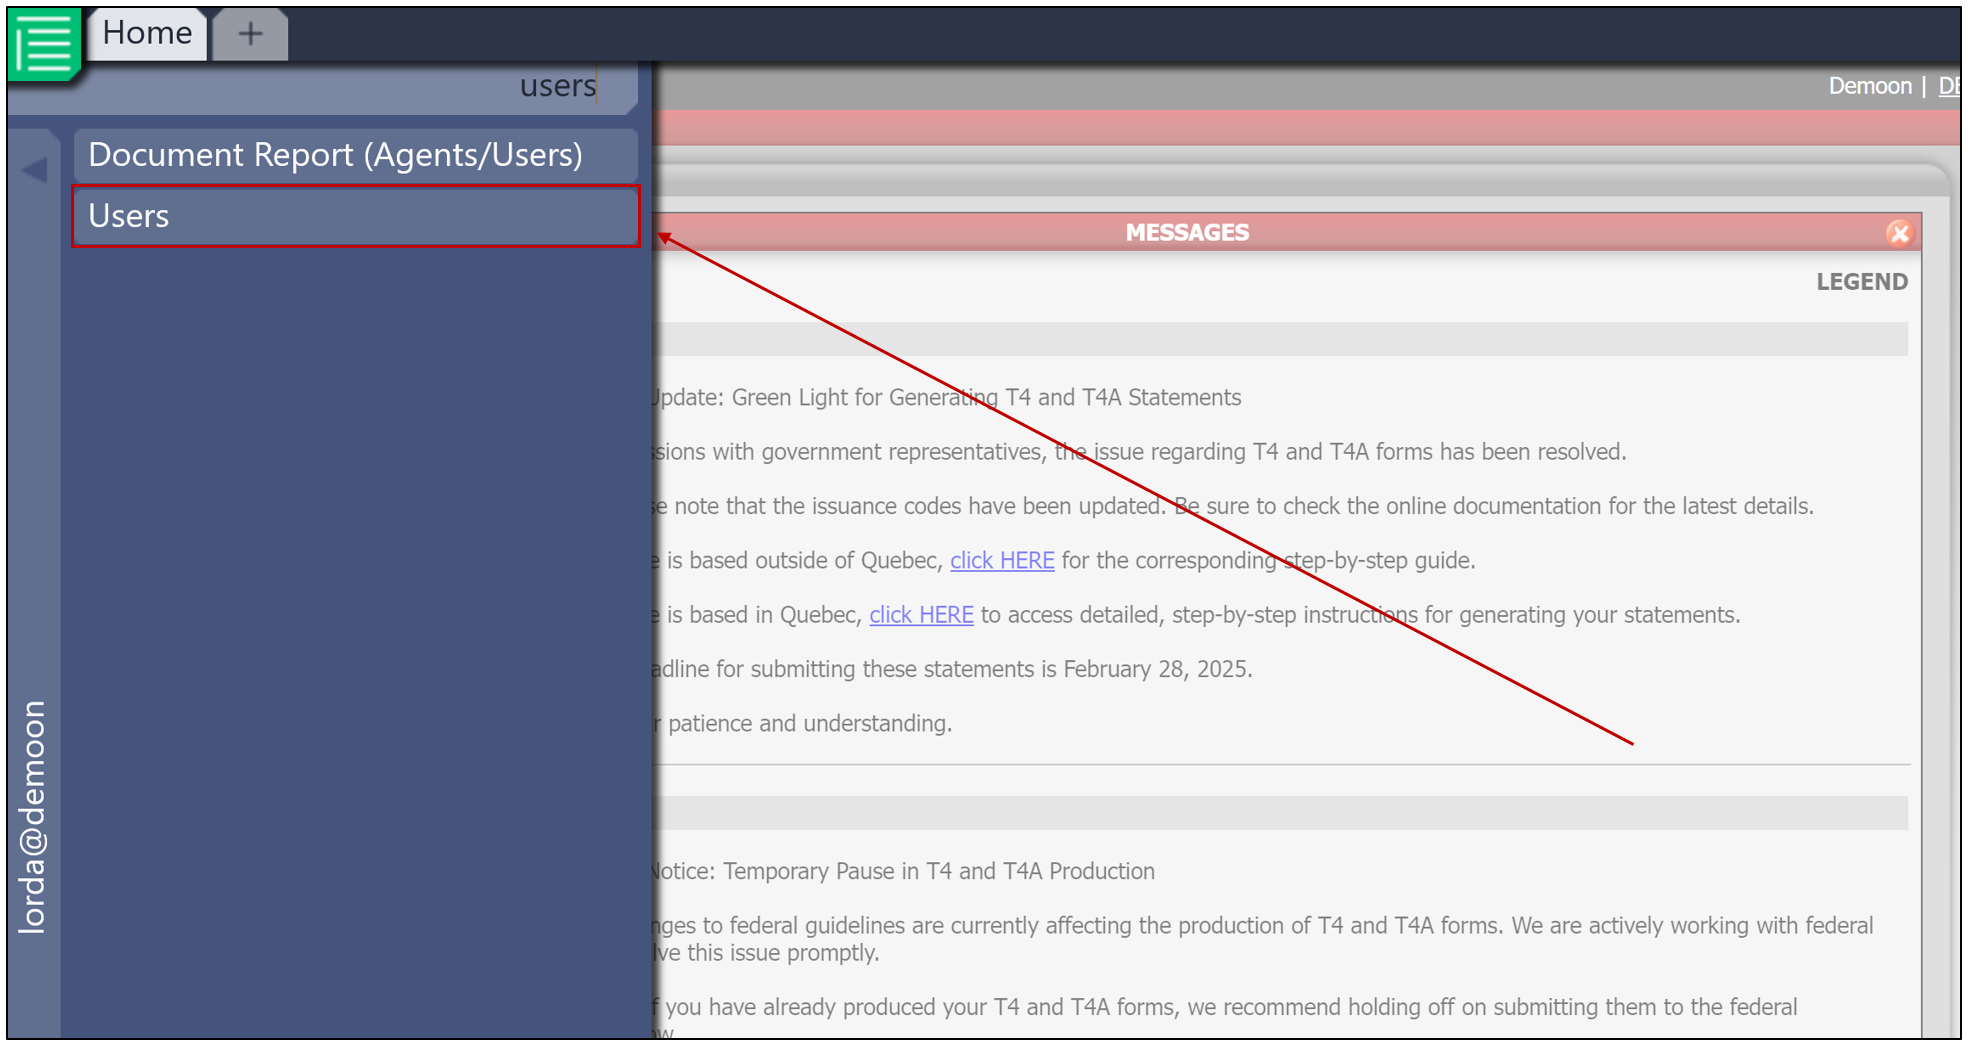
- You can then select the desired user from the List of Users , then click on Actions.
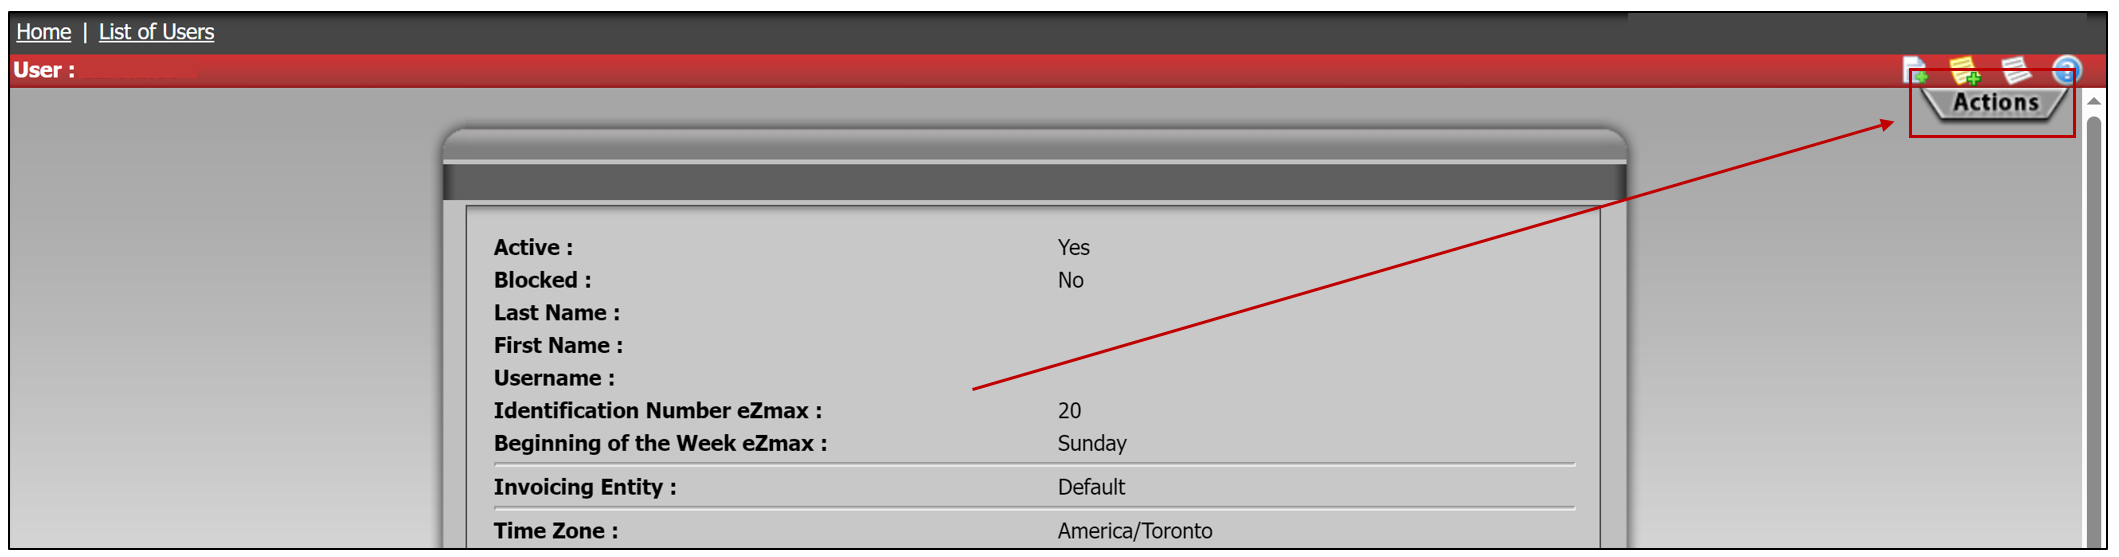
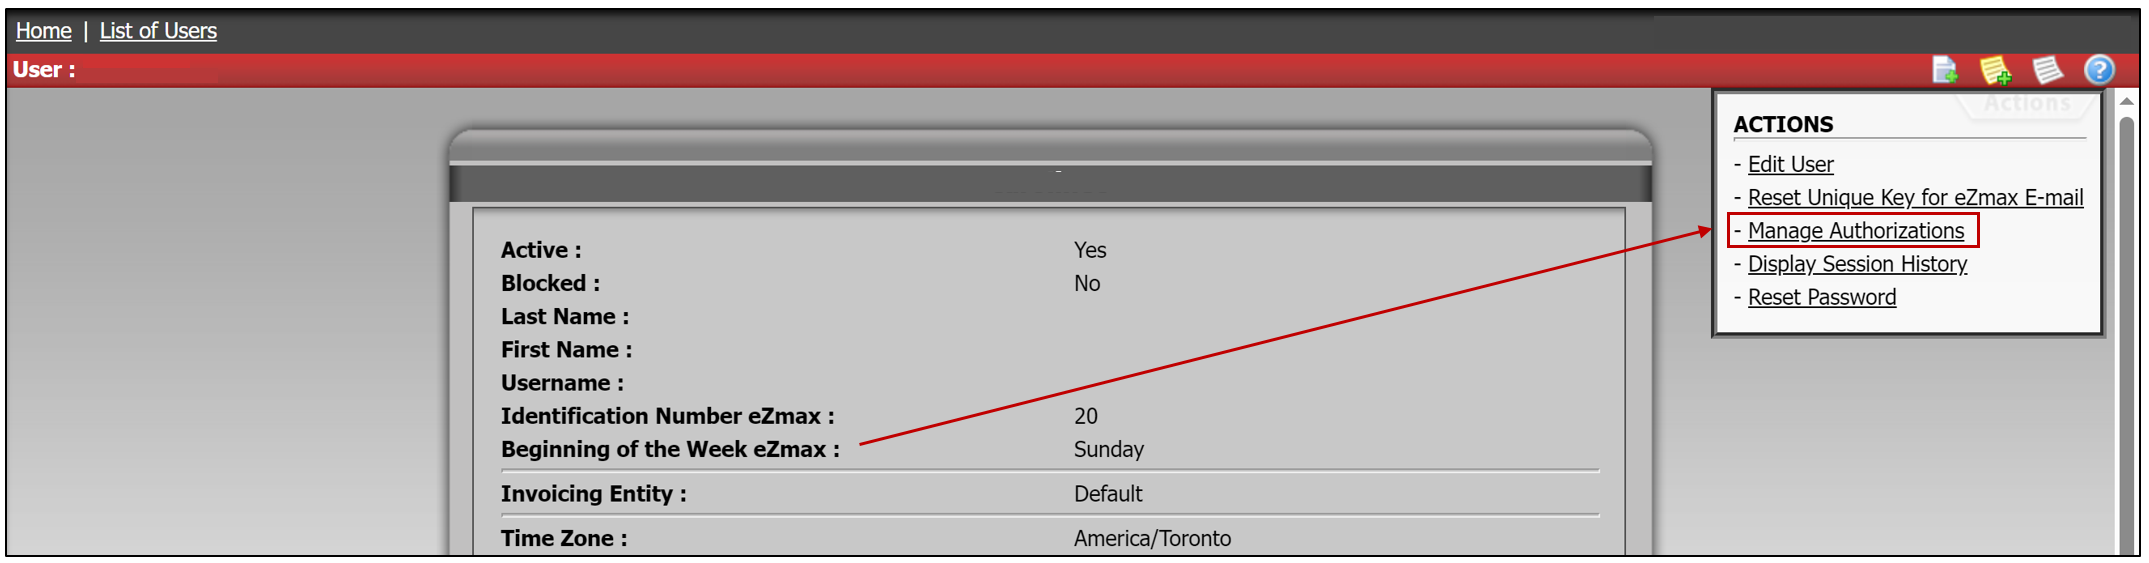
- Select Manage Authorizations.
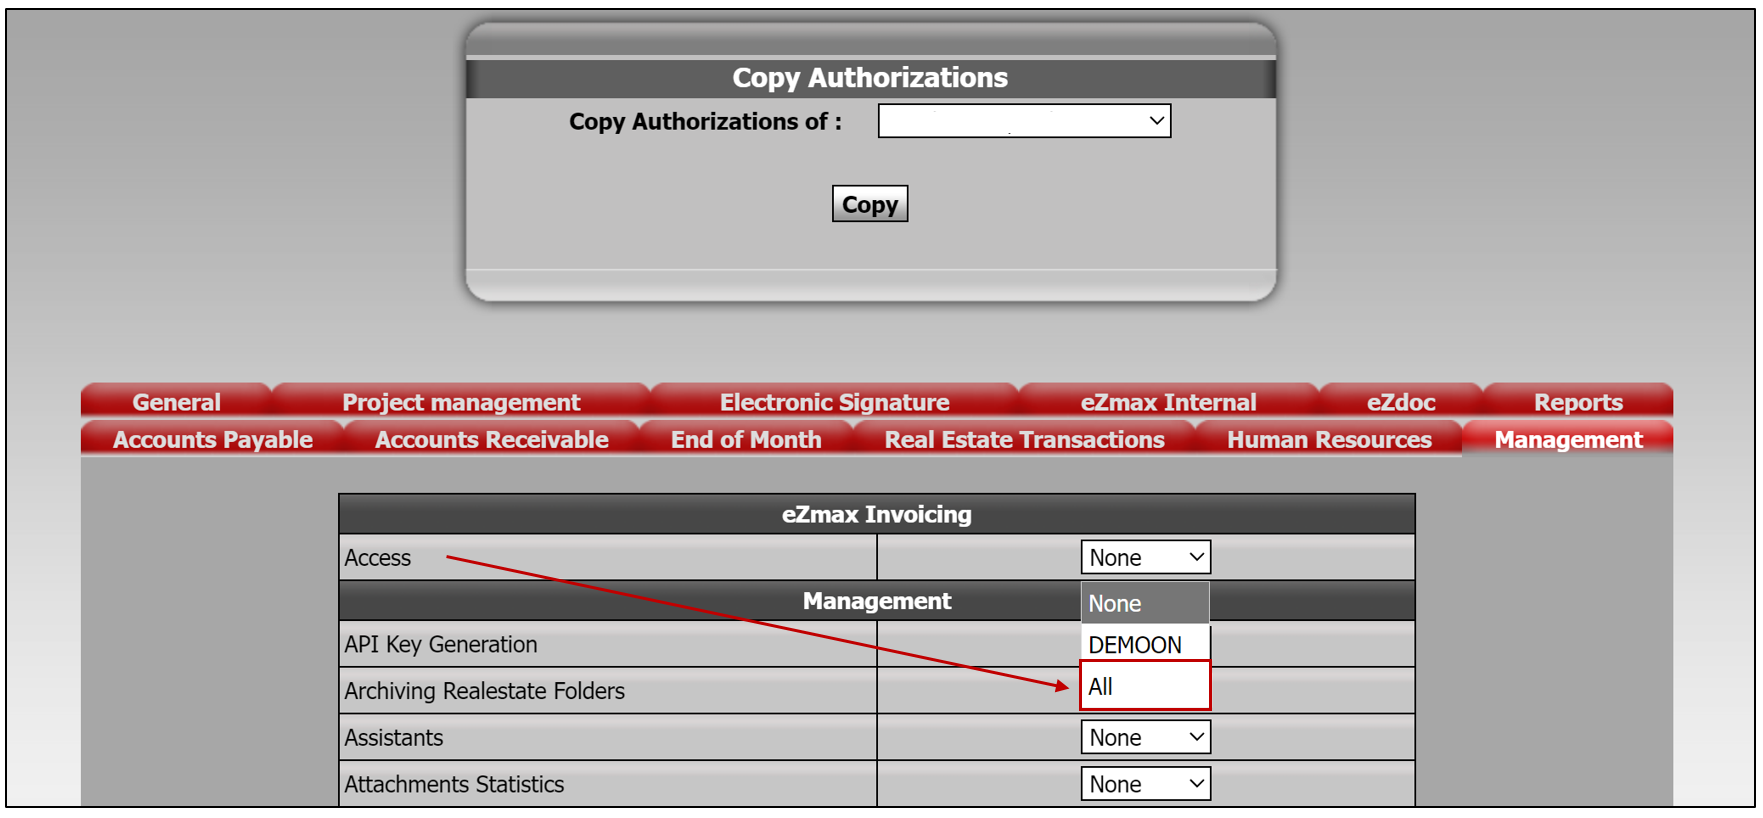
- Under the Management tab, you will find eZmax Invoicing. Make sure to set the Access to All if you want the user to have all associated permissions.
- When you are finished, click Submit.
Invoice Details
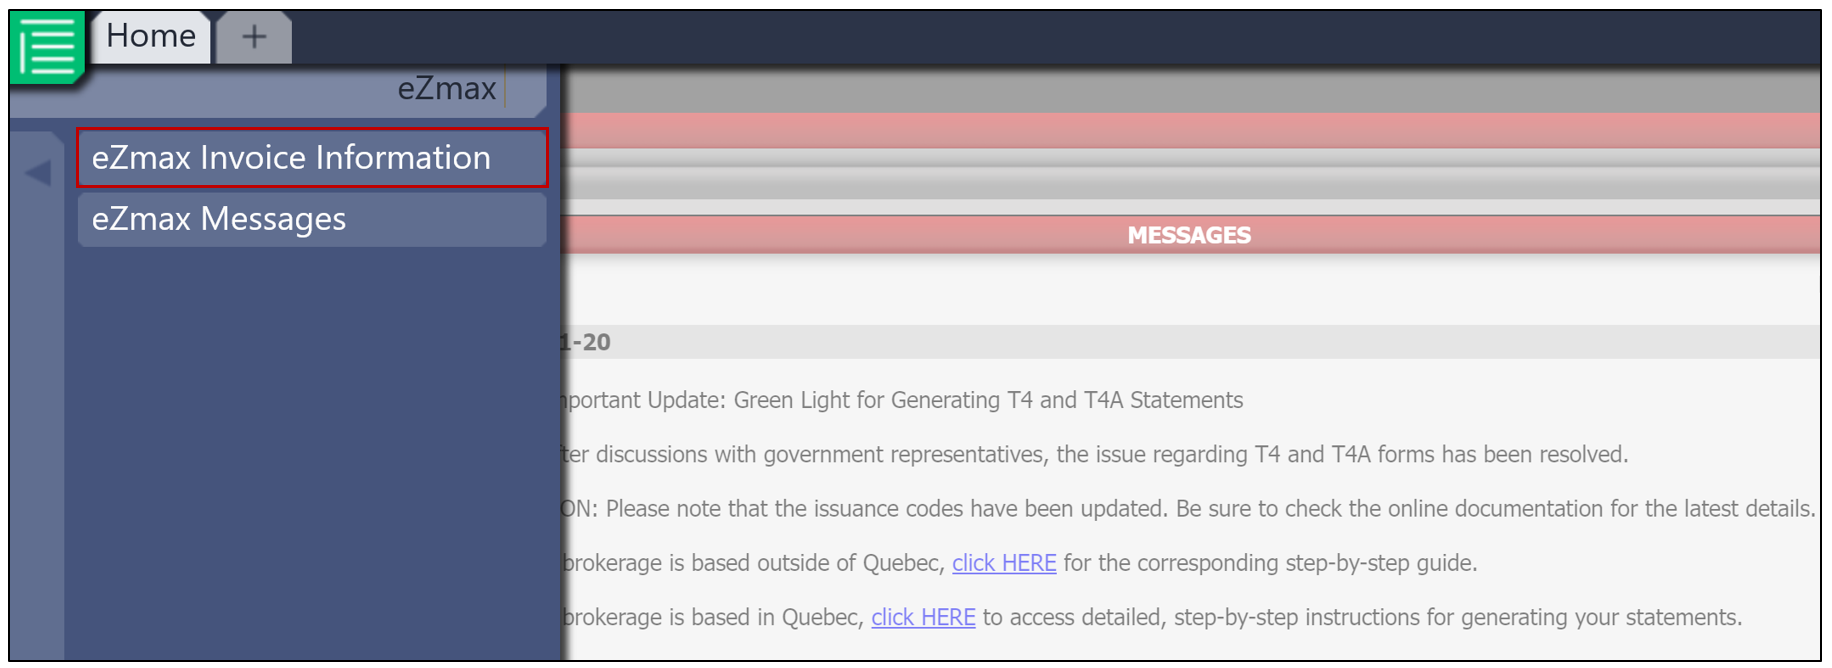
- From the main menu, click on the
icon, then type eZmax Invoice Information in the search bar.
Informations
- You will notice that the invoice includes two types of periods: the upcoming period that will be billed (Draft), as well as previous invoices.
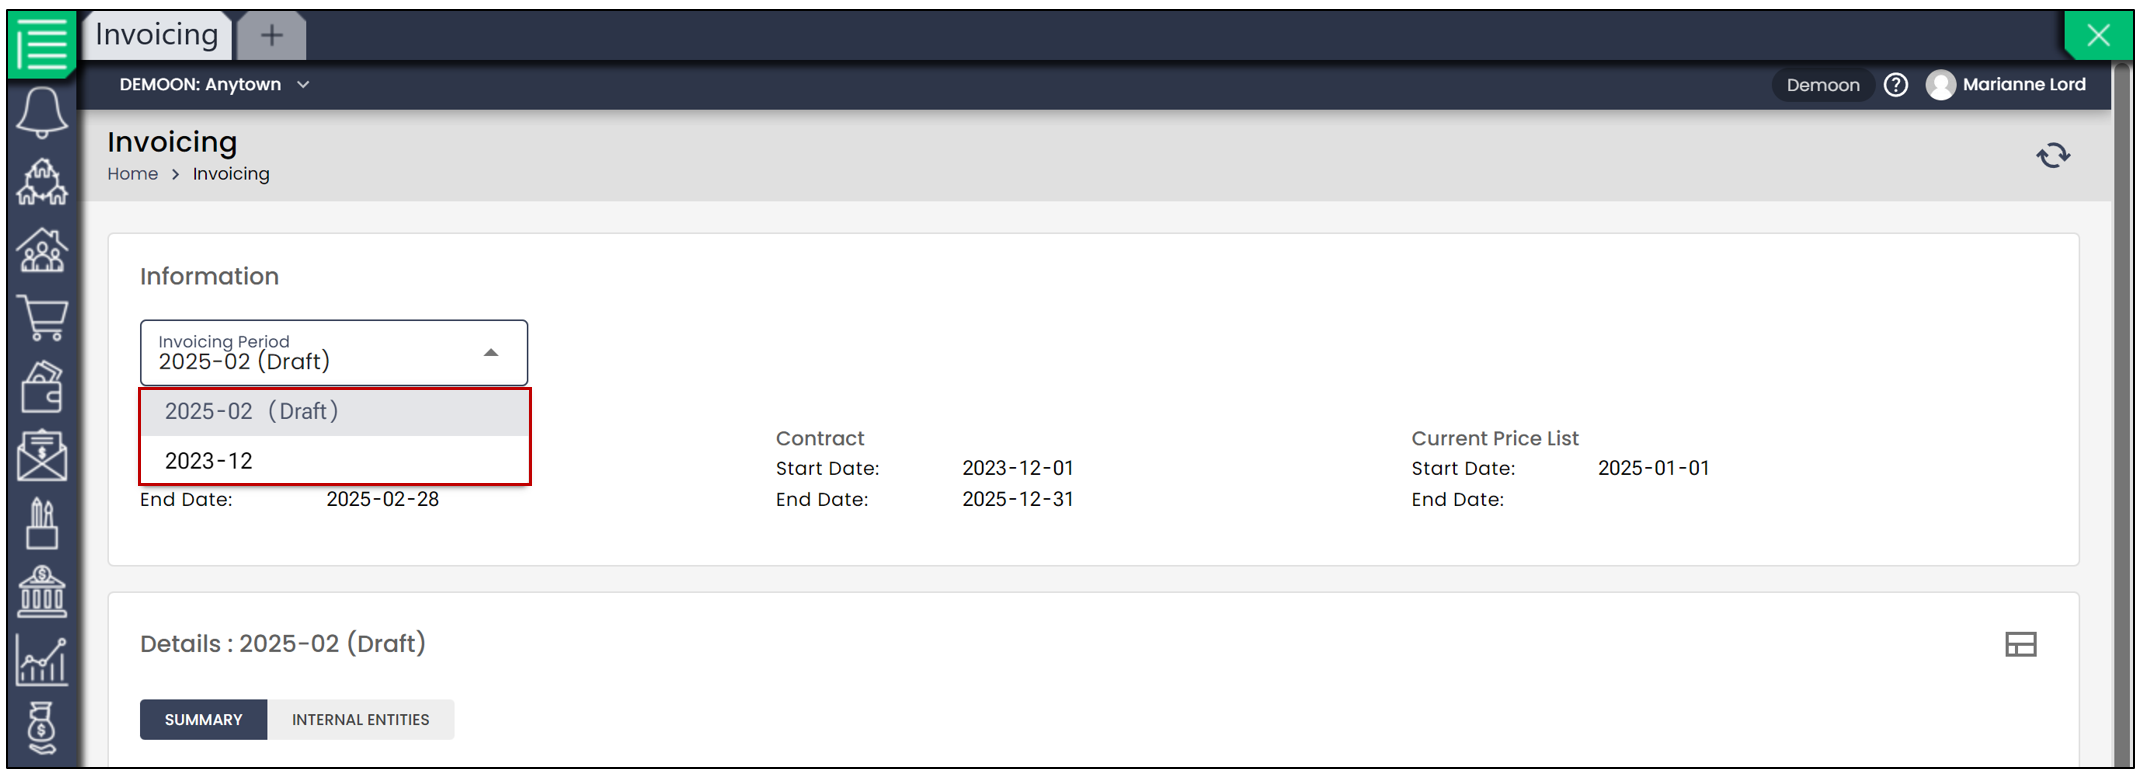
NOTE: The billing history will always be accessible. For example, after one year, you will be able to view invoices from the last twelve months.
NOTE: We strongly recommend that you review your upcoming invoice. You will be able to see which agents will be billed and disable them if needed. By disabling them, you will avoid being billed on the next invoice.
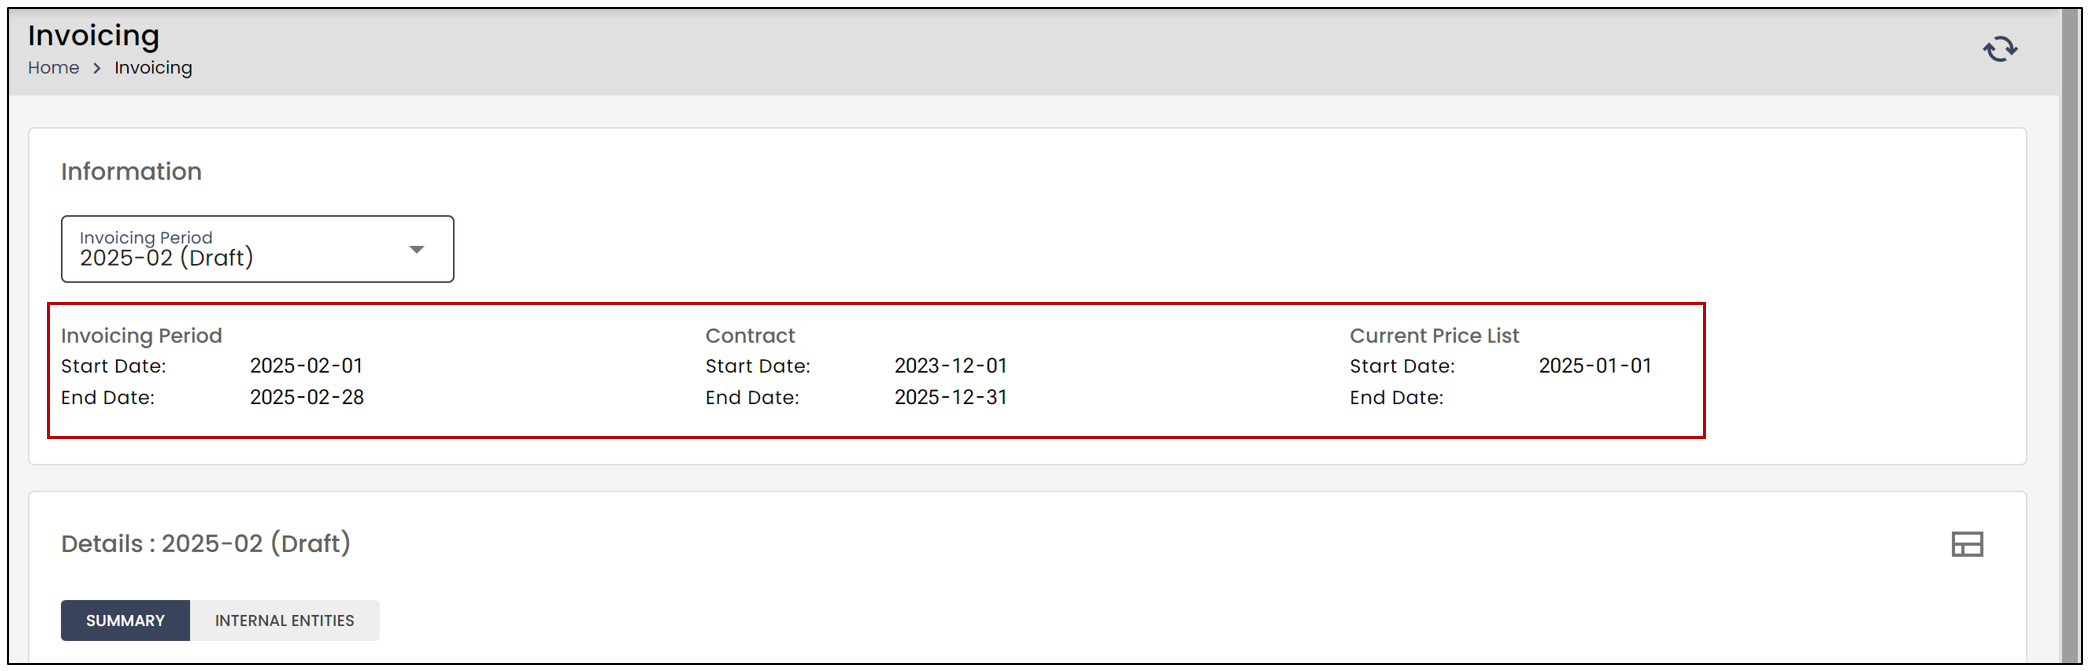
- By clicking on a previous invoice, you will be able to view the Invoicing Period , the Contract period, as well as the Current Price List when the invoice was issued.
Details
In the Details section, you will be able to view all charges that have been added to your invoice.
- Click on the

icon to view the details of a specific product.
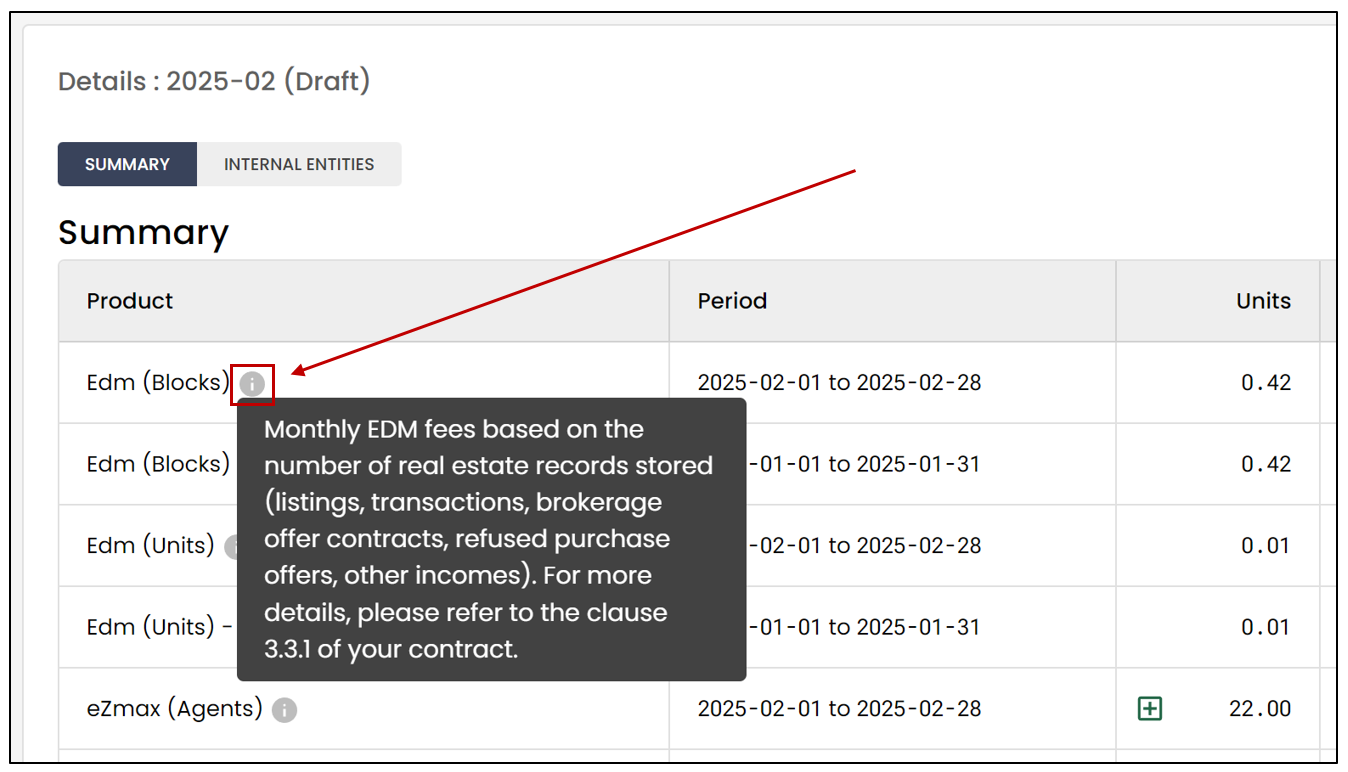
- In the next column, you will find the covered Period for each product.
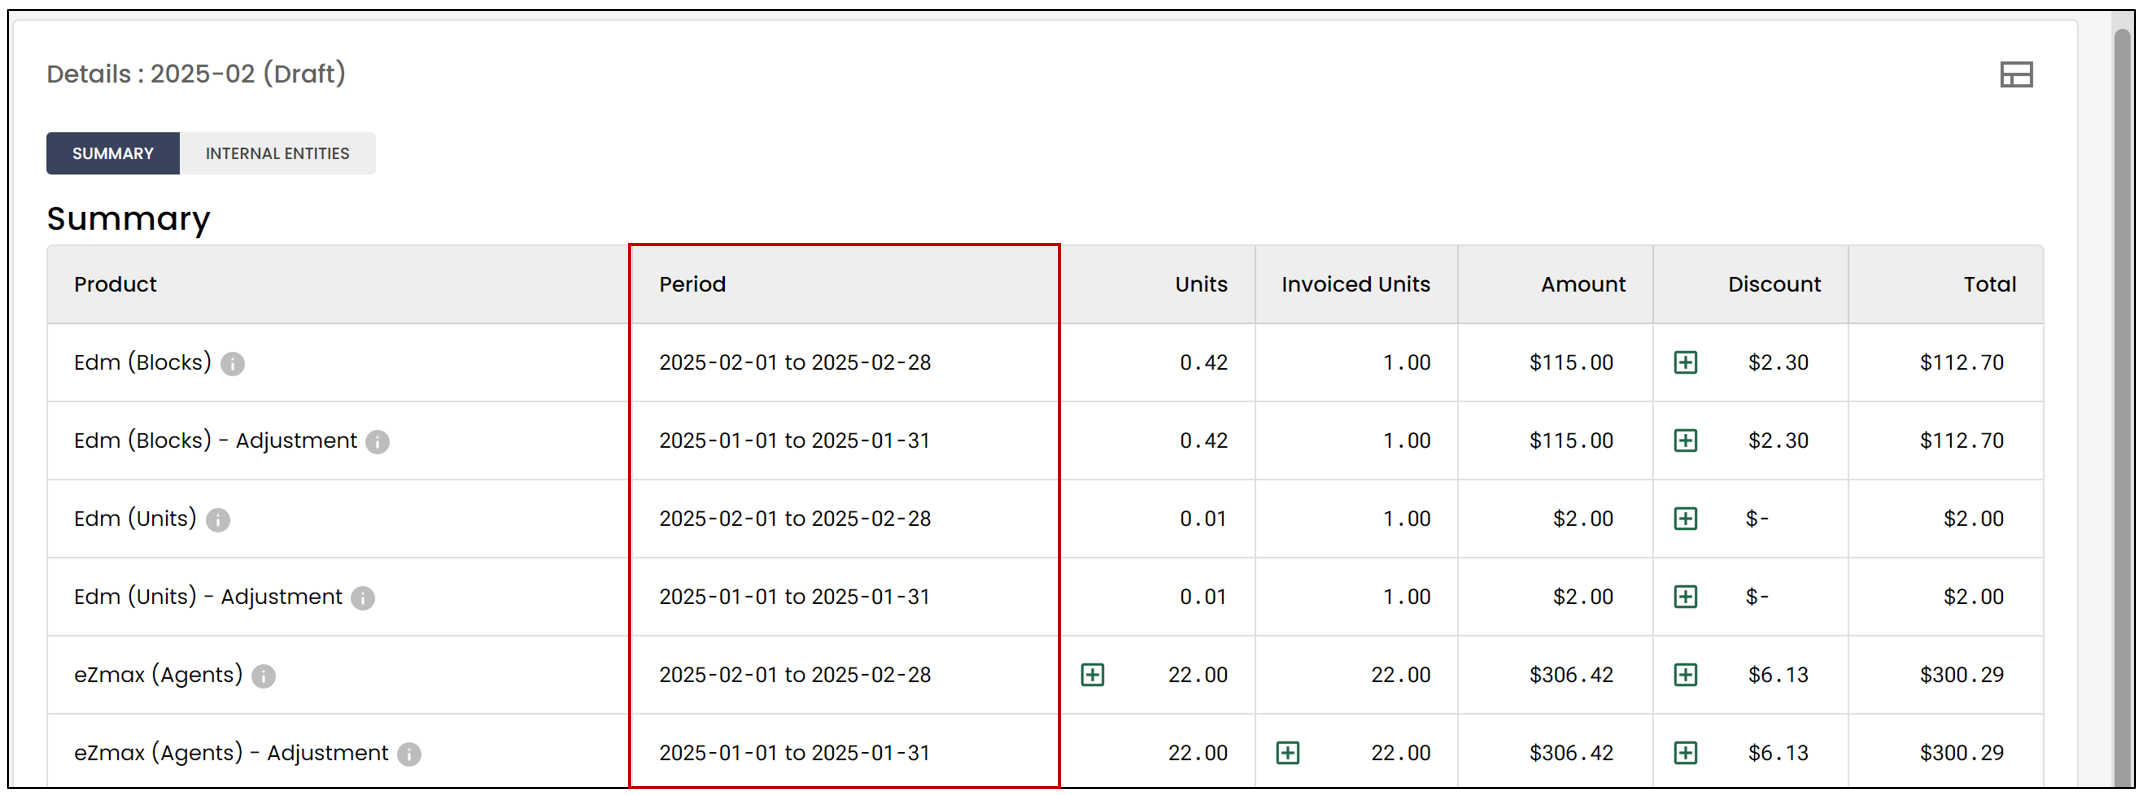
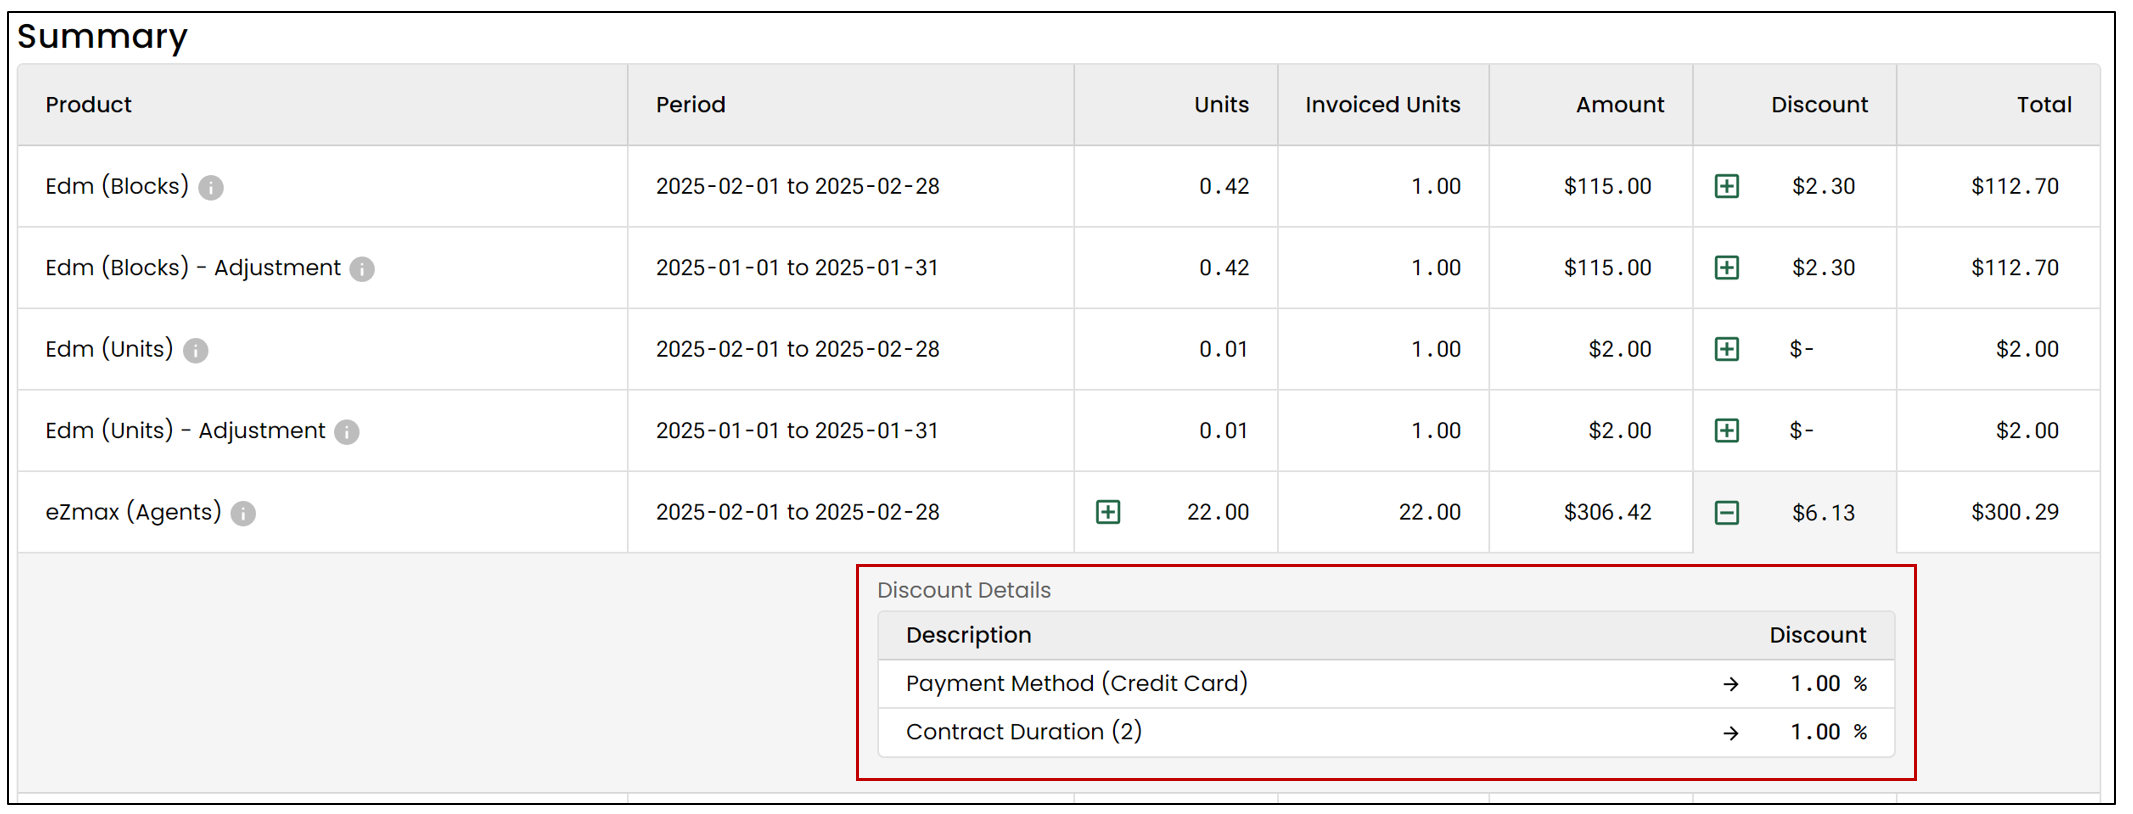
- In the fourth column, you will find the number of Invoiced Units. Simply click on the "+" sign to get more information. You will then be able to see which agents were billed, as well as the reason for the billing.
NOTE: Referring to the contract, you will see that an agent is billable if they have made at least one Log In their software or a Profile Change. They will also be charged if they have made a Listing , a Deal , generated an Other income , performed a Commission Calculation , or received Invoices during the billing period.
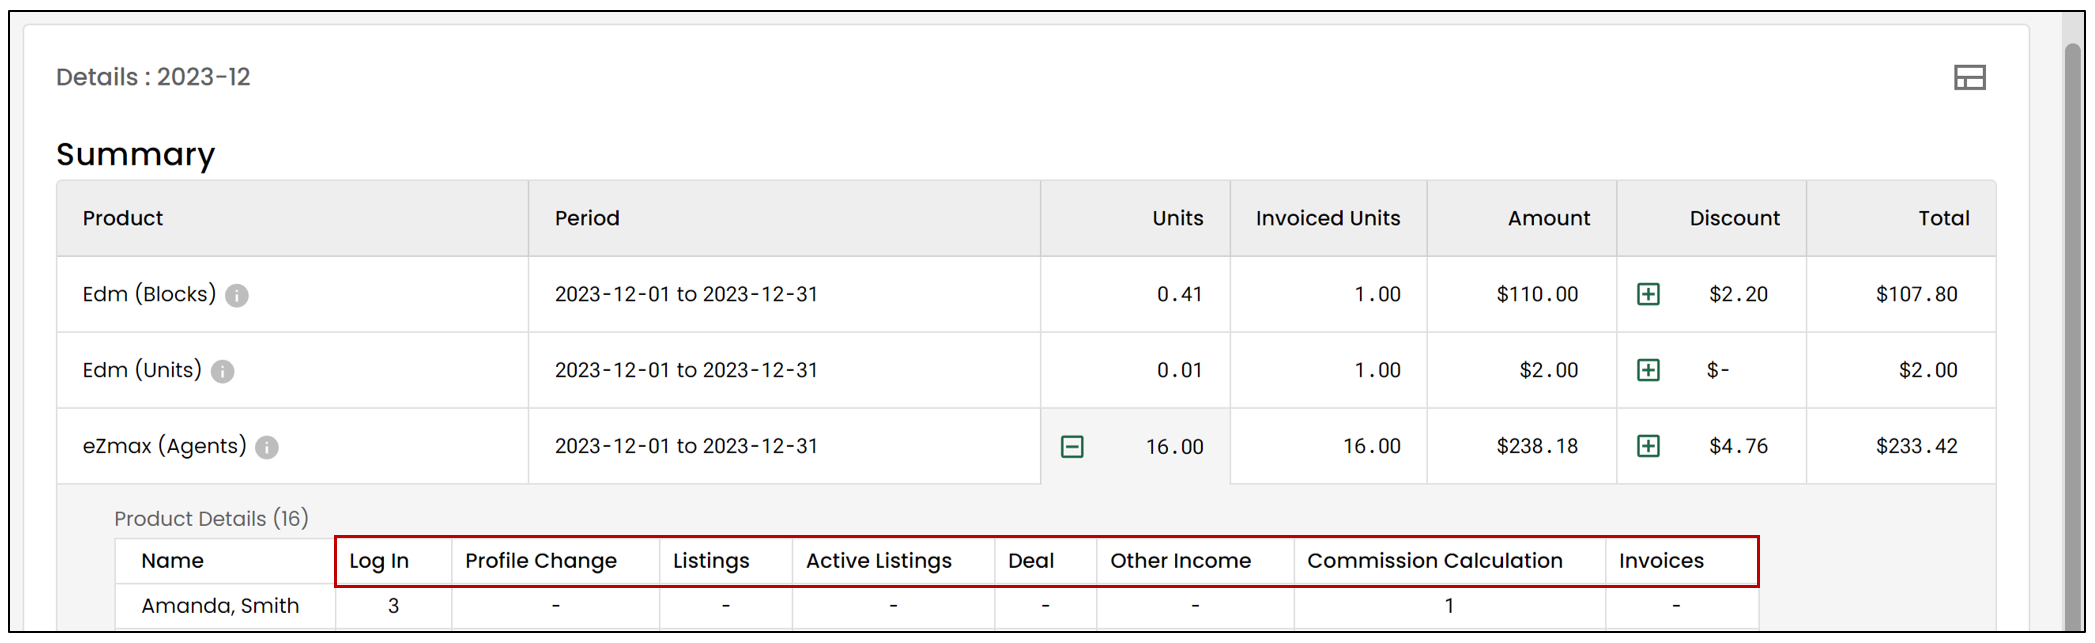
NOTE: It is important to note that even if an agent is inactive, they will still be added to the invoice if any of the conditions mentioned above are met. If you wish to suspend an agent’s account, please refer to the information below.
- By clicking on the "+" sign next to eZsign (Agents) or eZsign (Admins) , you will gain access to information related to the eZsign electronic signature. You will be able to see which agents have been billed and those who have an active eZsign Account in their name.
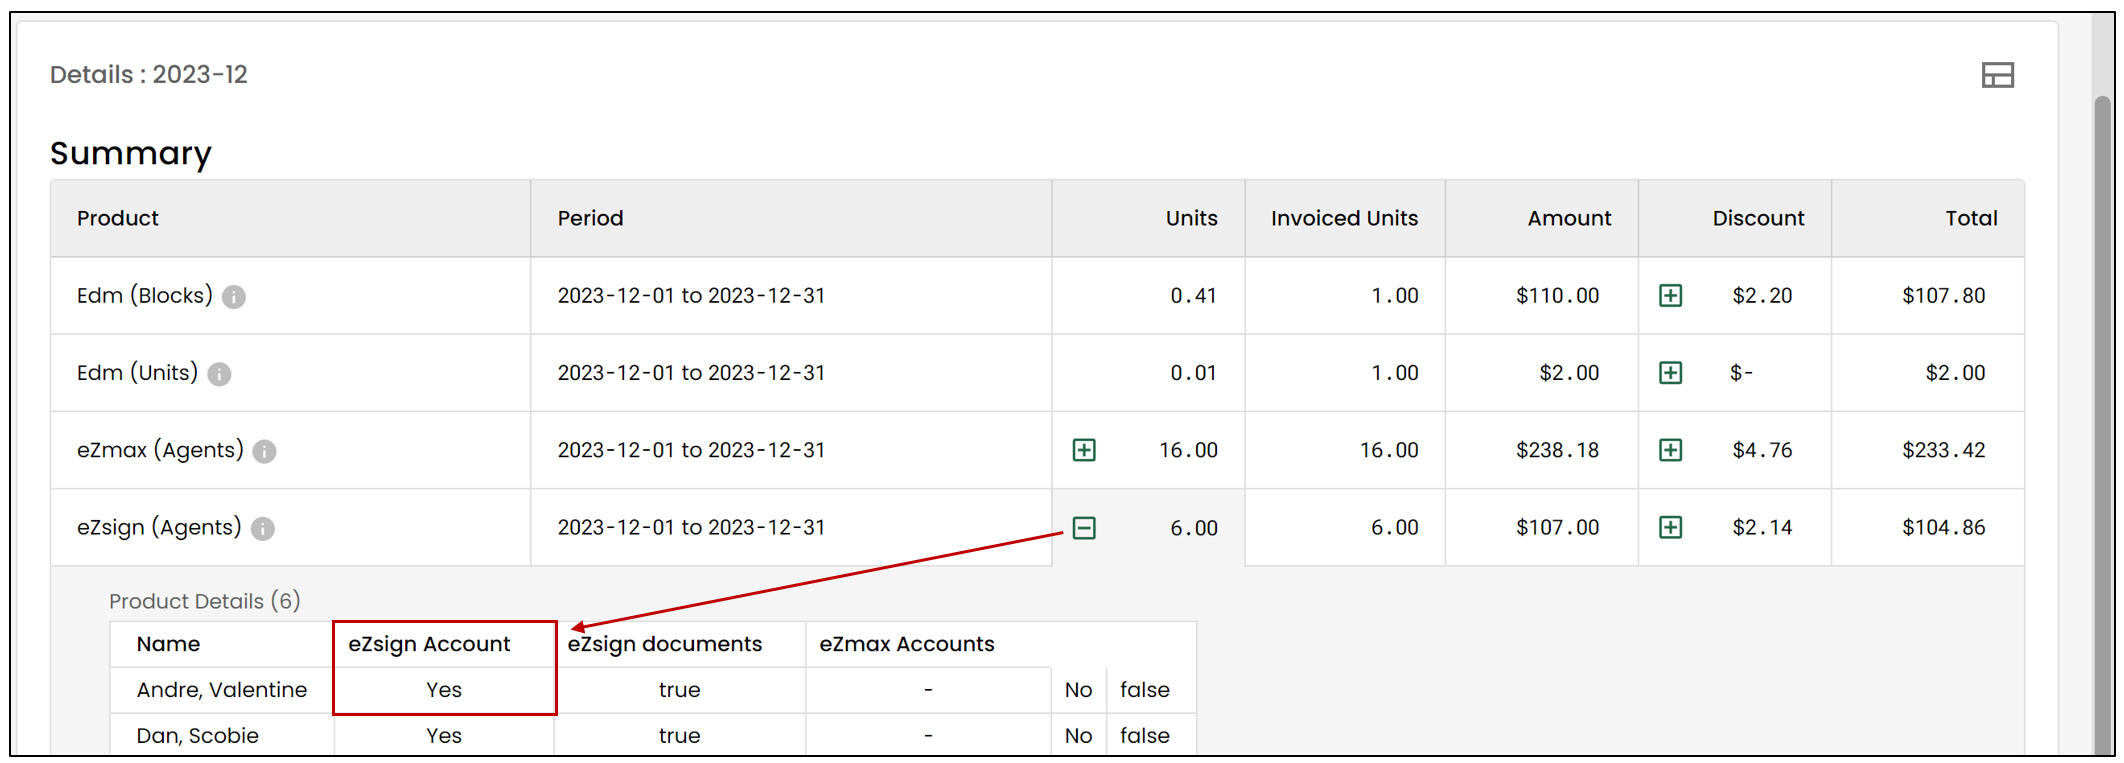
NOTE: In this example, you can see that all billed periods extend from December 1, 2023, to December 31, 2023. If new agents were added in the middle of the month, the Adjustment would be made on the next invoice (in this case, the January invoice).
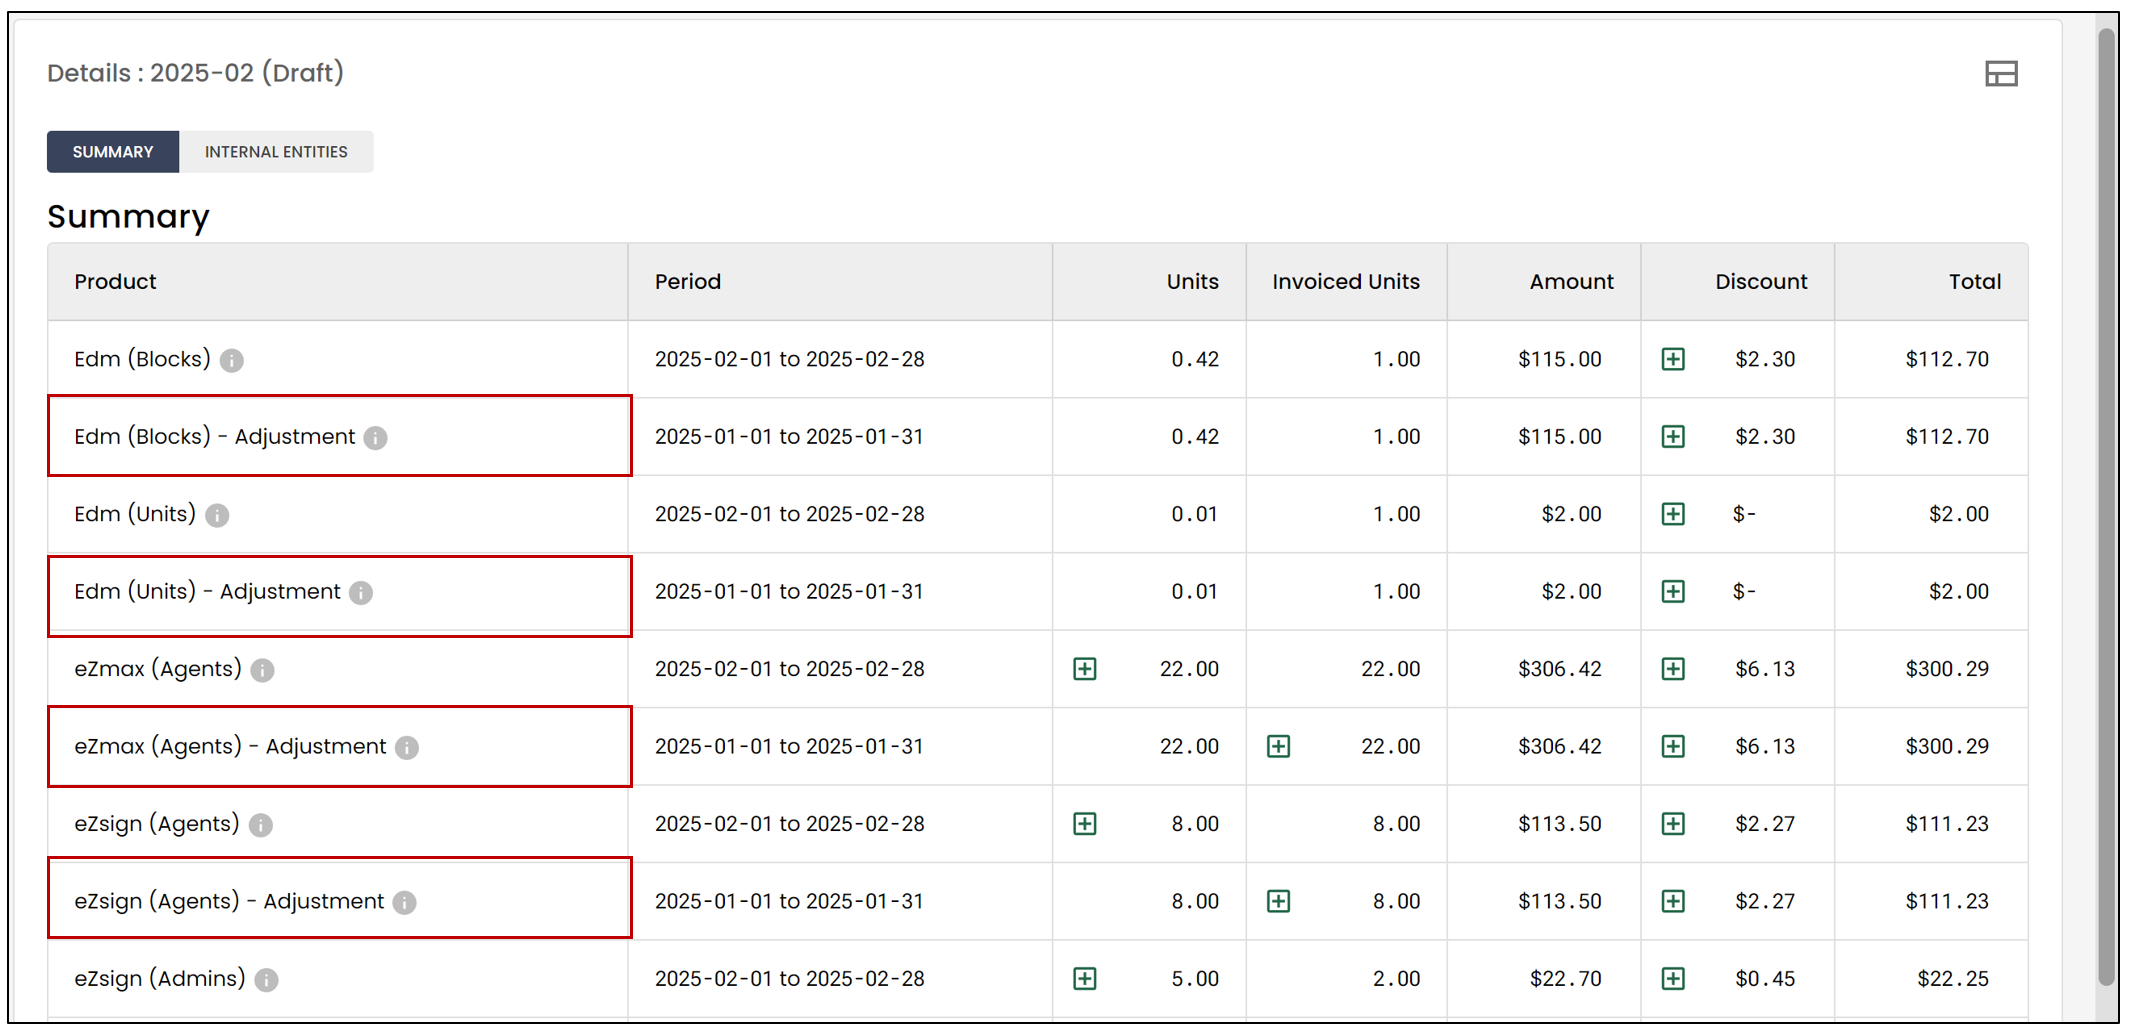
- If you wish to view the Discounts applied to the billing, click on the ’+’ sign.
Deactivate an Agent’s Account
If you are aware that a user will not be active, you can deactivate their account to prevent any charge.
- From the main menu, click on the
icon, then type Agents in the search bar.
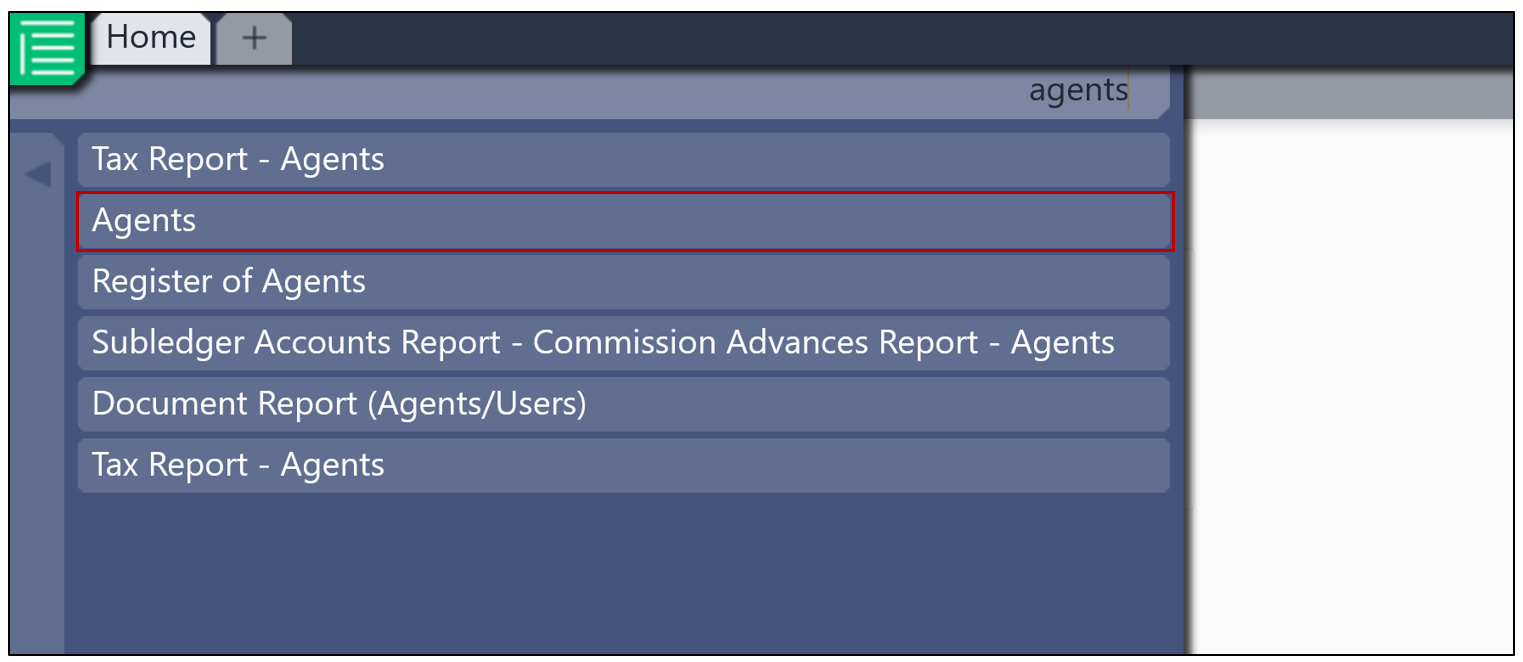
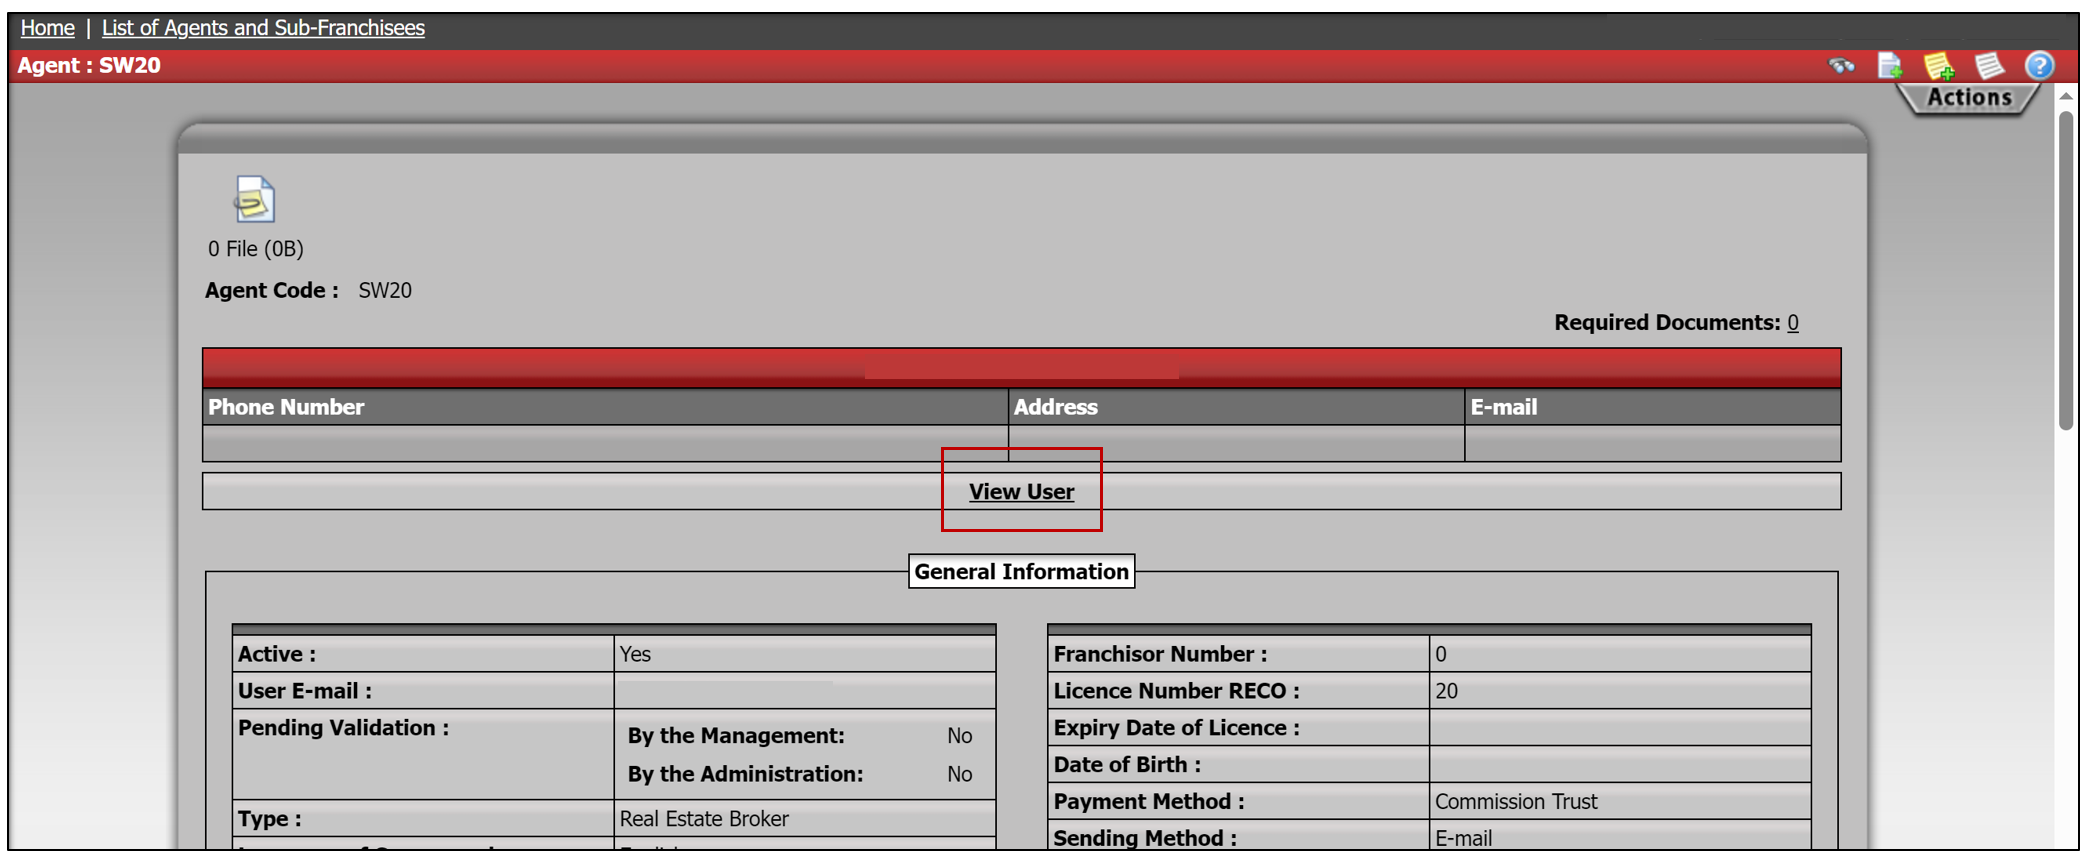
- Then select the desired user from the List of Agents , and click on View User.
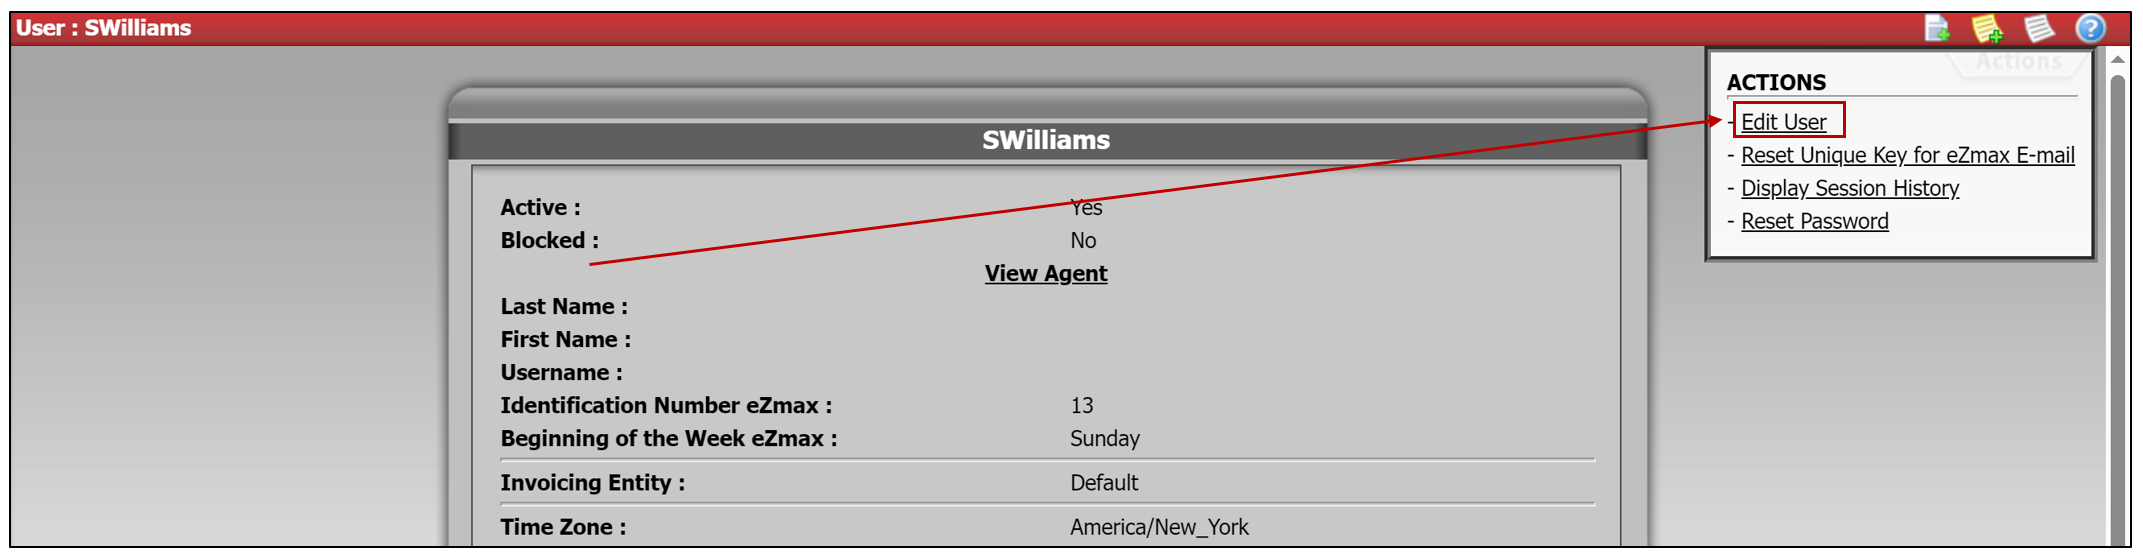
- Click on Actions , then click on Edit User.
- In the user's Active section, uncheck the box.
- In the user’s Access eZsign section, change the access to No.
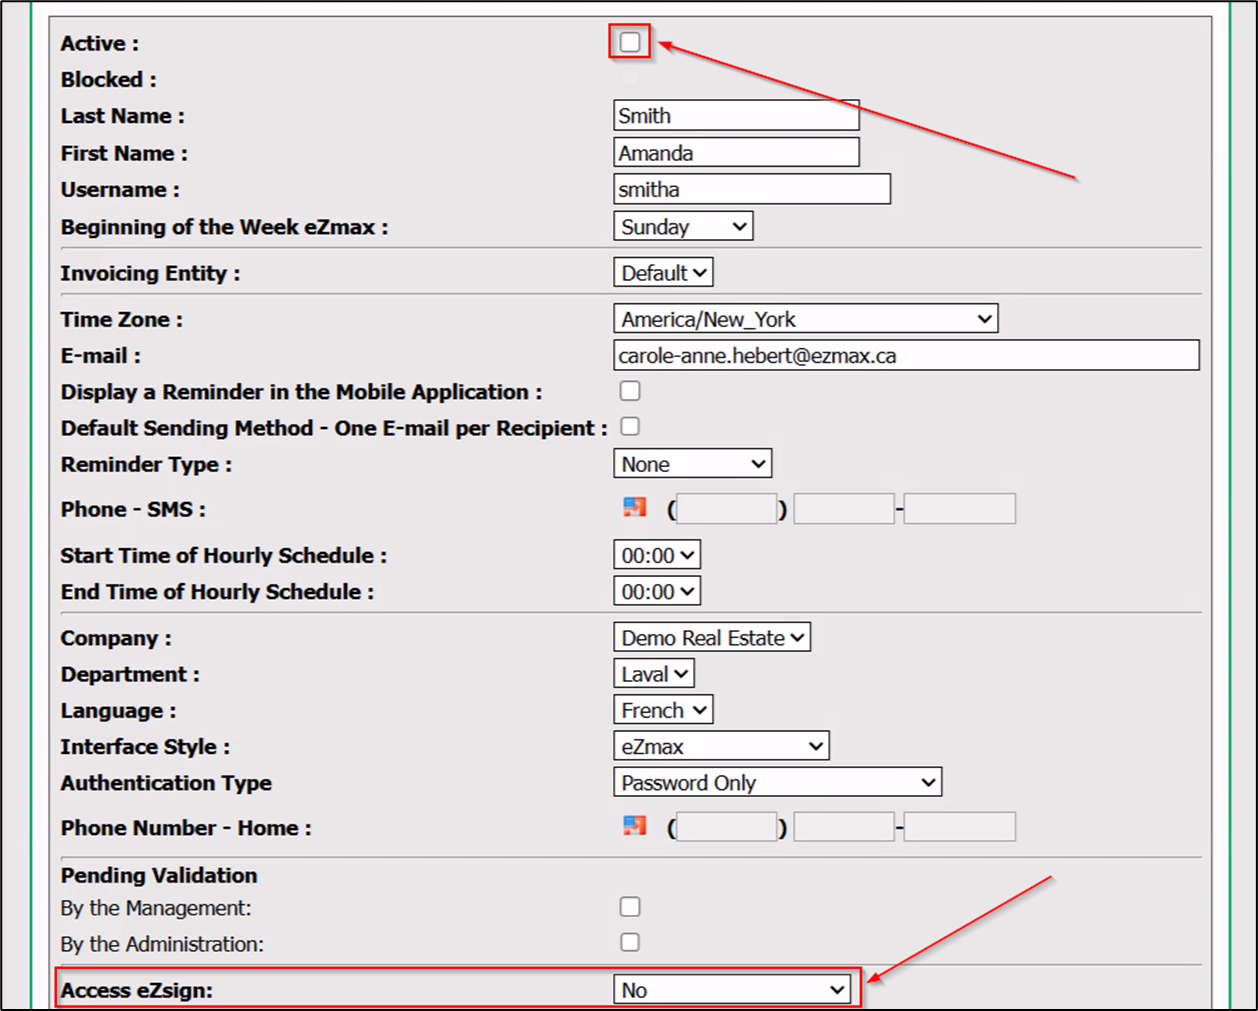
- Then click on Submit to save your changes.
NOTE: When you review the billing again, you will notice that the number of billed eZsign agents will have decreased.